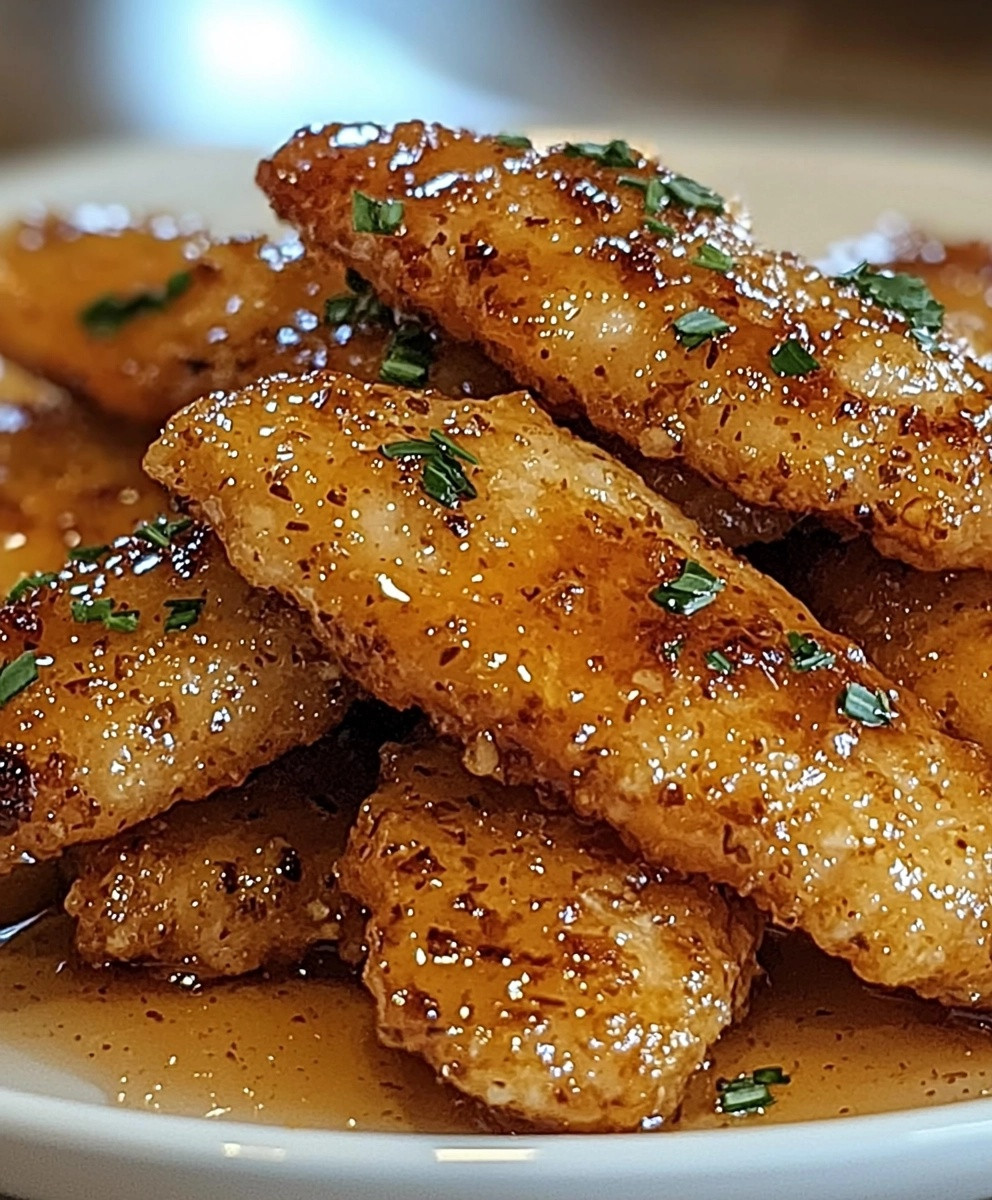
Honey Garlic Chicken Tenders are a delightful dish that brings together the perfect balance of sweet and savory flavors, making them a favorite in many households. As I prepared this recipe, I couldn’t help but think about how this dish has roots in various culinary traditions, often celebrated for its simplicity and deliciousness. The combination of tender chicken coated in a sticky honey garlic glaze not only tantalizes the taste buds but also offers a satisfying texture that keeps everyone coming back for more.
People love Honey Garlic Chicken Tenders for their convenience; they are quick to prepare and can easily be served as a weeknight dinner or a crowd-pleasing appetizer. The aroma that fills the kitchen while they cook is simply irresistible, and the golden-brown finish is a feast for the eyes. Whether youre cooking for family or friends, this dish is sure to impress and leave everyone asking for seconds. Join me as we dive into this delicious recipe that is bound to become a staple in your home!
Ingredients:
- 1 pound chicken tenders
- 1/2 cup honey
- 1/4 cup soy sauce
- 4 cloves garlic, minced
- 1 tablespoon fresh ginger, grated
- 1 tablespoon olive oil
- 1 teaspoon sesame oil
- 1/2 teaspoon black pepper
- 1/4 teaspoon red pepper flakes (optional, for heat)
- 1 tablespoon cornstarch
- 2 tablespoons water
- Sesame seeds, for garnish
- Chopped green onions, for garnish
Preparing the Marinade
1. In a medium-sized bowl, combine the honey, soy sauce, minced garlic, grated ginger, olive oil, sesame oil, black pepper, and red pepper flakes (if using). Whisk everything together until well blended. The honey should dissolve into the soy sauce, creating a smooth marinade. 2. Take your chicken tenders and place them in a large resealable plastic bag or a shallow dish. Pour the marinade over the chicken, ensuring that each piece is well coated. Seal the bag or cover the dish with plastic wrap. 3. Refrigerate the chicken for at least 30 minutes, but if you have time, marinating for 2-4 hours will enhance the flavor even more. This step is crucial as it allows the chicken to absorb all those delicious flavors.Preparing the Chicken Tenders
4. After marinating, remove the chicken from the refrigerator. Preheat your oven to 400°F (200°C) if you plan to bake the chicken, or prepare your grill or skillet if you prefer to cook it on the stovetop. 5. If youre baking, line a baking sheet with parchment paper or lightly grease it with cooking spray. This will prevent the chicken from sticking and make cleanup easier. 6. Remove the chicken tenders from the marinade, allowing any excess marinade to drip off. Place the tenders on the prepared baking sheet in a single layer. If youre grilling or pan-frying, you can skip this step and move directly to cooking.Cooking the Chicken Tenders
7. **Baking Method:** – Bake the chicken tenders in the preheated oven for about 15-20 minutes, flipping them halfway through. The chicken should be golden brown and cooked through, reaching an internal temperature of 165°F (75°C). 8. **Grilling Method:** – Preheat your grill to medium-high heat. Grill the chicken tenders for about 4-5 minutes on each side, or until they are cooked through and have nice grill marks. 9. **Pan-Frying Method:** – Heat a tablespoon of oil in a large skillet over medium heat. Add the chicken tenders and cook for about 4-5 minutes on each side, or until they are golden brown and cooked through.Thickening the Sauce
10. While the chicken is cooking, take the remaining marinade and pour it into a small saucepan. Bring it to a gentle boil over medium heat. 11. In a small bowl, mix the cornstarch with the water to create a slurry. Once the marinade is boiling, slowly whisk in the cornstarch mixture. Continue to cook for another 2-3 minutes, stirring constantly until the sauce thickens. 12. Once thickened, remove the saucepan from the heat. This sauce will be drizzled over the chicken tenders for added flavor.Assembling the Dish
13. Once the chicken tenders are cooked, remove them from the oven, grill, or skillet. Let them rest for a few minutes to allow the juices to redistribute. 14. Drizzle the thickened honey garlic sauce over the chicken tenders, ensuring each piece is generously coated. You can also toss the tenders in the sauce if you prefer them fully covered. 15. For a beautiful presentation, sprinkle sesame seeds and chopped green onions over the top of the chicken tenders. This not only adds a pop of color but also enhances the flavor.Serving Suggestions
16. Serve the honey garlic chicken tenders hot, alongside your favorite sides. They pair wonderfully with steamed rice, roasted vegetables, or a fresh salad. 17. If you have leftovers (which is rare because theyre so delicious!), store them in an airtight container in the refrigerator for up to 3 days. Reheat in the oven or microwave before serving.Conclusion:
In summary, these Honey Garlic Chicken Tenders are an absolute must-try for anyone looking to elevate their weeknight dinners or impress guests at a gathering. The perfect balance of sweet and savory flavors, combined with the tender juiciness of the chicken, makes this dish a standout. Plus, they are incredibly easy to prepare, allowing you to whip up a delicious meal in no time. For serving suggestions, consider pairing these chicken tenders with a side of crispy roasted vegetables or a fresh garden salad to add a burst of color and nutrition to your plate. If you’re feeling adventurous, you can also experiment with variations by adding a splash of soy sauce for an extra umami kick or tossing in some sesame seeds for added texture. I wholeheartedly encourage you to try this Honey Garlic Chicken Tenders recipe and make it your own! Once youve tasted the delightful combination of flavors, Id love to hear about your experience. Share your thoughts, any tweaks you made, or even a photo of your creation! Lets spread the joy of cooking together, and I cant wait to see how you make this dish uniquely yours. Happy cooking! Print
Honey Garlic Chicken Tenders: A Deliciously Easy Recipe for Family Dinners
- Total Time: 35 minutes
- Yield: 4 servings 1x
Description
Crispy honey garlic chicken tenders coated in panko breadcrumbs and tossed in a sweet and savory sauce, perfect for a quick dinner or as a crowd-pleasing appetizer.
Ingredients
- 1 pound chicken tenders
- 1/2 cup all-purpose flour
- 1/2 teaspoon salt
- 1/2 teaspoon black pepper
- 1/2 teaspoon garlic powder
- 1/2 teaspoon onion powder
- 1/4 teaspoon paprika
- 1 large egg
- 1 tablespoon water
- 1 cup panko breadcrumbs
- 1/4 cup honey
- 1/4 cup soy sauce
- 2 cloves garlic, minced
- 1 tablespoon rice vinegar (or apple cider vinegar)
- 1 tablespoon sesame oil
- 1 tablespoon vegetable oil (for frying)
- Chopped green onions (for garnish)
- Sesame seeds (for garnish)
Instructions
- Preheat your oven to 400°F (200°C).
- Rinse the chicken tenders under cold water and pat them dry with paper towels.
- In three shallow bowls, prepare:
- Bowl 1: Combine flour, salt, black pepper, garlic powder, onion powder, and paprika.
- Bowl 2: Whisk together egg and water.
- Bowl 3: Add panko breadcrumbs.
- Dip each chicken tender into the flour mixture, then the egg mixture, and finally coat with panko breadcrumbs. Press gently to adhere.
- In a large skillet, heat vegetable oil over medium-high heat, about 1/4 inch deep.
- Fry the chicken tenders in batches for 3-4 minutes on each side until golden brown and cooked through. Drain on paper towels.
- In a small saucepan, combine honey, soy sauce, minced garlic, rice vinegar, and sesame oil. Stir and simmer for 5-7 minutes until slightly thickened.
- In a large bowl, toss the fried chicken tenders with the honey garlic sauce until well coated.
- Transfer the coated chicken tenders to a serving platter.
- Sprinkle with chopped green onions and sesame seeds.
- Enjoy warm, paired with steamed rice or your favorite side.
Notes
- Ensure the oil is hot enough before frying to achieve a crispy texture.
- You can adjust the sweetness of the sauce by adding more or less honey according to your taste.
- For a healthier option, consider baking the chicken tenders instead of frying.
- Prep Time: 15 minutes
- Cook Time: 20 minutes


Leave a Comment