
No-Bake Chocolate Cheesecake Vegan is a delightful treat that brings together the rich, creamy texture of traditional cheesecake with the added benefits of being plant-based. As someone who has always had a sweet tooth, I can confidently say that this dessert is a game-changer. The history of cheesecake dates back to ancient Greece, but this vegan version takes a modern twist, making it accessible for everyone, regardless of dietary preferences. People love this dish not only for its indulgent taste but also for its convenience; it requires no baking and can be whipped up in just a few minutes. The combination of velvety chocolate and a crumbly crust creates a heavenly experience that will leave your taste buds dancing. Trust me, once you try this No-Bake Chocolate Cheesecake Vegan, it will become a staple in your dessert repertoire!

Ingredients:
- For the crust:
- 1 ½ cups almond flour
- ½ cup pitted Medjool dates
- ¼ cup cocoa powder
- ¼ teaspoon sea salt
- 2 tablespoons coconut oil, melted
- For the filling:
- 2 cups raw cashews, soaked for at least 4 hours
- ½ cup maple syrup
- ½ cup coconut cream (the solid part from a can of coconut milk)
- ½ cup unsweetened cocoa powder
- ¼ cup almond milk (or any plant-based milk)
- 1 teaspoon vanilla extract
- 1 tablespoon lemon juice
- Pinch of sea salt
- For the topping (optional):
- Vegan chocolate shavings
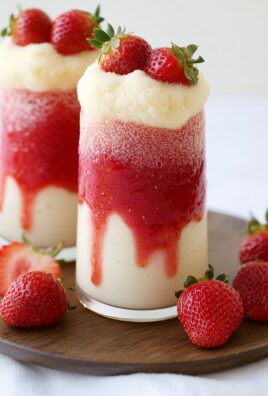
- Fresh berries (like raspberries or strawberries)
- Mint leaves for garnish
Preparing the Crust
- Start by gathering all your ingredients for the crust. Its super simple and requires no baking, which is perfect for a quick dessert.
- In a food processor, combine the almond flour, pitted Medjool dates, cocoa powder, and sea salt. Pulse until the mixture resembles coarse crumbs.
- Next, add the melted coconut oil to the mixture. Pulse again until everything is well combined and starts to stick together. You want a consistency that holds when pressed between your fingers.
- Once the crust mixture is ready, take a 9-inch springform pan and press the mixture evenly into the bottom. Use your fingers or the back of a measuring cup to pack it down firmly. Make sure its even and compact.
- Place the crust in the freezer while you prepare the filling. This will help it set up nicely.
Preparing the Filling
- Now, lets move on to the filling. Make sure your cashews have been soaked for at least 4 hours. This step is crucial for achieving that creamy texture.
- Drain and rinse the soaked cashews under cold water. This helps remove any excess starch and ensures a smooth blend.
- In a high-speed blender, combine the soaked cashews, maple syrup, coconut cream, cocoa powder, almond milk, vanilla extract, lemon juice, and a pinch of sea salt.
- Blend on high until the mixture is completely smooth and creamy. You may need to stop and scrape down the sides a few times to ensure everything is well incorporated. This should take about 2-3 minutes.
- Once the filling is smooth, taste it! Adjust the sweetness if needed by adding a bit more maple syrup or cocoa powder for a richer chocolate flavor.
Assembling the Cheesecake
- Take the crust out of the freezer. It should be firm and ready for the filling.
- Pour the chocolate filling over the crust, spreading it evenly with a spatula. Make sure its nice and smooth on top.
- Once the filling is spread out evenly, gently tap the pan on the counter to remove any air bubbles. This will help the filling settle nicely.
- Cover the cheesecake with plastic wrap or a lid and place it back in the freezer. Let it set for at least 4 hours, or overnight if you can wait! The longer it sets, the firmer it will become.
Serving the Cheesecake
- When youre ready to serve, remove the cheesecake from the freezer. Let it sit at room temperature for about 10-15 minutes to soften slightly, making it easier to slice.
- Run a knife around the edges of the springform pan to loosen the cheesecake. Carefully remove the sides of the pan.
- Slice the cheesecake into wedges using a sharp knife. For clean slices, dip the knife in hot water and wipe it dry between cuts.
- If youd like,

Conclusion:
In summary, this No-Bake Chocolate Cheesecake Vegan recipe is an absolute must-try for anyone looking to indulge in a rich, creamy dessert without the guilt. The combination of velvety chocolate and a nutty crust creates a delightful treat that satisfies your sweet tooth while being entirely plant-based. Plus, its incredibly easy to whip up, making it perfect for both novice and experienced bakers alike. For serving suggestions, consider topping your cheesecake with fresh berries, a drizzle of vegan chocolate sauce, or a sprinkle of crushed nuts for added texture. You can also experiment with variations by incorporating different flavors, such as adding a hint of peppermint extract for a refreshing twist or using almond flour for the crust for a unique taste. I encourage you to give this No-Bake Chocolate Cheesecake Vegan a try and share your experience with friends and family. Whether youre hosting a gathering or simply treating yourself, this dessert is sure to impress. Dont forget to let me know how it turns out for you! Happy baking! Print
No-Bake Chocolate Cheesecake Vegan: A Deliciously Easy Recipe
- Total Time: 260 minutes
- Yield: 8 servings
Description
This no-bake vegan chocolate cheesecake features a rich cashew filling and a delightful almond flour crust, making it a creamy and indulgent dessert. It’s simple to prepare and can be topped with your choice of garnishes for a personalized touch. Perfect for chocolate enthusiasts!
Ingredients
- cashews
- almond flour
- vegan chocolate shavings
- fresh berries
- mint leaves
Instructions
- Garnish each slice with vegan chocolate shavings, fresh berries, and mint leaves for a beautiful presentation.
- Serve immediately and enjoy your delicious, creamy chocolate cheesecake!
Notes
- Make sure to soak the cashews for at least 4 hours for the best texture.
- This cheesecake can be stored in the freezer for up to 2 weeks. Just make sure to wrap it well to prevent freezer burn.
- Feel free to customize the toppings based on your preferences or seasonal fruits.
- Prep Time: 20 minutes
- Cook Time: 0 minutes

Leave a Comment