
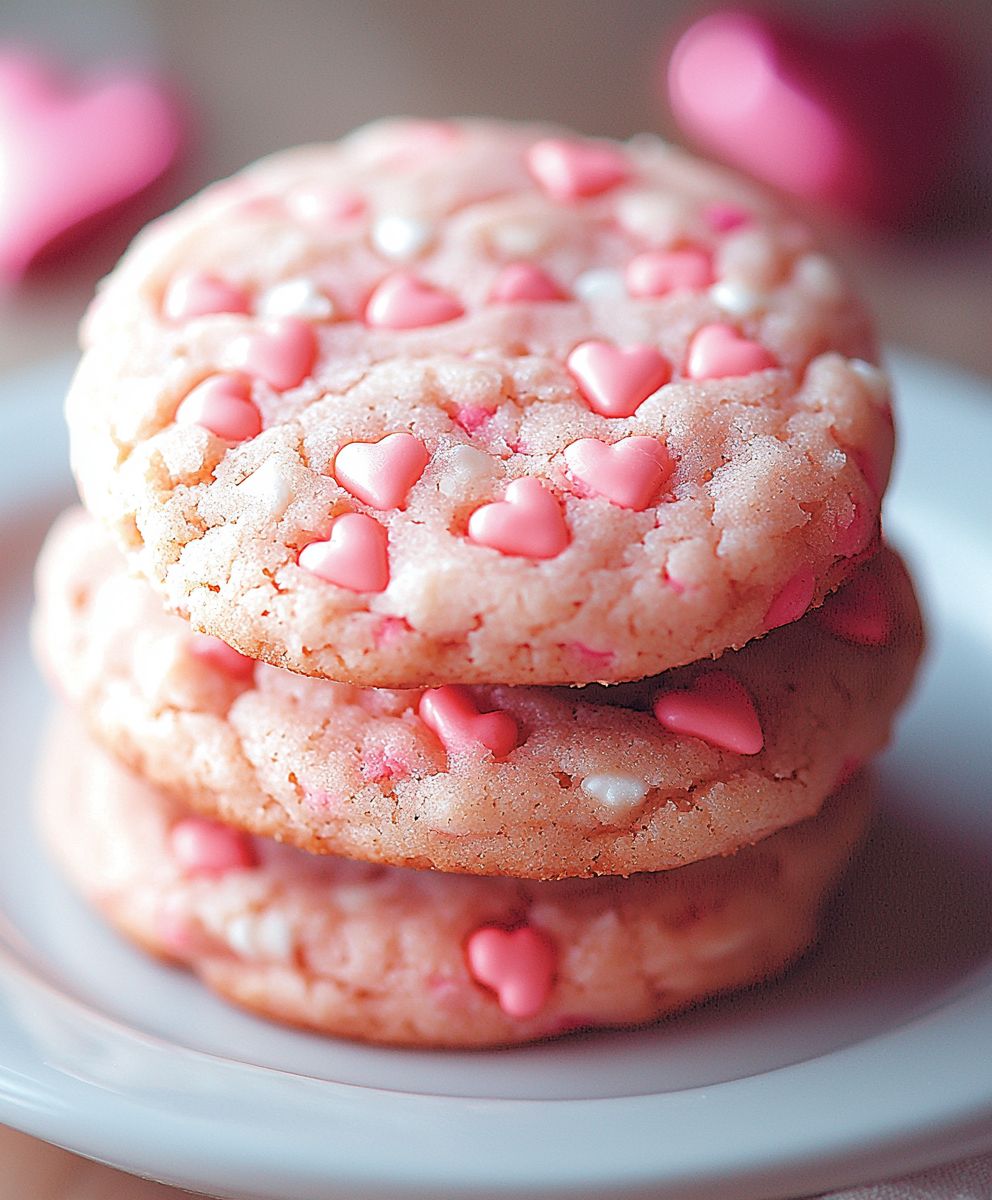
Valentines Day Cake Cookies: the perfect way to show your love this February! Imagine biting into a soft, pillowy cookie that tastes exactly like a slice of decadent vanilla cake. That’s precisely what you get with these delightful treats, and trust me, they are incredibly addictive. Forget the elaborate desserts and hours spent decorating; these cookies deliver all the Valentine’s Day sweetness with a fraction of the effort.
While the exact origin of cake cookies is a bit of a mystery, the concept of transforming classic cake flavors into cookie form has gained immense popularity in recent years. It’s a brilliant fusion of two beloved desserts, offering the satisfying chewiness of a cookie with the rich, moist texture of a cake. What’s not to love?
People adore these Valentines Day Cake Cookies for several reasons. First, they’re incredibly easy to make, requiring minimal ingredients and baking time. Second, the taste is simply divine a perfect balance of sweetness and vanilla goodness. Finally, they are incredibly versatile. You can customize them with different sprinkles, frostings, or even chocolate chips to create your own unique Valentine’s Day masterpiece. So, ditch the stress and embrace the simplicity of these delightful cookies. They’re guaranteed to be a hit with your loved ones!

Ingredients:
- For the Cake Cookies:
- 2 1/4 cups all-purpose flour
- 1 teaspoon baking powder
- 1/2 teaspoon baking soda
- 1/4 teaspoon salt
- 1 cup (2 sticks) unsalted butter, softened
- 1 1/2 cups granulated sugar
- 2 large eggs
- 1 teaspoon vanilla extract
- 1/2 cup sour cream
- 1/4 cup milk
- For the Vanilla Buttercream Frosting:
- 1 cup (2 sticks) unsalted butter, softened
- 3-4 cups powdered sugar, sifted
- 1/4 cup milk
- 1 teaspoon vanilla extract
- Pinch of salt
- For Decoration:
- Red and pink food coloring (gel food coloring recommended)
- Valentine’s Day themed sprinkles (hearts, glitter, etc.)
- Optional: Edible glitter
Preparing the Cake Cookie Dough
- Combine Dry Ingredients: In a medium bowl, whisk together the flour, baking powder, baking soda, and salt. This ensures that the baking powder and soda are evenly distributed throughout the flour, which is crucial for a consistent rise and texture in your cookies. Set this aside for now.
- Cream Butter and Sugar: In a large bowl (or the bowl of your stand mixer), cream together the softened butter and granulated sugar until light and fluffy. This usually takes about 3-5 minutes on medium speed. The mixture should become noticeably paler and increase in volume. This step is important because it incorporates air into the dough, which contributes to the cake-like texture of the cookies. Scrape down the sides of the bowl occasionally to ensure everything is evenly mixed.
- Add Eggs and Vanilla: Beat in the eggs one at a time, making sure each egg is fully incorporated before adding the next. Then, stir in the vanilla extract. The eggs add richness and structure to the cookies, while the vanilla enhances the flavor.
- Combine Wet and Dry Ingredients: Gradually add the dry ingredients to the wet ingredients, alternating with the sour cream and milk. Begin and end with the dry ingredients. So, add about 1/3 of the dry ingredients, then half of the sour cream and milk, then another 1/3 of the dry ingredients, the remaining sour cream and milk, and finally the last 1/3 of the dry ingredients. Mix until just combined. Be careful not to overmix, as this can develop the gluten in the flour and result in tough cookies. Overmixing is the enemy of a tender cake cookie!
- Chill the Dough: Cover the bowl with plastic wrap and refrigerate the dough for at least 1 hour, or preferably 2-3 hours. Chilling the dough allows the gluten to relax, which prevents the cookies from spreading too much during baking. It also makes the dough easier to handle and roll out. Don’t skip this step!
Baking the Cake Cookies
- Preheat Oven and Prepare Baking Sheets: Preheat your oven to 350°F (175°C). Line baking sheets with parchment paper or silicone baking mats. This will prevent the cookies from sticking and make cleanup a breeze.
- Roll Out the Dough: On a lightly floured surface, roll out the chilled dough to about 1/4 inch thickness. If the dough is still a bit sticky, sprinkle a little more flour on the surface.
- Cut Out Shapes: Use Valentine’s Day themed cookie cutters (hearts, stars, etc.) to cut out shapes from the dough. Re-roll the scraps and cut out more cookies until all the dough is used.
- Bake the Cookies: Place the cut-out cookies on the prepared baking sheets, leaving about 1 inch of space between each cookie. Bake for 8-10 minutes, or until the edges are lightly golden brown. Keep a close eye on them, as they can burn easily.
- Cool the Cookies: Remove the baking sheets from the oven and let the cookies cool on the baking sheets for a few minutes before transferring them to a wire rack to cool completely. Make sure the cookies are completely cool before frosting.
Preparing the Vanilla Buttercream Frosting
- Cream Butter: In a large bowl (or the bowl of your stand mixer), cream the softened butter until smooth and fluffy. This usually takes about 2-3 minutes on medium speed.
- Add Powdered Sugar: Gradually add the sifted powdered sugar to the butter, beating on low speed until combined. Sifting the powdered sugar helps to prevent lumps in the frosting. Add the powdered sugar in increments, alternating with the milk.
- Add Milk and Vanilla: Add the milk and vanilla extract and beat until the frosting is smooth and creamy. If the frosting is too thick, add a little more milk. If it’s too thin, add a little more powdered sugar.
- Add Salt: Add a pinch of salt to balance the sweetness.
- Tint the Frosting (Optional): Divide the frosting into separate bowls if you want to make different colors. Add a few drops of red or pink food coloring to each bowl and stir until the desired color is achieved. Gel food coloring is recommended because it’s more concentrated and won’t thin out the frosting as much as liquid food coloring.
Decorating the Cake Cookies
- Frost the Cookies: Once the cookies are completely cool, frost them with the vanilla buttercream frosting. You can use a knife, spatula, or piping bag to apply the frosting.
- Add Sprinkles: Immediately sprinkle the frosted cookies with Valentine’s Day themed sprinkles. The sprinkles will adhere best if applied while the frosting is still wet.
- Add Edible Glitter (Optional): For an extra touch of sparkle, sprinkle the cookies with edible glitter.
- Let the Frosting Set: Allow the frosting to set completely before serving or storing the cookies. This will prevent the frosting from smudging.
Tips for Success:
- Use Room Temperature Ingredients: Using room temperature butter, eggs, and sour cream will help the ingredients blend together more easily and create a smoother dough.
- Don’t Overmix the Dough: Overmixing the dough can develop the gluten in the flour, resulting in tough cookies. Mix until just combined.
- Chill the Dough: Chilling the dough is essential for preventing the cookies from spreading too much during baking.
- Use Parchment Paper or Silicone Baking Mats: This will prevent the cookies from sticking to the baking sheets and make cleanup a breeze.
- Don’t Overbake the Cookies: Overbaking the cookies will make them dry and crumbly. Bake until the edges are lightly golden brown.
- Let the Cookies Cool Completely Before Frosting: Frosting warm cookies will cause the frosting to melt and run.
- Store the Cookies Properly: Store the cookies in an airtight container at room temperature for up to 3 days.
Variations:
- Chocolate Cake Cookies: Add 1/4 cup of unsweetened cocoa powder to the dry ingredients for chocolate cake cookies.
- Lemon Cake Cookies: Add 1 tablespoon of lemon zest to the wet ingredients for lemon cake cookies.
- Almond Extract: Substitute almond extract for vanilla extract for a different flavor profile.
- Different Frosting Flavors: Experiment with different frosting flavors, such as chocolate, strawberry, or cream cheese.
- Add Food Coloring to the Dough: Divide the dough into separate bowls and add food coloring to create colorful cookies.
Conclusion:
This Valentines Day Cake Cookies recipe isn’t just another cookie recipe; it’s a shortcut to spreading love and deliciousness! Seriously, if you’re looking for a simple yet impressive treat to bake for your loved ones (or even just for yourself!), you absolutely have to give these a try. The combination of the soft, cake-like texture with the sweet, festive frosting is simply irresistible. They’re the perfect balance of easy to make and utterly delightful to eat, making them a winner in my book.
But the best part? They’re incredibly versatile! While I’ve outlined my favorite way to make them, feel free to get creative. Want to add a hint of almond extract to the batter? Go for it! Prefer a cream cheese frosting instead of buttercream? Absolutely! You could even dip them in melted chocolate for an extra decadent touch.
Here are a few serving suggestions to elevate your Valentines Day Cake Cookies experience:
* Cookie Sandwiches: Spread a layer of frosting between two cookies for a double dose of deliciousness. Add sprinkles or mini chocolate chips to the frosting for extra flair.
* Cookie Pops: Insert lollipop sticks into the cookies before baking for fun and festive cookie pops. These are especially great for kids!
* Cookie Crumbles: Crumble the cookies over ice cream or yogurt for a sweet and crunchy topping.
* Gift Giving: Package the cookies in a cute box or bag and give them as a thoughtful homemade gift. Everyone loves a sweet treat!
* Themed Party: Make these cookies the star of your Valentine’s Day party dessert table. Arrange them on a tiered stand for an elegant presentation.
Don’t be afraid to experiment with different colors and decorations to personalize your cookies. Use heart-shaped sprinkles, edible glitter, or even write messages with icing. The possibilities are endless!
I truly believe that these Valentines Day Cake Cookies will become a new favorite in your household. They’re quick, easy, and guaranteed to bring a smile to everyone’s face. Plus, the act of baking itself is a wonderful way to show your love and appreciation.
So, what are you waiting for? Gather your ingredients, preheat your oven, and get ready to bake some magic! I’m confident that you’ll be thrilled with the results.
And most importantly, I’d love to hear about your experience! Did you try the recipe? Did you make any variations? What did your loved ones think? Share your photos and stories in the comments below. I can’t wait to see your creations and hear all about your baking adventures. Happy baking, and Happy Valentine’s Day! I hope you enjoy making and sharing these delightful cookies as much as I do. Let me know if you have any questions, and I’ll be happy to help!
Valentines Day Cake Cookies: Delicious Recipes & Baking Tips
Soft, chewy sugar cookies decorated with royal icing for a festive Valentine's Day treat.
Ingredients
- 2 1/4 cups all-purpose flour
- 1 teaspoon baking soda
- 1 teaspoon salt
- 1 cup (2 sticks) unsalted butter, softened
- 3/4 cup granulated sugar
- 3/4 cup packed brown sugar
- 1 teaspoon vanilla extract
- 2 large eggs
- 1 cup Valentine’s Day themed sprinkles
Instructions
- Preheat oven to 350 degrees F.
- In a large bowl, cream together the butter, sugar and vanilla until light and fluffy.
- Beat in the egg.
- Gradually add the flour, baking powder and salt. Mix well.
- Divide dough in half.
- Add red food coloring to one half of the dough and mix well.
- On a lightly floured surface, roll out dough to 1/4 inch thickness.
- Cut out cookies using heart shaped cookie cutters.
- Place cookies 1 inch apart on ungreased cookie sheets.
- Bake for 8-10 minutes, or until edges are lightly browned.
- Let cool on baking sheets for a few minutes before removing to a wire rack to cool completely.
- Frost with your favorite frosting and decorate with sprinkles.
“`
Notes
- For a softer cookie, underbake slightly.
- Store in an airtight container at room temperature.
- These cookies can be decorated with royal icing or buttercream.
Leave a Comment