
Ginger Lime Pork: Prepare to embark on a culinary adventure that will tantalize your taste buds and leave you craving more! Imagine succulent pieces of pork, infused with the zesty brightness of lime and the warm, comforting spice of ginger. This isn’t just a meal; it’s an experience.
The beauty of Ginger Lime Pork lies in its versatility and vibrant flavor profile. While the exact origins of this particular combination are somewhat modern, the individual components boast rich histories. Ginger, revered for centuries in Asian cuisine for its medicinal properties and distinctive flavor, pairs beautifully with lime, a staple in Latin American and Caribbean cooking. This fusion creates a dish that feels both familiar and excitingly new.
What makes this recipe so irresistible? It’s the perfect balance of sweet, sour, and savory. The ginger adds a subtle warmth that complements the pork’s richness, while the lime provides a refreshing tang that cuts through the fat. The result is a dish that’s both satisfying and light, making it ideal for any occasion. Whether you’re looking for a quick weeknight dinner or a dish to impress your guests, this Ginger Lime Pork recipe is sure to be a winner. The tender texture of the pork, combined with the vibrant sauce, creates a symphony of flavors and textures that will have everyone asking for seconds. Get ready to discover your new favorite way to enjoy pork!

Ingredients:
- Potatoes: 2 lbs, Russet or Yukon Gold, peeled and cubed
- Garlic: 6 cloves, minced
- Butter: 4 tablespoons, unsalted
- Olive Oil: 2 tablespoons
- Milk: 1/4 cup, whole milk or cream
- Egg: 1 large, lightly beaten
- All-Purpose Flour: 1/2 cup, plus more for dusting
- Parmesan Cheese: 1/4 cup, grated
- Fresh Parsley: 2 tablespoons, chopped
- Salt: 1 teaspoon, or to taste
- Black Pepper: 1/2 teaspoon, or to taste
- Paprika: 1/4 teaspoon
- Garlic Powder: 1/4 teaspoon
- Onion Powder: 1/4 teaspoon
- Vegetable Oil: For frying
- Optional Dipping Sauce: Ketchup, Aioli, or your favorite sauce
Preparing the Potato Mixture
- Boil the Potatoes: First, place the peeled and cubed potatoes in a large pot. Cover them with cold water and add a generous pinch of salt. Bring the water to a boil over high heat. Once boiling, reduce the heat to medium and let the potatoes simmer until they are fork-tender. This usually takes about 15-20 minutes. You’ll know they’re ready when a fork easily pierces through the center of a potato cube. Don’t overcook them, or they’ll become too mushy.
- Drain and Mash: Once the potatoes are cooked, carefully drain them in a colander. Return the drained potatoes to the pot. Add the butter and milk (or cream) to the pot. Using a potato masher or a ricer, mash the potatoes until they are smooth and creamy. Be careful not to over-mash, as this can make them gluey. A few small lumps are perfectly fine.
- Sauté the Garlic: While the potatoes are boiling, heat the olive oil in a small skillet over medium heat. Add the minced garlic and sauté for about 1-2 minutes, or until fragrant and lightly golden. Be careful not to burn the garlic, as it will become bitter. Remove the skillet from the heat and set aside.
- Combine Ingredients: Add the sautéed garlic and olive oil to the mashed potatoes. Stir in the beaten egg, flour, Parmesan cheese, chopped parsley, salt, pepper, paprika, garlic powder, and onion powder. Mix everything together until well combined. The mixture should be thick enough to hold its shape but still slightly soft. If the mixture seems too wet, add a little more flour, one tablespoon at a time, until you reach the desired consistency.
- Chill the Mixture: Cover the potato mixture with plastic wrap and refrigerate for at least 30 minutes. This will help the mixture firm up and make it easier to shape into pops. You can chill it for longer, even overnight, if you prefer.
Shaping the Potato Pops
- Prepare Your Work Station: Line a baking sheet with parchment paper. This will prevent the potato pops from sticking. Lightly dust your hands with flour to prevent the potato mixture from sticking to them.
- Shape the Pops: Take a spoonful of the chilled potato mixture (about 1-2 tablespoons) and roll it into a small ball. Gently flatten the ball slightly to create a disc shape. You can make them any size you like, but I find that smaller pops are easier to fry evenly. Place the shaped potato pop on the prepared baking sheet. Repeat this process with the remaining potato mixture, spacing the pops evenly on the baking sheet.
- Optional: Add a Stick: If you want to make actual “pops” with sticks, now is the time to insert them. Gently press a lollipop stick or a wooden skewer into the center of each potato disc. Be careful not to push the stick all the way through.
- Freeze Briefly (Optional): For extra firmness, you can place the baking sheet with the shaped potato pops in the freezer for about 15-20 minutes before frying. This will help them hold their shape even better during frying. This step is optional, but I highly recommend it, especially if your potato mixture is on the softer side.
Frying the Garlic Potato Pops
- Heat the Oil: Pour enough vegetable oil into a deep pot or Dutch oven to reach a depth of about 2-3 inches. Heat the oil over medium-high heat until it reaches a temperature of 350°F (175°C). You can use a deep-fry thermometer to monitor the temperature. If you don’t have a thermometer, you can test the oil by dropping a small piece of potato into it. If the potato sizzles and turns golden brown in about 1-2 minutes, the oil is ready.
- Fry in Batches: Carefully add the potato pops to the hot oil in batches, being careful not to overcrowd the pot. Overcrowding will lower the oil temperature and result in soggy pops. Fry the pops for about 2-3 minutes per side, or until they are golden brown and crispy.
- Remove and Drain: Use a slotted spoon or a spider strainer to remove the fried potato pops from the oil. Place them on a wire rack lined with paper towels to drain any excess oil.
- Season and Serve: While the potato pops are still hot, sprinkle them with a little extra salt, if desired. Serve them immediately with your favorite dipping sauce. Ketchup, aioli, ranch dressing, or even a simple sour cream dip would be delicious.
Baking Option (Healthier Alternative)
If you prefer a healthier alternative to frying, you can bake the garlic potato pops instead. Here’s how:
- Preheat Oven: Preheat your oven to 400°F (200°C).
- Prepare Baking Sheet: Line a baking sheet with parchment paper.
- Brush with Oil: Lightly brush the shaped potato pops with olive oil or melted butter. This will help them brown nicely in the oven.
- Bake: Place the potato pops on the prepared baking sheet and bake for 20-25 minutes, or until they are golden brown and slightly crispy. Flip them halfway through the baking time to ensure even browning.
- Serve: Remove the baked potato pops from the oven and let them cool slightly before serving. Serve them with your favorite dipping sauce.
Tips and Variations
- Cheese Variations: Experiment with different types of cheese. Instead of Parmesan, try using cheddar, Gruyere, or even a blend of cheeses.
- Herb Variations: Add other fresh herbs to the potato mixture, such as rosemary, thyme, or chives.
- Spice it Up: Add a pinch of red pepper flakes or a dash of hot sauce to the potato mixture for a little heat.
- Garlic Infused Oil: For an even more intense garlic flavor, infuse the olive oil with garlic before sautéing. Simply heat the olive oil with a few cloves of crushed garlic over low heat for about 10-15 minutes. Remove the garlic before using the oil.
- Air Fryer Option: You can also cook these in an air fryer! Preheat your air fryer to 375°F (190°C). Lightly spray the potato pops with cooking oil and air fry for 10-12 minutes, flipping halfway through, until golden brown and crispy.
- Make Ahead: The potato mixture can be made ahead of time and stored in the refrigerator for up to 2 days. Shape the pops just before frying or baking.
- Freezing for Later: You can freeze the shaped, uncooked potato pops. Place them on a baking sheet lined with parchment paper and freeze until solid. Then, transfer them to a freezer-safe bag or container. When ready to cook, fry or bake them directly from frozen, adding a few extra minutes to the cooking time.
Conclusion:
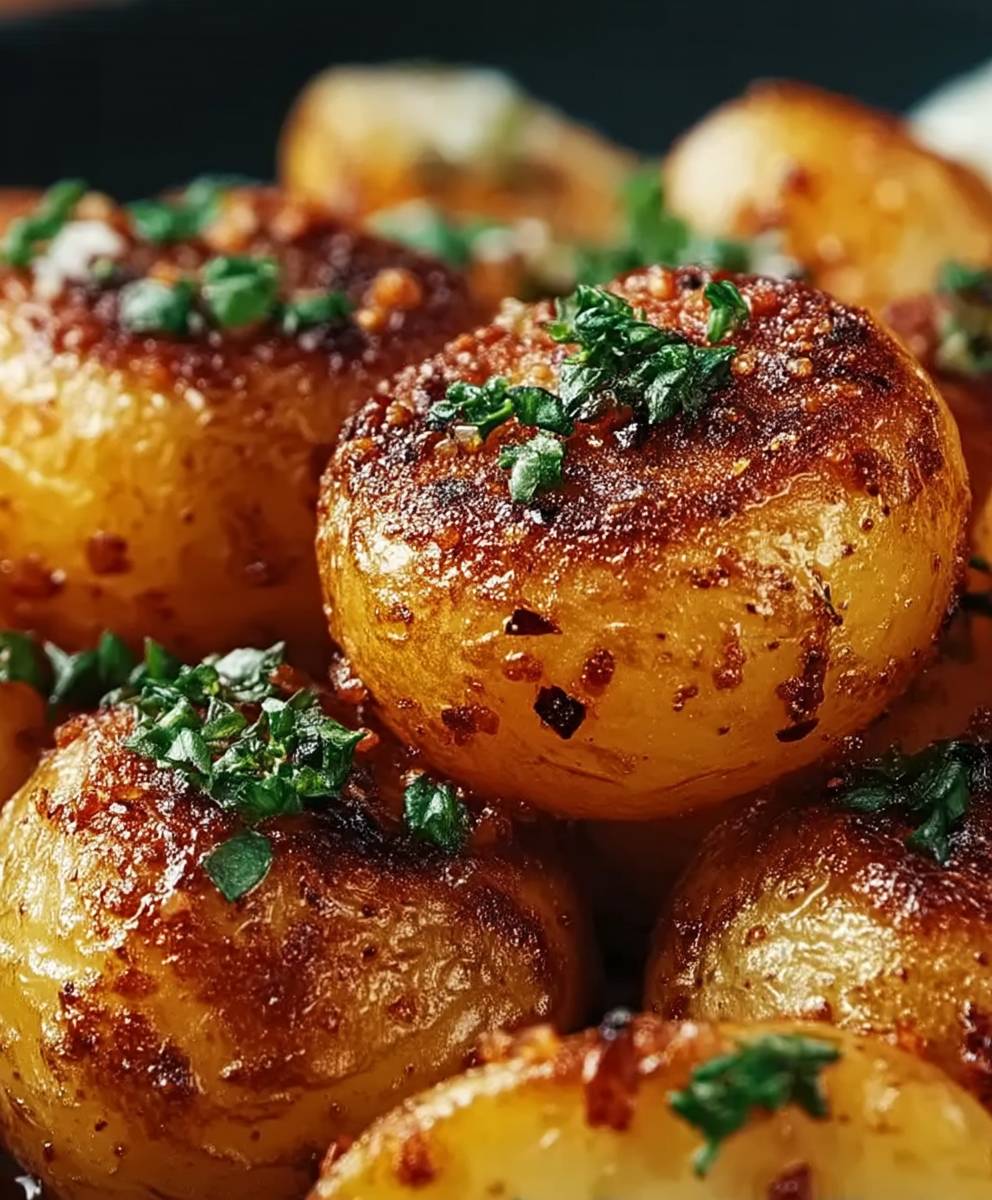
Well, there you have it! I truly believe these Garlic Potato Pops are about to become your new favorite snack, side dish, or even a surprisingly delightful appetizer. They’re crispy on the outside, fluffy on the inside, and bursting with that irresistible garlic flavor that makes everything better. Seriously, what’s not to love?
I know, I know, there are a million potato recipes out there. But trust me on this one. The unique shape and preparation method of these pops elevates them beyond your average roasted potato. They’re fun to make, even more fun to eat, and they’re guaranteed to be a crowd-pleaser. Whether you’re hosting a game night, planning a potluck, or just looking for a satisfying treat to enjoy on a cozy evening, these little guys are the answer.
But the best part? They’re incredibly versatile! While I’ve shared my go-to garlic-infused version, the possibilities are truly endless. Feeling cheesy? Sprinkle some grated Parmesan or cheddar over them during the last few minutes of baking. Want a little kick? Add a pinch of red pepper flakes to the seasoning mix. Craving something herby? Toss them with fresh rosemary, thyme, or oregano after they come out of the oven.
Serving Suggestions and Variations:
* Dipping Sauces: Don’t underestimate the power of a good dipping sauce! Ranch dressing, aioli, sriracha mayo, or even a simple ketchup are all fantastic choices.
* Spice it Up: Experiment with different spice blends. Cajun seasoning, smoked paprika, or even a curry powder can add a unique twist.
* Cheese Please: As mentioned before, cheese is always a good idea. Try different types of cheese or even a combination of cheeses.
* Herb Garden: Fresh herbs are your friend! Parsley, chives, dill, or any other herb you love will elevate the flavor of these pops.
* Make it a Meal: Serve these Garlic Potato Pops alongside your favorite protein, like grilled chicken, steak, or fish, for a complete and satisfying meal. They also pair perfectly with a veggie burger for a delicious vegetarian option.
* Air Fryer Option: If you’re looking for an even quicker and easier way to make these, try air frying them! Simply preheat your air fryer to 400°F (200°C) and cook for about 15-20 minutes, or until golden brown and crispy, flipping halfway through.
I’m so excited for you to try this recipe and experience the magic of these Garlic Potato Pops for yourself. I’m confident that they’ll become a staple in your kitchen, just like they have in mine.
So, what are you waiting for? Gather your ingredients, preheat your oven (or fire up your air fryer!), and get ready to create some seriously delicious potato pops. And most importantly, don’t forget to share your creations with me! I’d love to see your photos, hear about your variations, and learn about your experiences. Tag me on social media or leave a comment below I can’t wait to see what you come up with! Happy cooking!
Garlic Potato Pops: Crispy, Flavorful Bites You'll Love
Crispy on the outside, fluffy on the inside potato pops infused with garlic and herbs. Perfect as a side dish or appetizer.
Ingredients
1 kg potatoes, peeled and cubed
4 cloves garlic, crushed
1/4 cup olive oil
1 teaspoon salt
1/2 teaspoon black pepper
1/4 cup chopped fresh parsley
- 1 kg potatoes, peeled and cubed
- 4 cloves garlic, crushed
- 1/4 cup olive oil
- 1 teaspoon salt
- 1/2 teaspoon black pepper
- 1/4 cup chopped fresh parsley
Instructions
- Preheat oven to 400 degrees F (200 degrees C).
- In a large bowl, toss potatoes with olive oil, garlic, salt, and pepper.
- Arrange potatoes in a single layer on a baking sheet.
- Bake in preheated oven for 20 minutes, or until golden brown and crisp.
- Remove from oven and sprinkle with parsley.
- Serve immediately.
Notes
- For best results, use a starchy potato such as Russet or Yukon Gold.
- If you don’t have a piping bag, you can use a zip-top bag with a corner cut off.
- These are best served immediately.

Leave a Comment