
Red Velvet Bundt Cake: just the name conjures images of rich, decadent desserts perfect for celebrations, holidays, or simply a delightful weekend treat. But have you ever wondered about the story behind this iconic cake? It’s more than just a pretty dessert; it’s a slice of history!
The origins of red velvet cake are somewhat debated, with some tracing it back to the Depression era when bakers used beet juice to enhance the color and moisture of their cakes. Others point to the Waldorf-Astoria Hotel in New York City as the birthplace of this crimson confection. Regardless of its exact beginnings, Red Velvet Bundt Cake has undeniably captured hearts (and taste buds) for generations.
What makes this cake so irresistible? It’s the perfect balance of flavors and textures. The subtle tang of buttermilk and cocoa powder, combined with the moist, tender crumb, creates a symphony of deliciousness in every bite. And let’s not forget that stunning red hue! Baking it in a Bundt pan elevates it even further, creating a visually appealing centerpiece that’s sure to impress. Plus, a Bundt cake is incredibly easy to slice and serve, making it a fantastic option for gatherings of any size. So, are you ready to bake a show-stopping dessert that’s as delicious as it is beautiful? Let’s get started!

Ingredients:
- 250g (1 cup) unsalted butter, softened
- ½ cup (110g) icing sugar, sifted
- 1 teaspoon vanilla extract
- 1 ¾ cups (260g) plain flour, sifted
- ¼ cup (30g) cornflour
- Pinch of salt
- Icing sugar, for dusting
- Optional: Food coloring (gel or powder)
- Optional: Sprinkles or other decorations
Preparing the Dough:
- Cream the Butter and Sugar: In a large bowl, or the bowl of your stand mixer, beat the softened butter and sifted icing sugar together until light and fluffy. This usually takes about 3-5 minutes. Make sure to scrape down the sides of the bowl occasionally to ensure everything is evenly incorporated. The mixture should be pale and creamy. This step is crucial for achieving that melt-in-your-mouth texture!
- Add Vanilla Extract: Stir in the vanilla extract until just combined. Don’t overmix at this stage. Overmixing can develop the gluten in the flour, which we want to avoid for these delicate cookies.
- Sift in Dry Ingredients: In a separate bowl, sift together the plain flour, cornflour, and salt. Sifting is important to remove any lumps and ensure a light and airy texture. The cornflour is key to that signature melting moment texture, so don’t skip it!
- Combine Wet and Dry Ingredients: Gradually add the dry ingredients to the wet ingredients, mixing on low speed until just combined. Be careful not to overmix. The dough should come together easily and be soft and pliable. If you’re using a stand mixer, use the paddle attachment.
- Add Food Coloring (Optional): If you want to add food coloring, now is the time. Add a small amount of gel or powder food coloring to the dough and mix until evenly distributed. Remember, a little goes a long way, so start with a small amount and add more until you reach your desired color. Be careful not to overmix the dough at this stage.
- Chill the Dough: Wrap the dough in plastic wrap and chill in the refrigerator for at least 30 minutes. This will help the dough firm up and make it easier to handle. Chilling also prevents the cookies from spreading too much during baking. You can chill the dough for longer, even overnight, if needed. If chilling overnight, let the dough sit at room temperature for a few minutes before rolling.
Shaping and Baking the Cookies:
- Preheat Oven and Prepare Baking Sheets: Preheat your oven to 150°C (300°F). Line two baking sheets with parchment paper. Parchment paper prevents the cookies from sticking and makes cleanup a breeze.
- Roll and Cut Out Cookies: On a lightly floured surface, roll out the chilled dough to about 5mm (¼ inch) thickness. Use cookie cutters to cut out your desired shapes. You can use any shape you like, but traditional melting moments are often round or star-shaped. If the dough becomes too soft while rolling, return it to the refrigerator for a few minutes to firm up.
- Place Cookies on Baking Sheets: Carefully transfer the cut-out cookies to the prepared baking sheets, leaving a little space between each cookie. This allows for even baking and prevents the cookies from sticking together.
- Bake the Cookies: Bake for 12-15 minutes, or until the edges are lightly golden. The cookies should still be pale in the center. Be careful not to overbake them, as they will become dry and crumbly. The baking time may vary depending on your oven, so keep a close eye on them.
- Cool the Cookies: Remove the baking sheets from the oven and let the cookies cool on the baking sheets for a few minutes before transferring them to a wire rack to cool completely. This prevents them from breaking while they are still warm and delicate.
Assembling the Melting Moments (Optional):
While these cookies are delicious on their own, you can elevate them by making them into “melting moments” by sandwiching two cookies together with a buttercream filling. Here’s how:
Buttercream Filling Ingredients:
- 125g (½ cup) unsalted butter, softened
- 2 cups (250g) icing sugar, sifted
- 2 tablespoons milk
- ½ teaspoon vanilla extract
Making the Buttercream:
- Cream the Butter: In a large bowl, or the bowl of your stand mixer, beat the softened butter until light and fluffy.
- Add Icing Sugar: Gradually add the sifted icing sugar, beating on low speed until combined.
- Add Milk and Vanilla: Add the milk and vanilla extract and beat until the buttercream is smooth and creamy. If the buttercream is too thick, add a little more milk. If it’s too thin, add a little more icing sugar.
Assembling the Cookies:
- Pipe or Spread Buttercream: Once the cookies are completely cool, pipe or spread a generous amount of buttercream onto the flat side of one cookie.
- Sandwich with Another Cookie: Top with another cookie, flat side down, and gently press together to sandwich the buttercream in between.
- Dust with Icing Sugar: Dust the assembled cookies with icing sugar for a beautiful finishing touch.
Decorating (Optional):
Get creative with your melting moments! Here are some ideas:
- Sprinkles: Before baking, sprinkle the cookies with sprinkles or other decorations.
- Icing: Drizzle melted chocolate or royal icing over the cooled cookies.
- Edible Glitter: Dust the cookies with edible glitter for a sparkly effect.
Storage:
Store the cookies in an airtight container at room temperature for up to 5 days. If you’ve made them with buttercream filling, store them in the refrigerator. They can also be frozen for longer storage. Thaw completely before serving.
Tips for Perfect Melting Moments:
- Use Softened Butter: Make sure your butter is properly softened before creaming it with the sugar. This will ensure a smooth and creamy mixture.
- Don’t Overmix: Overmixing the dough can develop the gluten in the flour, resulting in tough cookies. Mix until just combined.
- Chill the Dough: Chilling the dough is essential for preventing the cookies from spreading too much during baking.
- Don’t Overbake: Overbaking the cookies will make them dry and crumbly. Bake until the edges are lightly golden and the center is still pale.
- Cool Completely: Let the cookies cool completely before assembling or decorating.
- Sift Ingredients: Sifting the icing sugar and flour ensures a light and airy texture.
- Cornflour is Key: Don’t skip the cornflour! It’s what gives these cookies their signature melting texture.
- Experiment with Flavors: Try adding different extracts, such as almond or lemon, to the dough for a unique flavor.
- Adjust Sweetness: If you prefer a less sweet cookie, you can reduce the amount of icing sugar slightly.
Troubleshooting:
- Cookies Spreading Too Much: If your cookies are spreading too much during baking, the dough may be too warm. Chill the dough for a longer period of time. Also, make sure your oven is not too hot.
- Cookies Too Dry: If your cookies are too dry, you may have overbaked them. Reduce the baking time slightly. Also, make sure you are using the correct amount of butter.
- Dough Too Crumbly: If your dough is too crumbly, you may have added too much flour. Add a tablespoon of milk or water to the dough to help it come together.
- Buttercream Too Thin: If your buttercream is too thin, add a little more icing sugar.
- Buttercream Too Thick: If your buttercream is too thick, add a little more milk.
Enjoy your delicious homemade Melting Moments! I hope you found this recipe helpful and easy to follow. Happy baking!
Conclusion:
And there you have it! These Melting Moments Cookies are truly something special, and I genuinely believe you need to experience their buttery, melt-in-your-mouth goodness. From the simple preparation to the delightful texture and flavor, this recipe is a winner on so many levels. It’s more than just a cookie; it’s a little moment of pure bliss with every single bite.
Why is this recipe a must-try? Well, beyond the obvious deliciousness, it’s incredibly versatile. It’s perfect for a cozy afternoon treat with a cup of tea, a delightful addition to a holiday cookie platter, or even a thoughtful homemade gift for friends and family. The delicate crumb and subtle sweetness make them universally appealing, and I guarantee they’ll disappear quickly, no matter who you’re sharing them with (or not sharing, I won’t judge!). Plus, the recipe itself is straightforward and forgiving, making it ideal for bakers of all skill levels. Even if you’re a beginner, you can confidently whip up a batch of these beauties and impress everyone with your baking prowess.
But the real magic lies in the texture. That melt-in-your-mouth sensation is what sets these cookies apart. It’s a combination of the right ingredients, the proper creaming technique, and a gentle baking process that creates that signature crumbly, yet tender, texture. It’s an experience that’s hard to describe, but trust me, once you try it, you’ll understand exactly what I mean.
Now, let’s talk about serving suggestions and variations! While these cookies are absolutely divine on their own, there are plenty of ways to customize them to your liking. For a classic touch, dust them generously with powdered sugar after they’ve cooled completely. This adds a touch of sweetness and creates a beautiful, elegant presentation.
If you’re feeling adventurous, you could try adding a hint of citrus zest to the dough. Lemon or orange zest would complement the buttery flavor beautifully and add a bright, refreshing note. Another option is to incorporate a teaspoon of vanilla extract or almond extract for a more pronounced flavor.
For chocolate lovers, consider adding a tablespoon or two of cocoa powder to the dough for a chocolatey twist. You could even dip the cooled cookies in melted chocolate and sprinkle them with chopped nuts or sprinkles for an extra decadent treat.
And if you’re looking for a festive variation, try adding a pinch of ground cinnamon or nutmeg to the dough during the holiday season. You could also use different colored sprinkles or sanding sugar to decorate the cookies for a special occasion.
The possibilities are endless! Feel free to experiment with different flavors and decorations to create your own signature version of these Melting Moments Cookies.
I truly hope you’ll give this recipe a try. I’m confident that you’ll fall in love with these cookies just as much as I have. They’re simple, delicious, and guaranteed to bring a smile to your face.
So, go ahead, gather your ingredients, preheat your oven, and get ready to bake up a batch of these irresistible treats. And when you do, please, please, please share your experience with me! I’d love to hear how they turned out, what variations you tried, and what your friends and family thought of them. You can leave a comment below, tag me on social media, or even send me an email. I’m always eager to hear from fellow bakers and cookie enthusiasts. Happy baking! I can’t wait to hear all about your Melting Moments Cookies adventures!
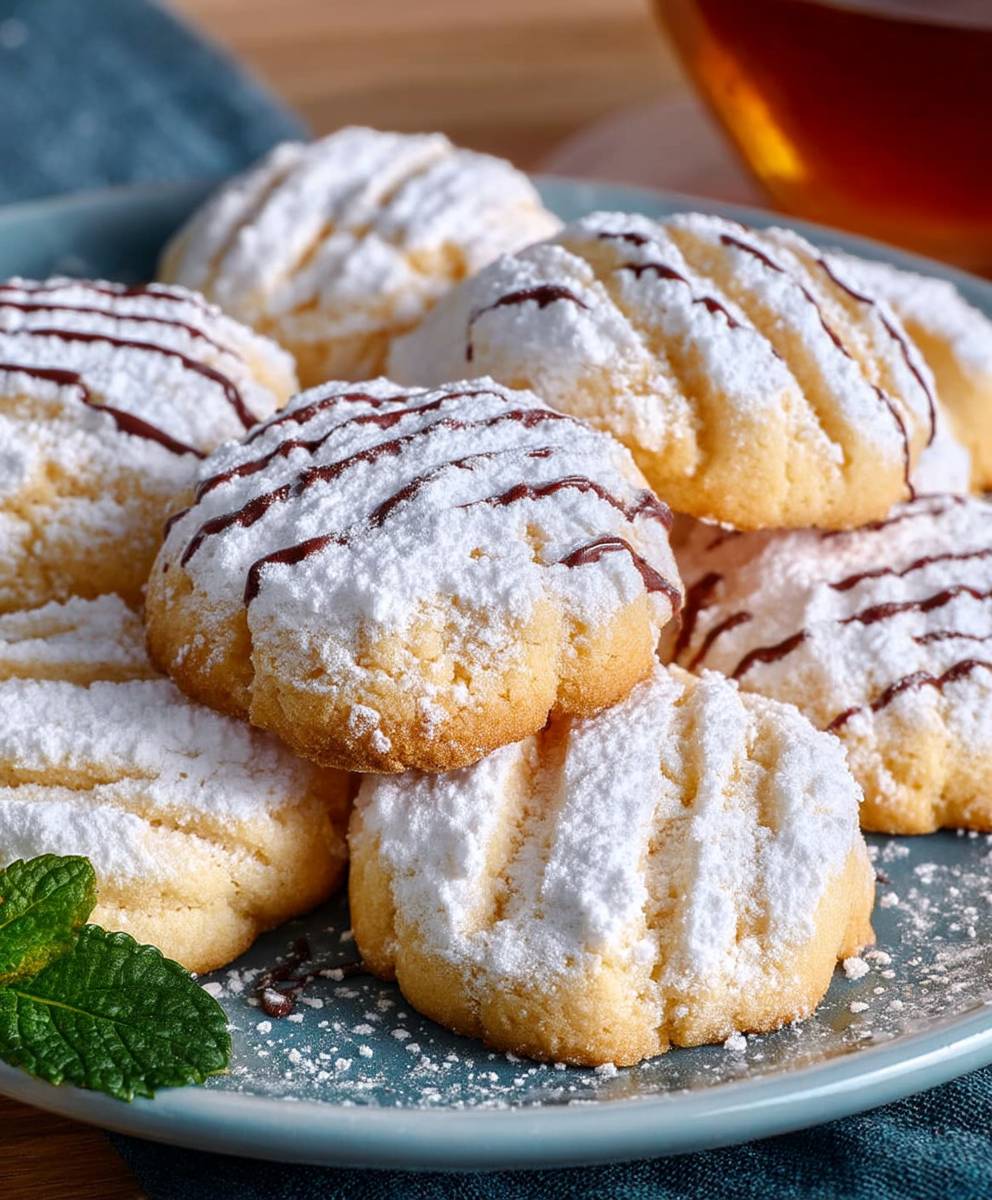
Melting Moments Cookies: The Ultimate Guide to Baking Perfection
Buttery, melt-in-your-mouth cookies with a delicate, crumbly texture and a sweet, creamy filling.
Ingredients
- 125g butter, softened
- 55g icing sugar, plus extra for dusting
- 1/2 tsp vanilla extract
- 150g plain flour
- 25g cornflour
Instructions
- Preheat oven to 350°F (175°C).
- In a large bowl, cream together the butter, confectioners’ sugar, and vanilla until light and fluffy.
- Gradually blend in the flour.
- Roll dough into 1 inch balls, and place on ungreased cookie sheets.
- Bake for 10 to 12 minutes, or until edges are lightly browned.
- Let cool on baking sheets for a few minutes before transferring to a wire rack to cool completely.
“`
Notes
- Store in an airtight container at room temperature.
Leave a Comment