
Focus Keyword: Authentic Italian Carbonara
“`html
Authentic Italian Carbonara: just the name conjures images of creamy, decadent pasta, doesn’t it? Forget everything you think you know about this classic dish we’re ditching the cream and embracing the true, unadulterated flavors of Rome! This isn’t your average weeknight pasta; this is a culinary journey to the heart of Italy.
Carbonara’s history is shrouded in a bit of mystery, with some believing it originated as a hearty meal for charcoal workers (“carbonari” in Italian) in the Apennine Mountains. Others suggest it was a post-World War II creation, influenced by American rations like bacon and powdered eggs. Regardless of its exact origins, one thing is certain: Authentic Italian Carbonara has become a beloved staple of Italian cuisine, celebrated worldwide for its simplicity and rich flavor.
What makes carbonara so irresistible? It’s the perfect marriage of textures the silky smooth pasta coated in a luscious sauce, the crispy, salty guanciale (or pancetta), and the sharp bite of Pecorino Romano cheese. Its a symphony of flavors that dance on your palate. Plus, when made correctly, it’s surprisingly quick and easy to prepare, making it a fantastic option for a satisfying and impressive meal. Get ready to experience carbonara the way it was meant to be truly authentic and utterly delicious!
“`

Ingredients:
- For the Dough:
- 3 ½ cups (420g) all-purpose flour, plus more for dusting
- ¼ cup (50g) granulated sugar
- 2 ¼ teaspoons (7g) active dry yeast
- ¾ teaspoon (4g) salt
- ¾ cup (180ml) whole milk, warmed to 110-115°F (43-46°C)
- ¼ cup (60ml) water, warmed to 110-115°F (43-46°C)
- 4 tablespoons (56g) unsalted butter, melted and cooled slightly
- 1 large egg, lightly beaten
- For the Filling:
- ½ cup (113g) unsalted butter, softened
- ½ cup (100g) granulated sugar
- ½ cup (50g) unsweetened cocoa powder
- 1 cup (approximately 150g) hazelnut spread (like Nutella)
- ½ cup (50g) chopped hazelnuts, toasted
- For the Glaze (Optional):
- 2 cups (240g) powdered sugar
- ¼ cup (60ml) milk
- 1 teaspoon vanilla extract
Preparing the Dough:
- Combine Dry Ingredients: In a large bowl, whisk together the flour, sugar, yeast, and salt. Make sure the yeast is fresh; otherwise, your rolls won’t rise properly! I always check the expiration date.
- Combine Wet Ingredients: In a separate bowl or measuring cup, combine the warmed milk, warmed water, melted butter, and beaten egg. The milk and water should be warm to the touch, but not hot, to activate the yeast without killing it.
- Combine Wet and Dry: Pour the wet ingredients into the dry ingredients and stir with a wooden spoon or spatula until a shaggy dough forms.
- Knead the Dough: Turn the dough out onto a lightly floured surface and knead for 8-10 minutes, or until the dough is smooth and elastic. You can also use a stand mixer fitted with a dough hook. If using a stand mixer, knead on medium speed for about 6-8 minutes. The dough should be slightly tacky but not sticky. If it’s too sticky, add a tablespoon of flour at a time until it reaches the right consistency.
- First Rise: Place the dough in a lightly oiled bowl, turning to coat. Cover the bowl with plastic wrap or a clean kitchen towel and let rise in a warm place for 1-1.5 hours, or until doubled in size. I like to put mine in a slightly warmed oven (turned off, of course!).
Preparing the Filling:
- Soften the Butter: Ensure your butter is properly softened. It should be soft enough to easily spread but not melted. I usually leave it out at room temperature for about an hour before starting.
- Combine Filling Ingredients: In a medium bowl, cream together the softened butter, sugar, and cocoa powder until light and fluffy. I use an electric mixer for this, but you can also do it by hand.
- Add Hazelnut Spread: Stir in the hazelnut spread until well combined. The mixture should be smooth and spreadable.
- Toast and Chop Hazelnuts: Preheat your oven to 350°F (175°C). Spread the hazelnuts on a baking sheet and toast for 8-10 minutes, or until fragrant and the skins start to crack. Let cool slightly, then rub the hazelnuts in a clean kitchen towel to remove the skins. Chop coarsely. Toasting the hazelnuts really brings out their flavor!
Assembling the Rolls:
- Roll Out the Dough: Once the dough has doubled in size, punch it down to release the air. Turn the dough out onto a lightly floured surface and roll it into a large rectangle, about 12×18 inches.
- Spread the Filling: Spread the chocolate-hazelnut filling evenly over the dough, leaving a ½-inch border along one of the long edges.
- Sprinkle with Hazelnuts: Sprinkle the chopped toasted hazelnuts evenly over the filling.
- Roll Up the Dough: Starting from the long edge opposite the border, tightly roll up the dough into a log.
- Cut the Rolls: Using a sharp serrated knife or unflavored dental floss, cut the log into 12 equal slices. Dental floss works surprisingly well for this! Just slide it under the log and cross the ends to cut.
- Arrange in Baking Pan: Place the rolls cut-side up in a greased 9×13 inch baking pan. You can also use a round cake pan if you prefer.
Second Rise and Baking:
- Second Rise: Cover the pan with plastic wrap or a clean kitchen towel and let rise in a warm place for 30-45 minutes, or until the rolls are puffy.
- Preheat Oven: Preheat your oven to 350°F (175°C).
- Bake the Rolls: Bake for 25-30 minutes, or until the rolls are golden brown and cooked through. A toothpick inserted into the center should come out clean.
- Cool Slightly: Let the rolls cool in the pan for 10-15 minutes before frosting.
Preparing the Glaze (Optional):
- Combine Ingredients: In a medium bowl, whisk together the powdered sugar, milk, and vanilla extract until smooth. Add more milk if needed to reach your desired consistency.
- Glaze the Rolls: Drizzle the glaze over the warm rolls. You can also spread the glaze evenly over the top.
Tips and Variations:
Using Different Nuts:
While hazelnuts are classic with chocolate, feel free to experiment with other nuts! Walnuts, pecans, or even almonds would be delicious in these rolls. Just make sure to toast them before chopping for the best flavor.
Adding Chocolate Chips:
For an extra chocolatey treat, sprinkle some chocolate chips over the filling before rolling up the dough. Milk chocolate, dark chocolate, or even white chocolate chips would all work well.
Making Ahead:
You can prepare the dough and filling ahead of time. After the first rise, punch down the dough, wrap it tightly in plastic wrap, and refrigerate for up to 24 hours. When ready to bake, let the dough come to room temperature for about 30 minutes before rolling it out. You can also assemble the rolls and let them rise in the refrigerator overnight. In the morning, let them come to room temperature for about 30 minutes before baking.
Freezing Instructions:
Baked rolls can be frozen for up to 2 months. Let them cool completely before wrapping them tightly in plastic wrap and then in foil. To thaw, let them sit at room temperature for several hours or overnight. You can also reheat them in a low oven (around 300°F or 150°C) for about 10-15 minutes to warm them through.
Yeast Troubleshooting:
If your dough doesn’t rise, it could be due to several factors. Make sure your yeast is fresh and hasn’t expired. The milk and water should be warm, but not hot, as hot liquids can kill the yeast. Also, make sure your rising environment is warm enough. A cold room can slow down the rising process.
Adjusting Sweetness:
If you prefer a less sweet roll, you can reduce the amount of sugar in the filling. You can also use a less sweet hazelnut spread or even make your own homemade version with less sugar.
Vegan Option:
To make these rolls vegan, use plant-based milk and butter substitutes. You can also use a flax egg (1 tablespoon of ground flaxseed mixed with 3 tablespoons of water) in place of the egg. Be sure to use a vegan hazelnut spread as well.
Gluten-Free Option:
While I haven’t personally tested this recipe with gluten-free flour, you can try using a gluten-free all-purpose flour blend. Keep in mind that gluten-free dough can be more delicate, so you may need to adjust the amount of liquid. Also, gluten-free rolls may not rise as much as traditional rolls.
Conclusion:
Okay, friends, let’s be honest you’ve made it this far, so you’re clearly intrigued by these Chocolate Hazelnut Rolls. And trust me, you absolutely *should* be! This isn’t just another sweet treat; it’s an experience. The rich, decadent chocolate swirled with the nutty, toasty hazelnut filling, all enveloped in a soft, pillowy dough… it’s pure bliss in every bite. I’ve baked a lot of things in my time, and these rolls consistently rank among my absolute favorites. They’re the kind of thing that makes a weekend brunch feel extra special, or turns an ordinary afternoon into a moment of pure indulgence.
But beyond the incredible flavor, what makes this recipe a must-try is its versatility. While I’ve presented my go-to method, feel free to get creative! Want to amp up the chocolate even more? Add some chocolate chips to the filling. Craving a little spice? A pinch of cinnamon or cardamom in the dough will do the trick. You could even experiment with different nuts walnuts or pecans would be delicious substitutes for the hazelnuts.
And the serving suggestions are endless! These rolls are fantastic warm, straight from the oven, perhaps with a scoop of vanilla ice cream melting on top. They’re also wonderful at room temperature, perfect for packing in a lunchbox or enjoying with a cup of coffee. For a truly decadent experience, try drizzling them with a simple glaze made from powdered sugar and milk. Or, if you’re feeling adventurous, whip up a batch of homemade Nutella to slather on top. Seriously, the possibilities are limited only by your imagination!
Serving Suggestions:
- Warm with vanilla ice cream
- At room temperature with coffee
- Drizzled with powdered sugar glaze
- Topped with homemade Nutella
I truly believe that baking is an act of love, and these Chocolate Hazelnut Rolls are a delicious way to show yourself and your loved ones some affection. They’re a little bit of effort, yes, but the reward is so, so worth it. The aroma that fills your kitchen as they bake, the smiles on the faces of those who get to enjoy them it’s all part of the magic.
So, what are you waiting for? Gather your ingredients, preheat your oven, and get ready to embark on a baking adventure. I’m confident that you’ll fall in love with these rolls just as much as I have. And when you do, I’d absolutely love to hear about it! Share your photos, your variations, and your experiences in the comments below. Let’s create a community of Chocolate Hazelnut Roll enthusiasts! I can’t wait to see what you create. Happy baking!
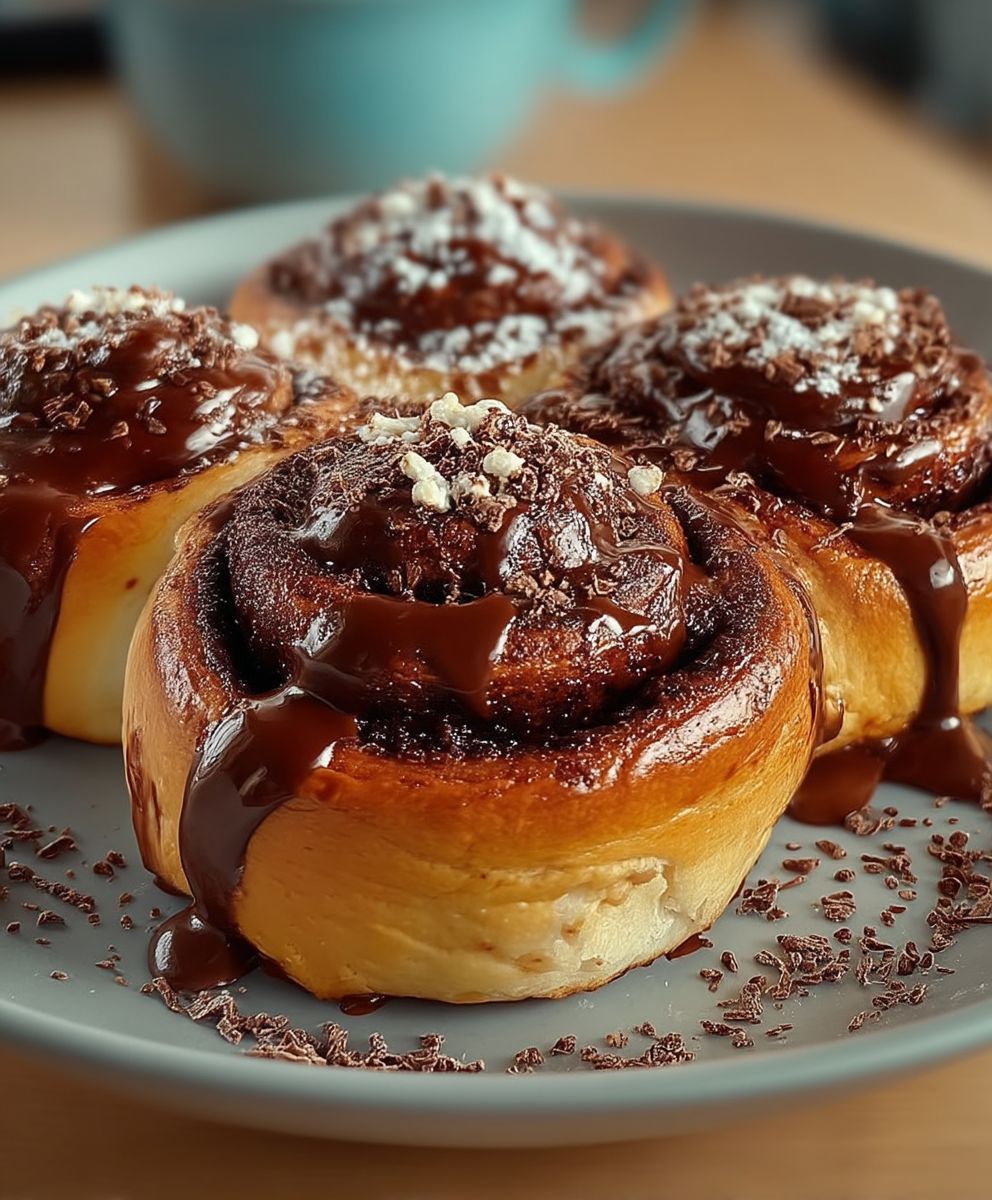
Chocolate Hazelnut Rolls: A Delicious & Easy Recipe
Flaky, buttery rolls filled with a rich chocolate hazelnut spread and topped with a sweet glaze. Perfect for breakfast, brunch, or dessert.
Ingredients
Prep time 25 minutes
Cook time 20-25 minutes
Ingredients:
* 2 1/4 cups (281g) all-purpose flour, plus more for dusting
* 1/4 cup (25g) unsweetened cocoa powder
* 1 teaspoon instant espresso powder
* 1 teaspoon salt
* 1/2 cup (100g) granulated sugar
* 1/4 cup (50g) packed light brown sugar
* 1 packet (2 1/4 teaspoons) rapid rise yeast
* 1 cup (240ml) milk
* 1/4 cup (57g) unsalted butter
* 1 teaspoon vanilla extract
* 1 large egg
Hazelnut Filling:
* 1/2 cup (113g) unsalted butter, softened
* 1 cup (100g) hazelnut flour
* 1/2 cup (50g) powdered sugar
* 1/4 teaspoon salt
* 1 teaspoon vanilla extract
Chocolate Glaze:
* 4 ounces (113g) semi-sweet chocolate, chopped
* 1/2 cup (120ml) heavy cream
* 1 tablespoon (14g) unsalted butter
* 1/4 teaspoon salt
- 2 1/4 cups (281g) all-purpose flour, plus more for dusting
- 1/4 cup (25g) unsweetened cocoa powder
- 1 teaspoon instant espresso powder
- 1 teaspoon salt
- 1/2 cup (100g) granulated sugar
- 1/4 cup (50g) packed light brown sugar
- 1 packet (2 1/4 teaspoons) rapid rise yeast
- 1 cup (240ml) milk
- 1/4 cup (57g) unsalted butter
- 1 teaspoon vanilla extract
- 1 large egg
- 1/2 cup (113g) unsalted butter, softened
- 1 cup (100g) hazelnut flour
- 1/2 cup (50g) powdered sugar
- 1/4 teaspoon salt
- 1 teaspoon vanilla extract
- 4 ounces (113g) semi-sweet chocolate, chopped
- 1/2 cup (120ml) heavy cream
- 1 tablespoon (14g) unsalted butter
- 1/4 teaspoon salt
Instructions
- Preheat oven to 350°F (175°C).
- In a large bowl, whisk together flour, sugar, yeast, and salt.
- In a separate bowl, whisk together milk, water, butter, and egg.
- Pour the wet ingredients into the dry ingredients and mix until a dough forms.
- Turn the dough out onto a lightly floured surface and knead for 5-7 minutes, or until smooth and elastic.
- Place the dough in a greased bowl, turning to coat. Cover and let rise in a warm place for 1 hour, or until doubled in size.
- Punch down the dough and turn it out onto a lightly floured surface.
- Roll the dough into a 12×18 inch rectangle.
- Spread the Nutella evenly over the dough.
- Sprinkle the chopped hazelnuts over the Nutella.
- Starting from the long edge, roll the dough up tightly.
- Cut the roll into 12 slices.
- Place the slices in a greased 9×13 inch baking dish.
- Cover and let rise for 30 minutes.
- Bake for 20-25 minutes, or until golden brown.
- Let cool slightly before serving.
Notes
**Prep time:** 30 minutes
**Cook time:** 20-25 minutes
**Ingredients:**
* **For the dough:**
* 1 cup warm milk
* 2 1/4 teaspoons active dry yeast
* 1/2 cup granulated sugar
* 1/2 teaspoon salt
* 1/4 cup unsalted butter, melted
* 2 large eggs
* 4 cups all-purpose flour, plus more for dusting
* **For the filling:**
* 1 cup chocolate hazelnut spread
* 1/4 cup unsalted butter, softened
* **For the glaze:**
* 4 ounces cream cheese, softened
* 1/2 cup unsalted butter, softened
* 2 cups powdered sugar
* 1/4 cup milk
* 1 teaspoon vanilla extract
**Instructions**
1. **Make the dough:** In a large bowl, whisk together the warm milk, yeast, and sugar. Let stand for 5 minutes, or until foamy.
2. Stir in the salt, melted butter, and eggs. Gradually add the flour, mixing until a soft dough forms.
3. Turn the dough out onto a lightly floured surface and knead for 5-7 minutes, or until smooth and elastic.
4. Place the dough in a greased bowl, turning to coat. Cover and let rise in a warm place for 1-1.5 hours, or until doubled in size.
5. **Make the filling:** In a small bowl, combine the chocolate hazelnut spread and softened butter.
6. **Assemble the rolls:** Punch down the dough and turn it out onto a lightly floured surface. Roll the dough into a 12×18 inch rectangle.
7. Spread the chocolate hazelnut filling evenly over the dough.
8. Starting on the long side, roll the dough tightly into a log.
9. Cut the log into 12 equal slices.
10. Place the rolls in a greased 9×13 inch baking dish. Cover and let rise for 30 minutes.
11. Preheat oven to 350 degrees F (175 degrees C).
12. Bake for 20-25 minutes, or until golden brown.
13. **Make the glaze:** While the rolls are baking, make the glaze. In a large bowl, beat together the cream cheese and butter until smooth.
14. Gradually add the powdered sugar, mixing until smooth. Stir in the milk and vanilla extract.
15. **Glaze the rolls:** Let the rolls cool slightly before glazing. Spread the glaze evenly over the warm rolls.
**Notes:**
* For best results, use a high-quality chocolate hazelnut spread.
* The rolls can be made ahead of time and stored in the refrigerator overnight.
* Leftover rolls can be stored in an airtight container at room temperature for up to 3 days.
* You can add chopped hazelnuts to the filling for extra flavor and texture.
* If you don’t have cream cheese, you can use a simple powdered sugar glaze instead.
- For best results, use a high-quality chocolate hazelnut spread.
- The rolls can be made ahead of time and stored in the refrigerator overnight.
- Leftover rolls can be stored in an airtight container at room temperature for up to 3 days.
- You can add chopped hazelnuts to the filling for extra flavor and texture.
- If you don’t have cream cheese, you can use a simple powdered sugar glaze instead.


Leave a Comment