
Cheddar Cheese Crisps: Prepare to be amazed by the easiest, cheesiest, and most satisfying snack you’ll ever make! Imagine golden, bubbly, intensely flavored crisps that melt in your mouth with a delightful crunch. These aren’t just any ordinary snack; they’re a flavor explosion waiting to happen, and the best part? They require only one ingredient!
While the exact origins of baked cheese crisps are difficult to pinpoint, the concept of transforming simple ingredients into something extraordinary has been a culinary tradition for centuries. Cultures around the world have long appreciated the magic of baking cheese to achieve a crispy, concentrated flavor. Think of it as a sophisticated, grown-up version of your favorite childhood cheese crackers.
So, why are Cheddar Cheese Crisps so universally loved? It’s simple: they’re incredibly delicious, satisfyingly crunchy, and unbelievably easy to make. The intense cheddar flavor is irresistible, and the texture is pure perfection. Plus, they’re naturally low-carb and gluten-free, making them a guilt-free treat for almost everyone. Whether you’re looking for a quick snack, a crunchy topping for your soup, or a unique addition to your charcuterie board, these crisps are guaranteed to be a hit. Let’s get started and transform a block of cheddar into something truly special!

Ingredients:
- 6 cups thinly sliced cucumbers (about 4-5 medium cucumbers, unpeeled)
- 2 cups thinly sliced onions (about 1-2 medium onions)
- 1 large green bell pepper, seeded and thinly sliced
- 1 large red bell pepper, seeded and thinly sliced
- 1/4 cup pickling salt (do not use iodized salt)
- 4 cups white vinegar (5% acidity)
- 2 cups granulated sugar
- 1 tablespoon mustard seeds
- 1 teaspoon celery seeds
- 1/2 teaspoon ground turmeric
- 1/4 teaspoon ground cloves
- Pinch of red pepper flakes (optional, for a little heat)
- 8-10 sprigs of fresh dill (optional)
Preparing the Vegetables:
Okay, let’s get started! First things first, we need to prep our veggies. This is probably the most time-consuming part, but trust me, it’s worth it. The key to great bread and butter pickles is having uniformly sliced vegetables. This ensures they pickle evenly and have a consistent texture.
- Slice the Cucumbers: Wash your cucumbers thoroughly. I prefer to leave the peels on for added texture and nutrients, but you can peel them if you prefer. Using a mandoline slicer (carefully!) or a sharp knife, slice the cucumbers into thin rounds, about 1/8 inch thick. Aim for consistency! If you don’t have a mandoline, just take your time and try to make them as uniform as possible. Place the sliced cucumbers in a large, non-reactive bowl (glass or stainless steel is best).
- Slice the Onions: Peel your onions and slice them thinly. Again, a mandoline can be helpful here, but a sharp knife works just fine. You want them to be about the same thickness as the cucumbers. Add the sliced onions to the bowl with the cucumbers.
- Slice the Bell Peppers: Remove the seeds and membranes from your bell peppers. Slice them into thin strips, about 1/4 inch wide. I like to use a mix of green and red bell peppers for color, but you can use whatever you have on hand. Add the sliced bell peppers to the bowl with the cucumbers and onions.
Salting and Resting:
This step is crucial for drawing out excess moisture from the vegetables. This helps to prevent soggy pickles and ensures a crispier final product. Don’t skip it!
- Add the Salt: Sprinkle the pickling salt over the sliced vegetables in the bowl. Make sure to distribute it evenly.
- Toss to Combine: Gently toss the vegetables with the salt to ensure everything is coated.
- Let it Rest: Cover the bowl with plastic wrap or a clean kitchen towel and let it sit at room temperature for at least 2 hours, or even better, overnight in the refrigerator. You’ll notice a lot of liquid accumulating in the bowl that’s exactly what we want!
Preparing the Brine:
While the vegetables are resting, we can prepare the brine. This is where all the delicious flavor comes from!
- Combine the Brine Ingredients: In a large, non-reactive saucepan (again, glass or stainless steel is best), combine the white vinegar, granulated sugar, mustard seeds, celery seeds, ground turmeric, ground cloves, and red pepper flakes (if using).
- Bring to a Boil: Place the saucepan over medium-high heat and bring the mixture to a rolling boil, stirring occasionally to dissolve the sugar.
- Simmer: Once the mixture is boiling, reduce the heat to low and simmer for 5 minutes, stirring occasionally. This allows the flavors to meld together.
Combining and Cooking:
Now comes the fun part putting it all together!
- Drain and Rinse the Vegetables: After the vegetables have rested for at least 2 hours (or overnight), drain them thoroughly in a colander. Rinse them well under cold running water to remove the excess salt. This is important, otherwise your pickles will be too salty! Drain them again, pressing gently to remove as much excess water as possible.
- Add Vegetables to Brine: Add the drained and rinsed vegetables to the simmering brine in the saucepan.
- Bring to a Simmer: Increase the heat to medium and bring the mixture back to a gentle simmer.
- Cook: Cook the vegetables in the brine for about 10-15 minutes, or until they become slightly translucent and tender-crisp. Be careful not to overcook them, or they will become mushy. Stir occasionally to ensure even cooking.
Canning (Optional):
If you want to preserve your bread and butter pickles for longer storage, you can can them using proper canning techniques. If you’re new to canning, I highly recommend researching and understanding the process thoroughly before you begin. Improper canning can lead to spoilage and potentially dangerous bacteria growth.
- Prepare Jars and Lids: Wash your canning jars, lids, and bands in hot, soapy water. Rinse them well. Sterilize the jars by boiling them in a large pot of water for 10 minutes. Keep the jars hot until ready to use. You can also sterilize them in the dishwasher if it has a sterilization cycle. Heat the lids in a separate saucepan of simmering water (do not boil) to soften the sealing compound.
- Pack the Jars: Using a slotted spoon, pack the hot pickles into the hot, sterilized jars, leaving 1/2 inch of headspace (the space between the top of the pickles and the top of the jar). You can add a sprig of fresh dill to each jar for extra flavor, if desired.
- Add Brine: Ladle the hot brine over the pickles in the jars, maintaining the 1/2 inch headspace.
- Remove Air Bubbles: Use a non-metallic utensil (like a chopstick or plastic knife) to gently press down on the pickles and release any trapped air bubbles.
- Wipe Jar Rims: Wipe the rims of the jars with a clean, damp cloth to remove any spills or drips.
- Place Lids and Bands: Place the lids on the jars and screw on the bands until they are fingertip tight (not too tight, not too loose).
- Process in a Water Bath Canner: Carefully lower the jars into a boiling water bath canner. The water should cover the jars by at least 1 inch. Bring the water to a rolling boil and process for 10 minutes for pint jars and 15 minutes for quart jars. Adjust processing time for altitude, if necessary (consult a canning guide for specific instructions).
- Cool and Check Seals: Turn off the heat and carefully remove the jars from the canner using a jar lifter. Place them on a towel-lined surface to cool completely. As the jars cool, you should hear a “pop” sound as the lids seal. After the jars have cooled completely (about 12-24 hours), check the seals by pressing down on the center of each lid. If the lid doesn’t flex or pop back up, it’s properly sealed. If the lid flexes, the jar is not sealed and should be refrigerated and eaten within a few weeks.
- Store: Store the sealed jars in a cool, dark place for at least 2 weeks before eating to allow the flavors to develop.
Refrigerating (No Canning):
If you don’t want to go through the canning process, you can simply refrigerate your bread and butter pickles. They won’t last as long as canned pickles, but they’ll still be delicious for several weeks.
- Cool the Pickles: Allow the cooked pickles and brine to cool completely.
- Transfer to Jars: Transfer the cooled pickles and brine to clean jars or containers.
- Refrigerate: Refrigerate for at least 24 hours before eating to allow the flavors to develop.
Serving and Enjoying:
Now for the best part eating your homemade bread and butter pickles! These pickles are incredibly versatile and can be enjoyed in so many ways.
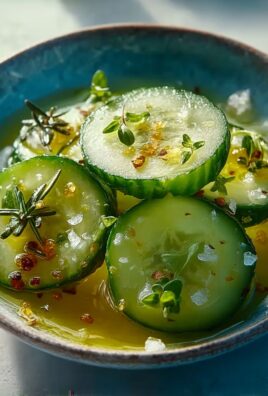
- As a Snack: Simply grab a jar and enjoy them straight from the fridge!
- On Sandwiches: Add them to your favorite sandwiches for a tangy and sweet crunch. They’re especially delicious on grilled cheese, ham sandwiches, and pulled pork sandwiches.
- With Burgers: Top your burgers with a few slices of bread and butter pickles for a burst of flavor.
- In
Conclusion:
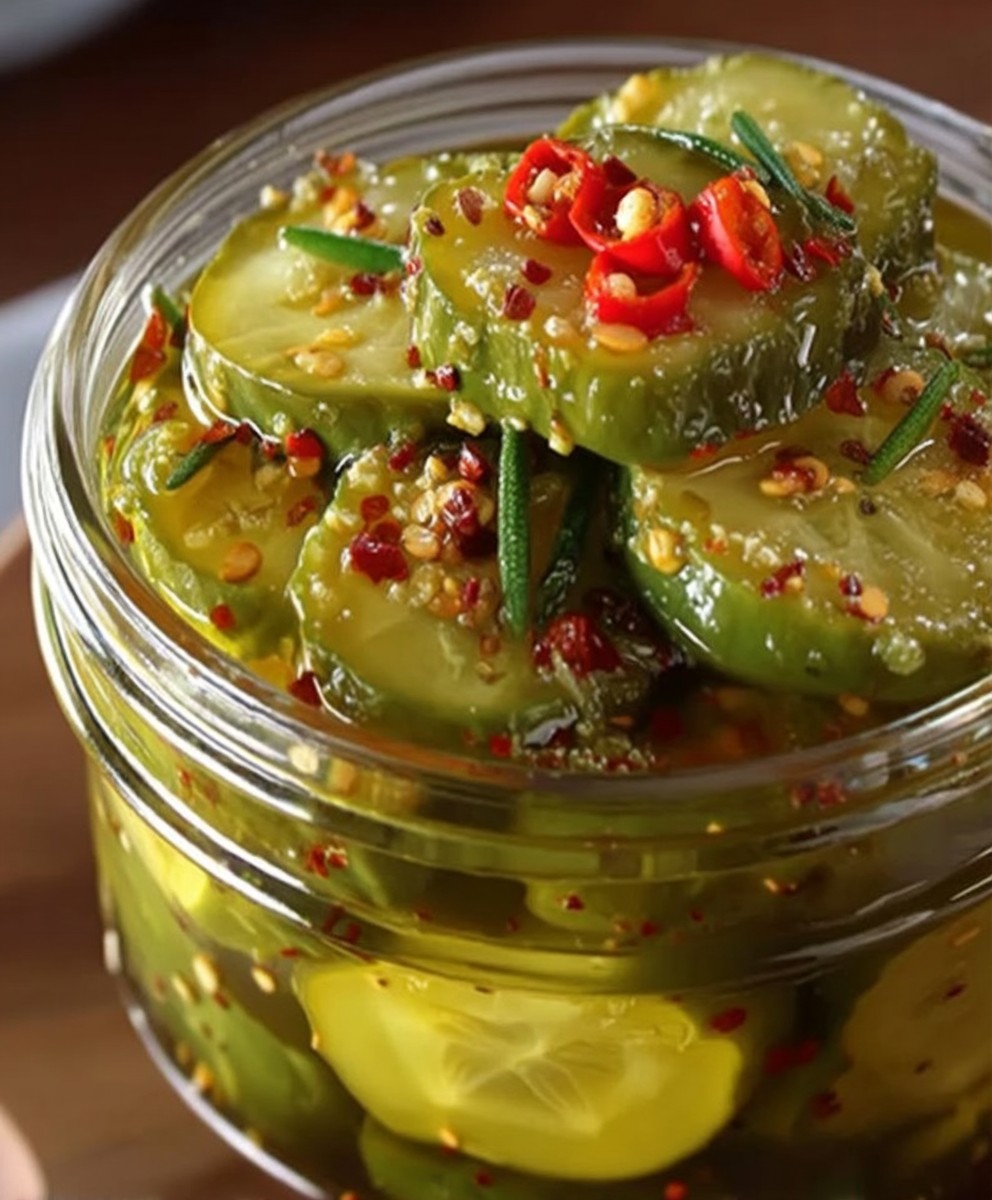
So, there you have it! My take on classic Bread and Butter Pickles. I genuinely believe this recipe is a must-try, and here’s why: these pickles strike the perfect balance between sweet, tangy, and subtly spiced. They’re not overly sweet like some store-bought versions, and the crispness is absolutely addictive. Forget those soggy, bland pickles these are bursting with flavor and have a satisfying crunch that will keep you coming back for more. Plus, making them yourself means you control the ingredients, ensuring a fresher, more wholesome final product.
But beyond the incredible taste, this recipe is also surprisingly easy to follow. I’ve broken down each step to be as clear and straightforward as possible, so even if you’re a beginner in the kitchen, you can confidently tackle this project. And the best part? The satisfaction of knowing you created something delicious from scratch is truly rewarding. Imagine the look on your friends’ and family’s faces when you present them with a jar of your homemade Bread and Butter Pickles they’ll be so impressed!
Serving Suggestions and Variations:
Now, let’s talk about how to enjoy these little gems. Of course, they’re fantastic straight from the jar as a snack. But don’t limit yourself! Here are a few of my favorite ways to use them:
- On sandwiches and burgers: They add a delightful tang and crunch to any sandwich, especially grilled cheese, pulled pork, or a classic BLT.
- In salads: Dice them up and toss them into potato salad, tuna salad, or even a green salad for a burst of flavor.
- As a relish: Chop them finely and use them as a relish for hot dogs, sausages, or even grilled fish.
- With cheese and charcuterie: They pair beautifully with a variety of cheeses and cured meats, making them a perfect addition to any cheese board.
- As a garnish: Add a few slices to your favorite cocktails, like a Bloody Mary or a pickleback.
And if you’re feeling adventurous, here are a few variations you can try:
- Spicy Bread and Butter Pickles: Add a pinch of red pepper flakes or a few slices of jalapeño to the brine for a kick of heat.
- Dill Bread and Butter Pickles: Add a generous amount of fresh dill to the brine for a more herbaceous flavor.
- Garlic Bread and Butter Pickles: Add a few cloves of minced garlic to the brine for a pungent and savory twist.
- Onion Variety: Experiment with different types of onions, such as red onions or shallots, for a unique flavor profile.
The possibilities are endless! Feel free to experiment and find your own perfect combination of flavors.
Time to Get Pickling!
I truly hope you’ll give this recipe a try. I’m confident that you’ll love the results. It’s a fun, rewarding, and delicious way to preserve the flavors of summer and enjoy them all year round. Don’t be intimidated by the pickling process it’s much easier than you might think. Just follow the instructions carefully, and you’ll be rewarded with a batch of homemade Bread and Butter Pickles that are far superior to anything you can buy in the store.
Once you’ve made your own batch, I’d love to hear about your experience! Share your photos and comments on social media using [Your Hashtag Here] or leave a review on my website. Let me know what variations you tried and how you enjoyed them. I’m always eager to learn from my readers and see how they’re putting their own spin on my recipes. Happy pickling!
Bread and Butter Pickles: The Ultimate Guide to Making and Enjoying Them
Sweet and tangy homemade pickles, perfect for snacking or topping burgers and sandwiches.
Ingredients
- 1 cup thinly sliced cucumbers
- 1/2 cup thinly sliced onion
- 1/4 cup thinly sliced green bell pepper
- 1/4 cup thinly sliced red bell pepper
- 1 1/2 cups white vinegar
- 3/4 cup granulated sugar
- 1 1/2 teaspoons mustard seeds
- 1/2 teaspoon celery seeds
- 1/4 teaspoon ground turmeric
- 1/4 teaspoon ground ginger
- 1/4 teaspoon red pepper flakes (optional)
- 1/2 teaspoon salt
Instructions
“`html- Slice cucumbers very thin.
- Place cucumber slices and onion in a large bowl.
- Sprinkle with pickling salt and cover with ice. Let stand for 3 hours.
- Drain well.
- In a large pot, combine vinegar, sugar, mustard seed, celery seed, and turmeric. Bring to a boil.
- Add cucumber and onion to the boiling mixture. Simmer for 10 minutes.
- Pack hot pickles into sterilized jars, leaving 1/2 inch headspace.
- Process in a boiling water bath for 10 minutes.
“`
Notes
“`html- For best results, use pickling cucumbers.
- If you don’t have pickling spice, you can use a combination of mustard seeds, coriander seeds, and allspice berries.
- These pickles are best after they have had a chance to sit in the refrigerator for at least 24 hours.
“`
Leave a Comment