
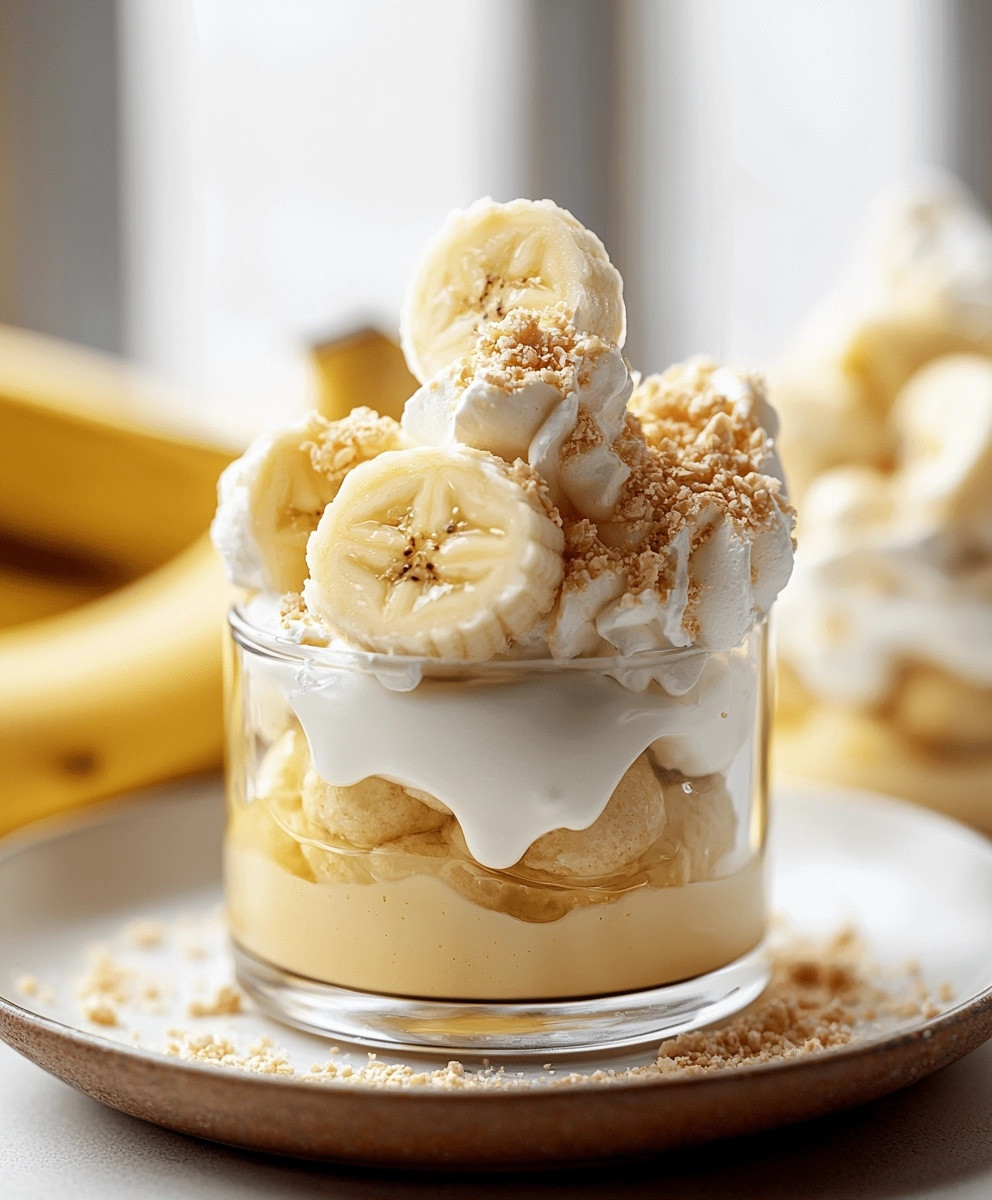
Budget Banana Pudding is not just a dessert; it’s a delightful experience that brings comfort and joy to any gathering. This classic Southern treat has a rich history, often associated with family gatherings and potlucks, where its creamy texture and sweet banana flavor can brighten any occasion. The origins of banana pudding can be traced back to the 19th century, evolving into the beloved dish we know today.
People adore Budget Banana Pudding for its simplicity and the way it combines layers of soft bananas, velvety pudding, and crunchy vanilla wafers. Not only is it a crowd-pleaser, but it’s also incredibly convenient to make, requiring minimal ingredients and effort. Whether you’re looking to impress guests or simply satisfy a sweet tooth, this budget-friendly recipe is sure to become a staple in your kitchen. Dive into the world of deliciousness with this easy-to-follow recipe that promises to deliver happiness in every spoonful!

Ingredients:
- 4 ripe bananas
- 1 box (5.1 oz) instant vanilla pudding mix
- 2 cups cold milk
- 1 cup heavy whipping cream
- 1/2 cup powdered sugar
- 1 teaspoon vanilla extract
- 1 box (12 oz) vanilla wafers
- Optional: additional banana slices and crushed vanilla wafers for garnish
Preparing the Pudding
- In a medium-sized mixing bowl, combine the instant vanilla pudding mix and cold milk. Use a whisk to mix them together until the pudding is smooth and begins to thicken, about 2 minutes.
- Once the pudding is ready, cover the bowl with plastic wrap and place it in the refrigerator to chill for at least 5-10 minutes. This will help it set properly.
Whipping the Cream
- While the pudding is chilling, take a large mixing bowl and pour in the heavy whipping cream.
- Add the powdered sugar and vanilla extract to the bowl with the heavy cream.
- Using an electric mixer, beat the cream mixture on medium-high speed until stiff peaks form. This should take about 3-5 minutes. Be careful not to overbeat, as it can turn into butter.
- Once the cream is whipped, gently fold it into the chilled pudding mixture. Use a spatula to combine them until fully incorporated, being careful not to deflate the whipped cream.
Preparing the Bananas and Vanilla Wafers
- Peel the ripe bananas and slice them into approximately 1/4-inch thick rounds. You will need about 2-3 bananas for layering, depending on their size.
- Open the box of vanilla wafers and set aside a handful for garnishing later. You will use the rest for layering in the pudding.
Assembling the Banana Pudding
- In a large trifle dish or a 9×13 inch baking dish, start by placing a layer of vanilla wafers at the bottom. Make sure to cover the entire base with the wafers.
- Next, add a layer of sliced bananas over the vanilla wafers. Spread them evenly to ensure every bite has banana flavor.
- Pour half of the pudding mixture over the bananas, spreading it evenly with a spatula.
- Repeat the layering process: add another layer of vanilla wafers, followed by another layer of banana slices, and then pour the remaining pudding mixture on top.
- For the final layer, add a last layer of vanilla wafers on top of the pudding. This will create a nice texture and presentation.
Chilling the Pudding
- Cover the assembled banana pudding with plastic wrap or a lid. Make sure it is sealed well to prevent any odors from the refrigerator from affecting the flavor.
- Place the dish in the refrigerator and let it chill for at least 4 hours, or preferably overnight. This allows the flavors to meld and the wafers to soften, creating a creamy texture.
Serving the Banana Pudding
- Once the pudding has chilled and set, remove it from the refrigerator. If you used plastic wrap, carefully peel it off.
- For serving, use a large spoon or spatula to scoop out portions of the banana pudding. Make sure to get some of the layers in each serving for the best flavor experience.
- If desired, garnish each serving with additional banana slices and crushed vanilla wafers for added texture and visual appeal.
- Serve immediately and enjoy your delicious budget banana pudding!
Storage Tips
- If you have any leftovers, cover the banana pudding tightly with plastic wrap or a lid and store it in the refrigerator. It is best consumed within 3-4 days.
- Note that the bananas may brown slightly over time, but the flavor will still be delicious. If you want to prevent browning, you can toss the banana slices in a little lemon juice before layering them in
Conclusion:
In summary, this Budget Banana Pudding recipe is a must-try for anyone looking to indulge in a delicious dessert without breaking the bank. Its creamy texture, delightful banana flavor, and simple ingredients make it a perfect treat for any occasion, whether it’s a family gathering, a potluck, or just a cozy night in. The versatility of this recipe allows you to get creative with serving suggestions; consider adding a layer of crushed graham crackers for added crunch, or drizzling some chocolate sauce on top for a decadent twist. You can also experiment with different types of bananas or even incorporate other fruits like strawberries or blueberries for a refreshing variation. We encourage you to give this Budget Banana Pudding a try and share your experience with friends and family. Whether you stick to the classic recipe or put your own spin on it, we would love to hear how it turns out for you. Don’t forget to snap a picture and share it on social media, tagging us so we can see your delicious creations! This Budget Banana Pudding is not just a dessert; it’s a delightful experience that brings joy and satisfaction to every bite. So gather your ingredients, whip up this delightful treat, and enjoy the sweet moments it brings to your table! Print
Budget Banana Pudding: Delicious and Affordable Dessert Recipe
- Total Time: 260 minutes
- Yield: 8 servings 1x
Description
This creamy Banana Pudding features layers of ripe bananas, fluffy whipped cream, and crunchy vanilla wafers, making it a delightful dessert for any occasion. Easy to prepare and perfect for sharing, it’s sure to be a crowd-pleaser!
Ingredients
- 4 ripe bananas
- 1 box (5.1 oz) instant vanilla pudding mix
- 2 cups cold milk
- 1 cup heavy whipping cream
- 1/2 cup powdered sugar
- 1 teaspoon vanilla extract
- 1 box (12 oz) vanilla wafers
- Optional: additional banana slices and crushed vanilla wafers for garnish
Instructions
- In a medium-sized mixing bowl, combine the instant vanilla pudding mix and cold milk. Whisk until smooth and thickened, about 2 minutes.
- Cover with plastic wrap and refrigerate for 5-10 minutes to set.
- In a large mixing bowl, pour in the heavy whipping cream.
- Add powdered sugar and vanilla extract.
- Beat on medium-high speed until stiff peaks form, about 3-5 minutes. Be careful not to overbeat.
- Gently fold the whipped cream into the chilled pudding mixture until fully combined.
- Peel and slice the bananas into 1/4-inch thick rounds.
- Set aside a handful of vanilla wafers for garnish.
- In a large trifle dish or 9×13 inch baking dish, layer vanilla wafers at the bottom.
- Add a layer of sliced bananas over the wafers.
- Pour half of the pudding mixture over the bananas, spreading evenly.
- Repeat the layering with another layer of vanilla wafers, banana slices, and the remaining pudding mixture.
- Finish with a final layer of vanilla wafers on top.
- Cover the assembled pudding with plastic wrap or a lid.
- Refrigerate for at least 4 hours, preferably overnight, to allow flavors to meld and wafers to soften.
- Remove from the refrigerator and peel off the plastic wrap.
- Scoop out portions, ensuring to include layers in each serving.
- Garnish with additional banana slices and crushed vanilla wafers if desired.
- Serve immediately and enjoy!
Notes
- For best results, consume within 3-4 days. The bananas may brown slightly, but the flavor remains delicious.
- To prevent browning, toss banana slices in a little lemon juice before layering.
- Prep Time: 20 minutes
- Cook Time: 0 minutes


Leave a Comment