
Turkey Pot Pie: the ultimate comfort food reimagined! Are you craving a warm, savory dish that feels like a hug in a bowl? Then look no further. This isn’t just any pot pie; it’s a delicious way to transform leftover Thanksgiving or holiday turkey into a hearty and satisfying meal that the whole family will adore. Forget dry turkey sandwiches this recipe elevates those holiday leftovers to a whole new level of deliciousness.
Pot pies, in general, have a rich history, dating back to ancient Greece. However, the savory pot pie we know and love today gained popularity in medieval England. Traditionally filled with meats and vegetables, they were a staple for both the wealthy and the common folk. Our version, the Turkey Pot Pie, builds upon this tradition, offering a modern twist that’s perfect for using up those post-holiday ingredients.
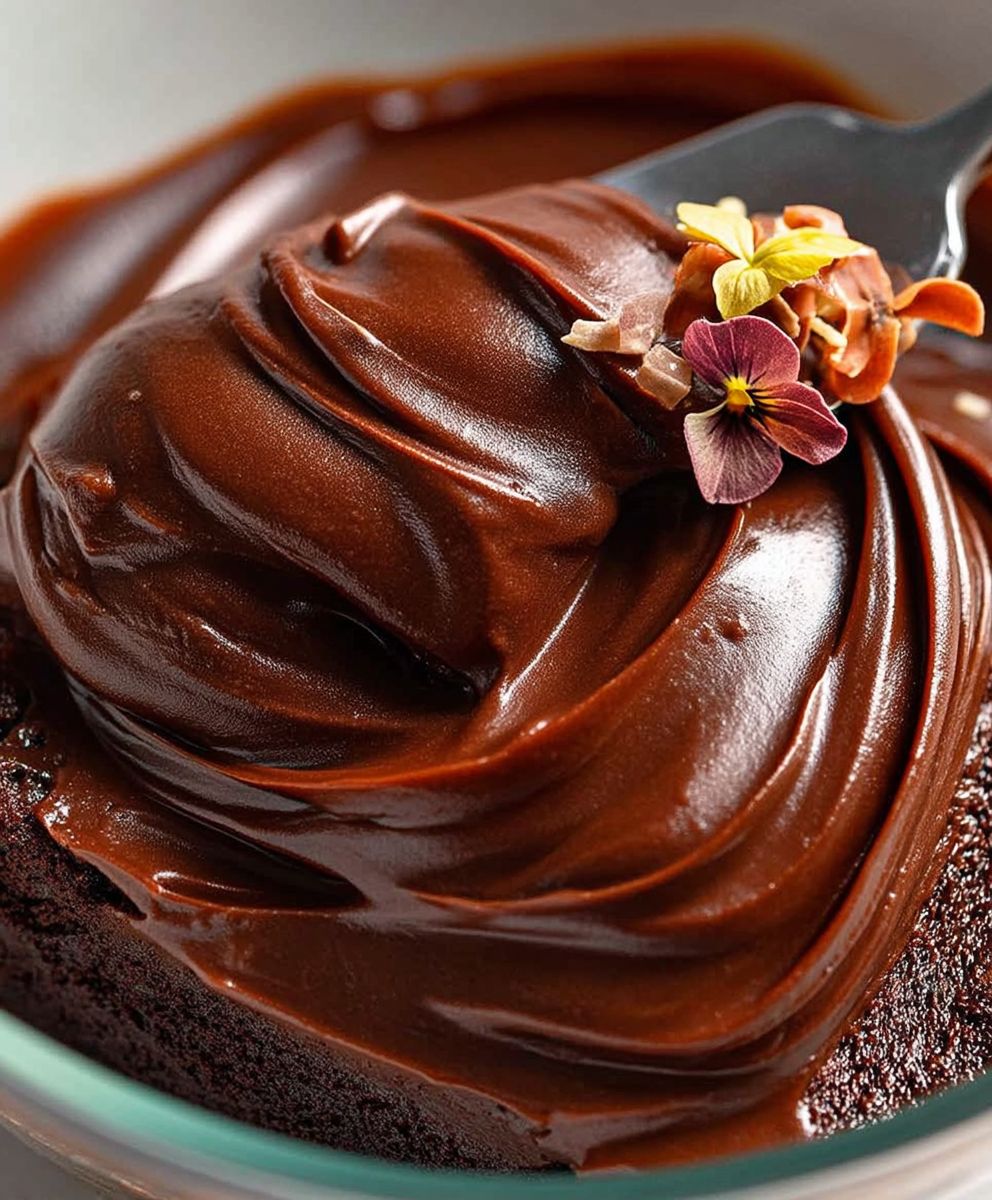
What makes this dish so irresistible? It’s the perfect combination of flaky, golden crust and a creamy, flavorful filling bursting with tender turkey, vegetables, and herbs. The aroma alone is enough to make your mouth water! Plus, it’s incredibly convenient. You can easily prepare the filling ahead of time and assemble the pot pie when you’re ready to bake. Whether you’re looking for a comforting weeknight dinner or a crowd-pleasing dish for a gathering, this Turkey Pot Pie is guaranteed to be a hit. Get ready to experience a symphony of flavors and textures that will leave you wanting more!

Ingredients:
- 1 cup (240ml) heavy cream
- 12 ounces (340g) semi-sweet chocolate, finely chopped
- 2 tablespoons (30g) unsalted butter, softened (optional, for shine)
- 1 teaspoon vanilla extract (optional, for flavor)
- Pinch of sea salt (optional, to enhance flavor)
Preparing the Chocolate:
Before we even think about heating anything, let’s get our chocolate ready. This is crucial! You want to finely chop your chocolate. The smaller the pieces, the faster and more evenly it will melt. I prefer using a serrated knife for this, as it helps to create those nice, even shavings. If you’re using chocolate chips, that’s okay too, but finely chopped chocolate will always give you a smoother, richer ganache.
Why is this so important? Large chunks of chocolate take longer to melt, and you risk overheating the cream while waiting for them to melt. Overheated cream can become grainy, and nobody wants grainy ganache! So, take your time and chop that chocolate finely. You’ll thank me later!
Heating the Cream:
Now, let’s move on to the cream. Pour your heavy cream into a saucepan. I recommend using a medium-sized saucepan it gives the cream enough room to heat evenly without splattering everywhere. Place the saucepan over medium heat. We’re not looking for a rolling boil here; we just want the cream to be hot enough to melt the chocolate. Watch it carefully! You’ll see small bubbles forming around the edges of the pan. That’s your cue to remove it from the heat.
Important: Don’t let the cream boil! Boiling the cream can change its texture and affect the final consistency of your ganache. If you accidentally let it boil, don’t panic! Just let it cool down slightly before proceeding to the next step. But try your best to avoid it in the first place.
Combining Cream and Chocolate:
This is where the magic happens! Pour the hot cream over the finely chopped chocolate in a heatproof bowl. Make sure all the chocolate is submerged in the cream. Now, let it sit undisturbed for about a minute. This allows the heat from the cream to start melting the chocolate. Don’t stir it yet! Patience is key here.
After a minute, gently stir the mixture with a whisk or a spatula. Start from the center and work your way outwards. You’ll notice the chocolate starting to melt and blend with the cream. Continue stirring until the mixture is smooth and glossy. If you have any stubborn chocolate pieces that refuse to melt, you can place the bowl over a double boiler (a saucepan filled with simmering water) or microwave it in 15-second intervals, stirring in between, until everything is melted and smooth. Be very careful not to overheat the chocolate!
Troubleshooting: If your ganache looks grainy or separated, it means the chocolate has seized. Don’t throw it away! You can try to rescue it by adding a tablespoon of hot cream and stirring vigorously. Sometimes, this will bring it back together. If that doesn’t work, you can try adding a teaspoon of boiling water. This might sound counterintuitive, but it can help to re-emulsify the mixture. Stir until smooth.
Adding the Finishing Touches:
Once your ganache is smooth and glossy, it’s time to add the optional ingredients. If you’re using butter, add the softened butter to the ganache and stir until it’s completely melted and incorporated. The butter will add a beautiful shine to the ganache. Next, add the vanilla extract and the pinch of sea salt. These ingredients will enhance the flavor of the chocolate and add a touch of complexity. Stir everything together until well combined.
Cooling and Setting the Ganache:
Now that your ganache is ready, it’s time to let it cool and set. The cooling time will depend on how you plan to use the ganache. If you want to use it as a glaze, you can use it immediately while it’s still warm and pourable. If you want to use it as a frosting or filling, you’ll need to let it cool and thicken.
For a glaze, let the ganache cool slightly at room temperature for about 15-20 minutes before using. This will allow it to thicken slightly so it doesn’t run off your cake or pastries completely.
For a frosting or filling, cover the bowl with plastic wrap, pressing the plastic wrap directly onto the surface of the ganache to prevent a skin from forming. Place the bowl in the refrigerator for at least 1-2 hours, or until the ganache has reached your desired consistency. The longer it chills, the thicker it will become. Check it periodically and stir it to ensure even cooling.
Important: Don’t let the ganache get too cold! If it becomes too firm, it will be difficult to spread. If this happens, you can let it sit at room temperature for a few minutes to soften slightly, or you can gently warm it in the microwave in short bursts, stirring in between, until it reaches the desired consistency.
Using the Ganache:
The possibilities are endless! Here are just a few ideas:
- Glaze: Pour warm ganache over cakes, cupcakes, donuts, or brownies for a beautiful and decadent glaze.
- Frosting: Whip chilled ganache with an electric mixer until light and fluffy for a rich and creamy frosting.
- Filling: Use chilled ganache as a filling for cakes, cupcakes, macarons, or tarts.
- Truffles: Roll chilled ganache into balls and coat them in cocoa powder, chopped nuts, or sprinkles for homemade truffles.
- Dipping Sauce: Serve warm ganache as a dipping sauce for fruit, cookies, or marshmallows.
Step-by-Step Instructions:
- Finely chop the semi-sweet chocolate.
- Pour the heavy cream into a medium saucepan and heat over medium heat until small bubbles form around the edges. Do not boil.
- Remove the saucepan from the heat and pour the hot cream over the chopped chocolate in a heatproof bowl.
- Let the mixture sit undisturbed for 1 minute.
- Gently stir the mixture with a whisk or spatula until smooth and glossy. If necessary, microwave in 15-second intervals, stirring in between, until all the chocolate is melted.
- If using, add the softened butter, vanilla extract, and sea salt. Stir until well combined.
- For a glaze, let the ganache cool slightly at room temperature for 15-20 minutes before using.
- For a frosting or filling, cover the bowl with plastic wrap, pressing the plastic wrap directly onto the surface of the ganache. Refrigerate for at least 1-2 hours, or until the ganache has reached your desired consistency.
- Use the ganache as desired.
Storage Instructions:
Leftover ganache can be stored in an airtight container in the refrigerator for up to a week. To re-warm, microwave in short bursts, stirring in between, until smooth and creamy. You can also freeze ganache for up to 2 months. Thaw it in the refrigerator overnight before using.
Tips and Tricks:
- Use high-quality chocolate for the best flavor.
- Finely chop the chocolate to ensure even melting.
- Don’t let the cream boil.
- Be patient when stirring the ganache. It may take a few minutes for the chocolate to melt completely.
- If the ganache seizes, try adding a tablespoon of hot cream or a teaspoon of boiling water.
- Adjust the ratio of chocolate to cream to achieve your desired consistency. More chocolate will result in a thicker ganache, while more cream will result in a thinner ganache.
- Experiment with different flavors by adding extracts, liqueurs, or spices to the ganache.
Variations:
- Dark Chocolate Ganache: Use dark chocolate instead of semi-sweet chocolate for a richer, more intense flavor.
- Milk Chocolate Ganache: Use milk chocolate instead of semi-sweet chocolate for a sweeter, milder flavor.
- White Chocolate Ganache: Use white chocolate instead of semi-sweet chocolate for a delicate, creamy flavor. Be careful not to overheat white chocolate, as it can burn easily.
- Coffee Ganache: Add 1-2 tablespoons of instant coffee powder to the hot cream for a coffee-flavored ganache.
- Peppermint Ganache: Add 1/4 teaspoon of peppermint extract to the ganache for
Conclusion:
So, there you have it! This chocolate ganache recipe isn’t just another dessert component; it’s a gateway to a world of decadent possibilities. I truly believe that once you experience the rich, velvety texture and intense chocolate flavor, you’ll understand why I consider it an absolute must-try. It’s simple enough for a weeknight treat, yet elegant enough to impress at your next dinner party.
But why stop there? The beauty of this ganache lies in its versatility. For a classic pairing, try serving it warm over vanilla ice cream or alongside a slice of freshly baked pound cake. Imagine the contrast of the cold ice cream melting into the warm, luscious ganache pure bliss! Or, for a more sophisticated dessert, use it as a glaze for a chocolate cake or as a filling for homemade truffles. The possibilities are truly endless.
If you’re feeling adventurous, consider these variations: Infuse the cream with a hint of espresso for a mocha ganache that will awaken your senses. Add a pinch of sea salt to enhance the sweetness and create a delightful salty-sweet flavor profile. For a festive touch, stir in a tablespoon of your favorite liqueur, such as Grand Marnier or Frangelico. And for those who prefer a lighter option, you can substitute some of the heavy cream with milk, although be aware that this will result in a slightly less rich ganache.
Another fantastic way to enjoy this chocolate ganache is as a dip for fresh fruit. Strawberries, raspberries, and even apple slices are transformed into elegant appetizers or desserts when paired with this decadent treat. You can even create a chocolate fondue experience by setting out a bowl of warm ganache with an assortment of dippers for your guests to enjoy. Think marshmallows, pretzels, and even chunks of brownie the options are limited only by your imagination!
I’ve poured my heart into perfecting this recipe, and I’m confident that you’ll love it as much as I do. It’s more than just a recipe; it’s an experience. It’s the feeling of warmth and comfort that comes from indulging in a truly delicious treat. It’s the satisfaction of creating something beautiful and sharing it with the people you love.
So, what are you waiting for? Gather your ingredients, put on your favorite music, and get ready to embark on a chocolate adventure. I promise you won’t regret it. And when you do try it, please, please share your experience with me! I’d love to hear how you used it, what variations you tried, and what your loved ones thought. Tag me in your photos on social media, or leave a comment below. I can’t wait to see what you create!
Ultimately, this chocolate ganache is more than just a recipe; it’s an invitation to indulge, to experiment, and to create memories. It’s a reminder that sometimes, the simplest things in life are the most satisfying. So go ahead, treat yourself. You deserve it!
Chocolate Ganache: The Ultimate Guide to Making Perfect Ganache
A simple, two-ingredient recipe for rich and decadent chocolate ganache. Perfect for frosting cakes, filling pastries, or making truffles.
Ingredients
- 225g heavy cream
- 225g bittersweet chocolate, finely chopped
- 2 tablespoons unsalted butter, softened
Instructions
- Place chocolate in a heatproof bowl.
- Heat cream in a saucepan until simmering.
- Pour hot cream over chocolate.
- Let stand for 1 minute.
- Stir until smooth.
- Let cool slightly before using.
Notes
“`html- For a richer ganache, use heavy cream instead of milk.
- If the ganache appears grainy, add a tablespoon of warm milk and stir until smooth.
- Ganache can be stored in the refrigerator for up to a week.
“`

Leave a Comment