
Scottish shortbread cookies: just the name conjures up images of cozy fireplaces, tartan blankets, and the comforting aroma of butter and sugar baking in the oven. Have you ever bitten into a cookie so tender, so crumbly, that it practically melts in your mouth? That’s the magic of authentic Scottish shortbread, and I’m thrilled to share my foolproof recipe with you!
These aren’t just any cookies; they’re a piece of Scottish history. Shortbread’s origins can be traced back to medieval Scotland, evolving from “biscuit bread,” a leftover bread dough sweetened and baked into a rusk. Over centuries, butter replaced yeast, transforming it into the rich, decadent treat we know and love today. Traditionally associated with celebrations like Christmas and Hogmanay (New Year’s Eve), shortbread was often given as a gift, symbolizing good fortune and prosperity.
So, what makes Scottish shortbread cookies so irresistible? It’s the simplicity of the ingredients butter, sugar, and flour combined in perfect harmony. The high butter content creates that signature melt-in-your-mouth texture, while the gentle sweetness satisfies without being overpowering. Plus, they’re incredibly easy to make! With just a few pantry staples and a little patience, you can create a batch of these delightful cookies that are perfect for enjoying with a cup of tea, gifting to loved ones, or simply indulging in a moment of pure bliss. Let’s get baking!

Ingredients:
- For the Crust:
- 1 ½ cups all-purpose flour
- ½ cup (1 stick) unsalted butter, cold and cubed
- ½ cup packed light brown sugar
- ¼ teaspoon salt
- 2 tablespoons ice water, plus more if needed
- For the Peanut Butter Filling:
- 1 cup (2 sticks) unsalted butter, softened
- 1 cup creamy peanut butter
- 3 cups powdered sugar
- ¼ cup heavy cream
- 1 teaspoon vanilla extract
- ¼ teaspoon salt
- For the Chocolate Ganache Topping:
- 12 ounces semi-sweet chocolate chips
- ¾ cup heavy cream
- 1 tablespoon unsalted butter
- Optional Garnish:
- Coarsely chopped peanuts
- Sea salt flakes
Preparing the Crust:
- Combine Dry Ingredients: In a large bowl, whisk together the flour, brown sugar, and salt. This ensures the salt and sugar are evenly distributed throughout the flour, which is crucial for a consistent crust.
- Cut in the Butter: Add the cold, cubed butter to the flour mixture. Using a pastry blender or your fingertips, cut the butter into the flour until the mixture resembles coarse crumbs. The key here is to work quickly so the butter doesn’t melt. Small pieces of butter create flaky layers in the crust.
- Add Ice Water: Gradually add the ice water, one tablespoon at a time, mixing gently after each addition. The amount of water needed can vary depending on the humidity. You want the dough to just come together when pressed. Be careful not to overmix, as this can develop the gluten in the flour and result in a tough crust.
- Form the Dough: Gently gather the dough into a ball. If it’s too dry and crumbly, add a tiny bit more ice water, a teaspoon at a time. Flatten the dough into a disc, wrap it in plastic wrap, and refrigerate for at least 30 minutes. This chilling time allows the gluten to relax and the butter to firm up, which will prevent the crust from shrinking during baking.
- Preheat and Prepare Pan: Preheat your oven to 350°F (175°C). Grease and flour a 9×13 inch baking pan. Alternatively, you can line the pan with parchment paper, leaving an overhang on the sides for easy removal of the bars later.
- Roll Out the Dough: On a lightly floured surface, roll out the chilled dough to fit the bottom of the prepared pan. If the dough is sticking, add a little more flour to the surface.
- Transfer to Pan: Carefully transfer the rolled-out dough to the prepared pan. Gently press the dough into the bottom and up the sides of the pan.
- Dock the Crust: Use a fork to prick the bottom of the crust all over. This prevents the crust from puffing up during baking.
- Bake the Crust: Bake for 18-22 minutes, or until the crust is lightly golden brown. Keep a close eye on it, as baking times can vary depending on your oven.
- Cool Completely: Remove the crust from the oven and let it cool completely in the pan before adding the peanut butter filling. This is important because if the crust is still warm, the peanut butter filling will melt.
Making the Peanut Butter Filling:
- Cream Butter and Peanut Butter: In a large bowl, cream together the softened butter and peanut butter until smooth and fluffy. Use an electric mixer (stand mixer or hand mixer) for best results. Make sure the butter is truly softened, but not melted, for the best texture.
- Add Powdered Sugar: Gradually add the powdered sugar, one cup at a time, mixing on low speed after each addition. Mixing on low speed prevents the powdered sugar from creating a cloud of dust.
- Add Heavy Cream, Vanilla, and Salt: Add the heavy cream, vanilla extract, and salt. Mix until smooth and creamy. The heavy cream adds moisture and richness to the filling, while the vanilla extract enhances the flavor. The salt balances the sweetness.
- Spread Filling Over Crust: Spread the peanut butter filling evenly over the cooled crust. Use an offset spatula or the back of a spoon to create a smooth, even layer.
- Chill: Place the pan in the refrigerator for at least 30 minutes to allow the peanut butter filling to firm up. This will make it easier to spread the chocolate ganache on top.
Preparing the Chocolate Ganache:
- Combine Chocolate and Cream: Place the chocolate chips in a heat-proof bowl. In a saucepan, heat the heavy cream over medium heat until it just begins to simmer. Do not boil the cream.
- Pour Cream Over Chocolate: Pour the hot cream over the chocolate chips. Let it sit for about a minute to allow the heat to melt the chocolate.
- Stir Until Smooth: Gently stir the mixture until the chocolate is completely melted and the ganache is smooth and glossy. If there are any stubborn chocolate pieces, you can microwave the mixture in 15-second intervals, stirring after each interval, until smooth.
- Add Butter: Stir in the butter until it is melted and incorporated into the ganache. The butter adds shine and richness to the ganache.
- Pour Over Peanut Butter Filling: Pour the chocolate ganache over the chilled peanut butter filling. Spread it evenly using an offset spatula or the back of a spoon.
Final Touches and Serving:
- Garnish (Optional): If desired, sprinkle the top of the chocolate ganache with coarsely chopped peanuts and sea salt flakes. The peanuts add a nice crunch, and the sea salt enhances the sweetness of the chocolate and peanut butter.
- Chill Completely: Refrigerate the bars for at least 2 hours, or preferably overnight, to allow the ganache to set completely. This will make them easier to cut and serve.
- Cut and Serve: Once the bars are completely chilled, use a sharp knife to cut them into squares or rectangles. For clean cuts, you can run the knife under hot water and wipe it dry between each cut.
- Storage: Store the chocolate peanut butter bars in an airtight container in the refrigerator for up to 5 days.
Conclusion:
And there you have it! These Chocolate Peanut Butter Bars are truly a must-try for anyone who loves the classic combination of chocolate and peanut butter. They’re rich, decadent, and surprisingly easy to make, making them the perfect treat for a weeknight dessert or a special occasion. I know I’ll be making them again and again!
But why are these bars so special? First, the texture is incredible. The peanut butter layer is smooth and creamy, providing a delightful contrast to the slightly chewy, fudgy chocolate topping. Second, the flavor is simply irresistible. The salty peanut butter perfectly complements the sweetness of the chocolate, creating a harmonious balance that will leave you wanting more. And third, they’re incredibly versatile. You can easily customize them to your liking with different toppings or variations.
Speaking of variations, let’s talk about some serving suggestions and ways to make these bars your own. For a truly decadent experience, try serving them with a scoop of vanilla ice cream and a drizzle of hot fudge sauce. Or, if you’re looking for something a little lighter, enjoy them with a glass of cold milk or a cup of hot coffee.
If you’re feeling adventurous, you can also experiment with different toppings. Consider adding chopped peanuts, pretzels, or even a sprinkle of sea salt to the chocolate layer for added texture and flavor. You could also swirl in some caramel sauce or Nutella for an extra layer of indulgence. For a festive touch, try adding sprinkles or chopped candy canes during the holidays.
Another fun variation is to use different types of chocolate. Dark chocolate will create a richer, more intense flavor, while milk chocolate will result in a sweeter, more classic taste. You could even use white chocolate for a completely different twist.
And don’t forget about the peanut butter! While creamy peanut butter is the traditional choice, you can also use chunky peanut butter for added texture. Or, if you’re feeling really adventurous, try using a different nut butter altogether, such as almond butter or cashew butter.
No matter how you choose to make them, I’m confident that you’ll love these Chocolate Peanut Butter Bars. They’re the perfect treat for satisfying your sweet tooth and sharing with friends and family.
So, what are you waiting for? Grab your ingredients and get baking! I promise you won’t regret it. And when you do, please, please, please come back and let me know how they turned out. I’d love to hear about your experience and any variations you tried. Did you add any special toppings? Did you use a different type of chocolate or nut butter? I’m always looking for new and exciting ways to make these bars even better.
Don’t be shy! Share your photos and comments on social media using [Your Hashtag] so we can all see your creations. I can’t wait to see what you come up with! Happy baking, and enjoy every delicious bite of these incredible Chocolate Peanut Butter Bars! I hope this recipe becomes a staple in your kitchen, just like it has in mine.
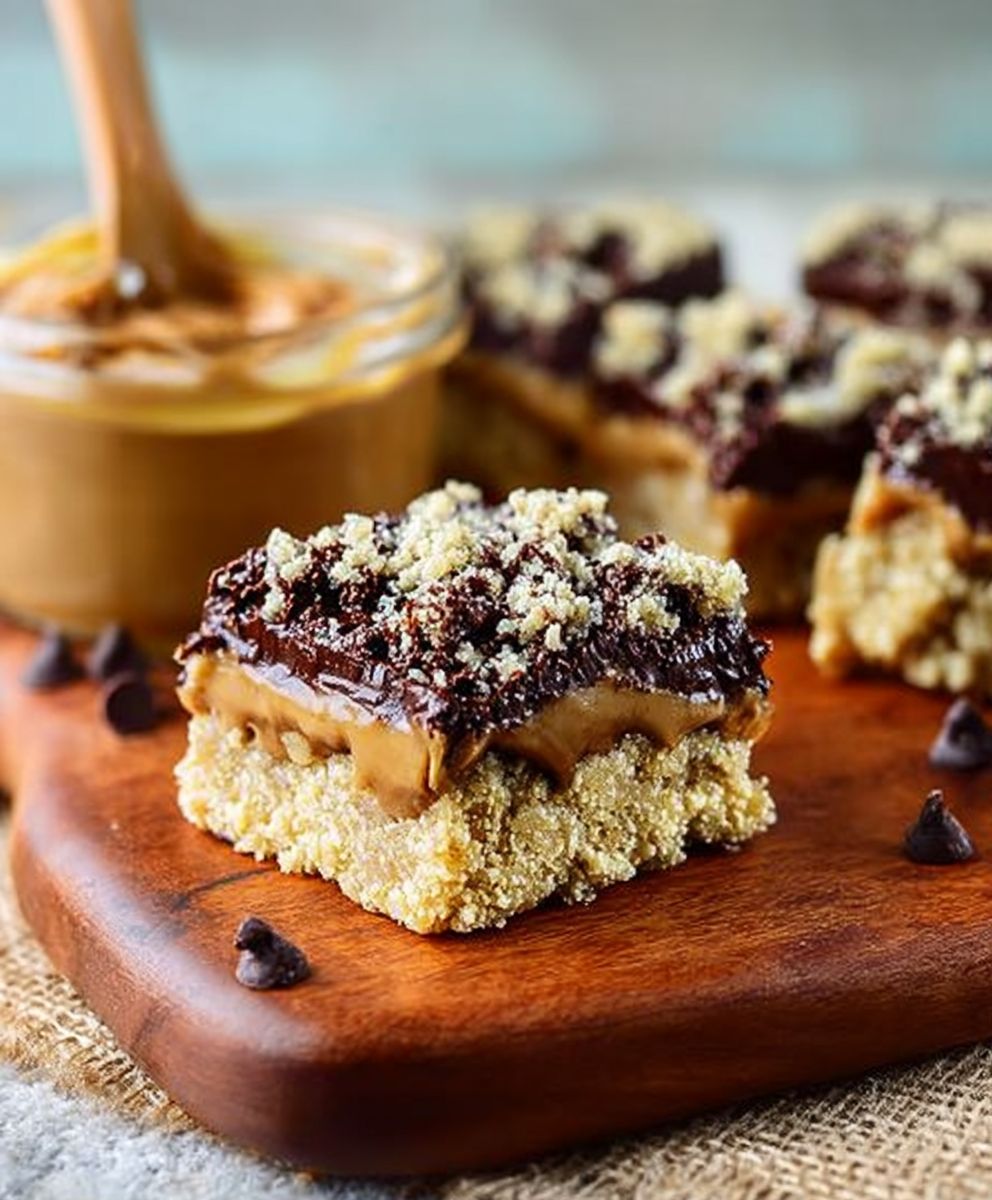
Chocolate Peanut Butter Bars: The Ultimate Recipe Guide
Layers of rich chocolate and creamy peanut butter create a decadent, no-bake treat. Perfect for satisfying sweet cravings!
Ingredients
- 1 cup (2 sticks) unsalted butter, softened
- 1 cup granulated sugar
- 1 cup packed brown sugar
- 2 teaspoons vanilla extract
- 2 large eggs
- 2 1/2 cups all-purpose flour
- 1 teaspoon baking soda
- 1 teaspoon salt
- 1 1/2 cups creamy peanut butter
- 1 1/2 cups chocolate chips
Instructions
- Preheat oven to 350 degrees F (175 degrees C). Grease a 9×13 inch baking pan.
- In a large bowl, cream together the butter, peanut butter, and brown sugar until smooth. Beat in the eggs one at a time, then stir in the vanilla. Dissolve baking soda in hot water; add to batter along with the salt. Stir in the oats and chocolate chips. Spread evenly into the prepared pan.
- Bake for 25 to 30 minutes, or until edges are nicely browned. Let cool in the pan before cutting into bars.
“`
Notes
- For best results, use a high-quality chocolate with a cocoa content of at least 70%.
- If you don’t have peanut butter chips, you can use chopped peanuts or other nuts.
- These bars can be stored in an airtight container at room temperature for up to 3 days or in the refrigerator for up to a week.
“`


Leave a Comment