
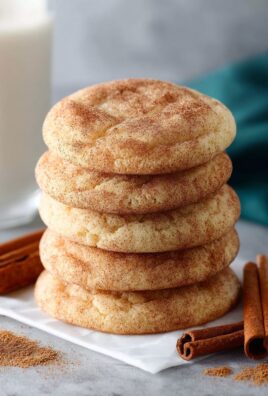
Gingerbread crinkle cookies, those spiced, chewy delights, are about to become your new holiday obsession! Imagine biting into a soft, warmly spiced cookie, the edges perfectly crisp and the center boasting a delightful chewiness, all coated in a snowy blanket of powdered sugar. Are you drooling yet? I know I am!
Gingerbread itself has a rich history, dating back to ancient Greece and Egypt, where it was used for ceremonial purposes. Over time, it evolved into the sweet treat we know and love, particularly popular during the Christmas season. While the exact origins of the crinkle cookie are a bit more modern, the combination of gingerbread spice and that signature crackled appearance makes these gingerbread crinkle cookies a truly irresistible treat.
What makes these cookies so beloved? It’s the perfect balance of flavors and textures. The warm spices like ginger, cinnamon, and cloves create a cozy, comforting taste, while the soft, chewy interior contrasts beautifully with the slightly crisp edges. Plus, the powdered sugar coating adds a touch of sweetness and that beautiful, festive look. They’re also surprisingly easy to make, making them perfect for baking with family and friends. Get ready to fill your kitchen with the intoxicating aroma of gingerbread and create memories that will last a lifetime!

Ingredients:
- For the Crust:
- 1 ½ cups graham cracker crumbs
- 5 tablespoons unsalted butter, melted
- ¼ cup granulated sugar
- Pinch of salt
- For the Cheesecake Filling:
- 24 ounces cream cheese, softened to room temperature
- 1 cup granulated sugar
- 2 large eggs
- ½ cup sour cream
- 2 teaspoons vanilla extract
- Zest of 1 lemon (optional, but highly recommended!)
- For the Easter Decorations:
- Assorted pastel-colored sprinkles
- Mini chocolate eggs
- Whipped cream (optional)
- Candy carrots (optional)
- Edible Easter grass (optional)
Preparing the Graham Cracker Crust:
Okay, let’s get started with the foundation of our mini cheesecakes the graham cracker crust! This part is super easy and sets the stage for the creamy goodness to come.
- Combine the Dry Ingredients: In a medium-sized bowl, whisk together the graham cracker crumbs, granulated sugar, and a pinch of salt. Make sure everything is evenly distributed. This ensures a consistent flavor and texture throughout the crust.
- Add the Melted Butter: Pour the melted butter into the bowl with the dry ingredients. Use a fork or your fingers to mix everything together until the crumbs are evenly moistened. The mixture should resemble wet sand. If it seems too dry, you can add a tiny bit more melted butter, a teaspoon at a time, until it reaches the right consistency.
- Press into Muffin Liners: Line a 24-cup mini muffin tin with paper liners. This makes it easy to remove the cheesecakes later. Spoon about 1 tablespoon of the graham cracker mixture into each liner. Use the bottom of a measuring cup or your fingers to firmly press the crumbs into an even layer at the bottom of each liner. The firmer you press, the better the crust will hold together.
- Pre-bake the Crust: Place the muffin tin in a preheated oven at 350°F (175°C) and bake for 5-7 minutes. This helps the crust set and prevents it from becoming soggy. Keep a close eye on them you want them to be lightly golden brown, but not burnt.
- Cool the Crust: Remove the muffin tin from the oven and let the crusts cool completely while you prepare the cheesecake filling. This is important because adding the warm filling to a hot crust can cause it to become soggy.
Making the Cheesecake Filling:
Now for the star of the show the creamy, dreamy cheesecake filling! This is where the magic happens, so let’s make sure we get it just right.
- Cream the Cream Cheese: In a large bowl (or the bowl of a stand mixer), beat the softened cream cheese with an electric mixer on medium speed until smooth and creamy. This is crucial! Make sure there are no lumps. If your cream cheese isn’t soft enough, it will be difficult to get a smooth consistency. You can let it sit at room temperature for an hour or two, or microwave it in 15-second intervals until softened (but not melted!).
- Add the Sugar: Gradually add the granulated sugar to the creamed cheese, beating on medium speed until well combined. Scrape down the sides of the bowl as needed to ensure everything is evenly mixed.
- Incorporate the Eggs: Add the eggs one at a time, beating well after each addition. Be careful not to overmix at this stage, as overmixing can incorporate too much air into the batter, which can cause the cheesecakes to crack during baking.
- Add Sour Cream and Vanilla: Stir in the sour cream and vanilla extract until just combined. Again, avoid overmixing. The sour cream adds a lovely tang and helps to keep the cheesecakes moist.
- Add Lemon Zest (Optional): If you’re using lemon zest, now’s the time to add it! Stir it in gently until it’s evenly distributed throughout the batter. The lemon zest adds a bright, fresh flavor that complements the richness of the cheesecake perfectly.
Baking the Mini Cheesecakes:
Almost there! Now it’s time to bake these little beauties and watch them transform into golden, creamy perfection.
- Fill the Muffin Liners: Carefully spoon the cheesecake filling into the muffin liners, filling each one almost to the top. Try to keep the filling level in each liner for even baking.
- Bake the Cheesecakes: Place the muffin tin back in the preheated oven at 350°F (175°C) and bake for 18-22 minutes, or until the edges are set and the centers are just slightly jiggly. The cheesecakes should be lightly golden brown around the edges.
- Cool in the Oven: Turn off the oven and crack the oven door slightly. Let the cheesecakes cool in the oven for about 30 minutes. This helps prevent them from cracking as they cool.
- Chill in the Refrigerator: Remove the muffin tin from the oven and let the cheesecakes cool completely at room temperature. Then, transfer them to the refrigerator and chill for at least 2 hours, or preferably overnight. This allows the cheesecakes to set completely and develop their full flavor.
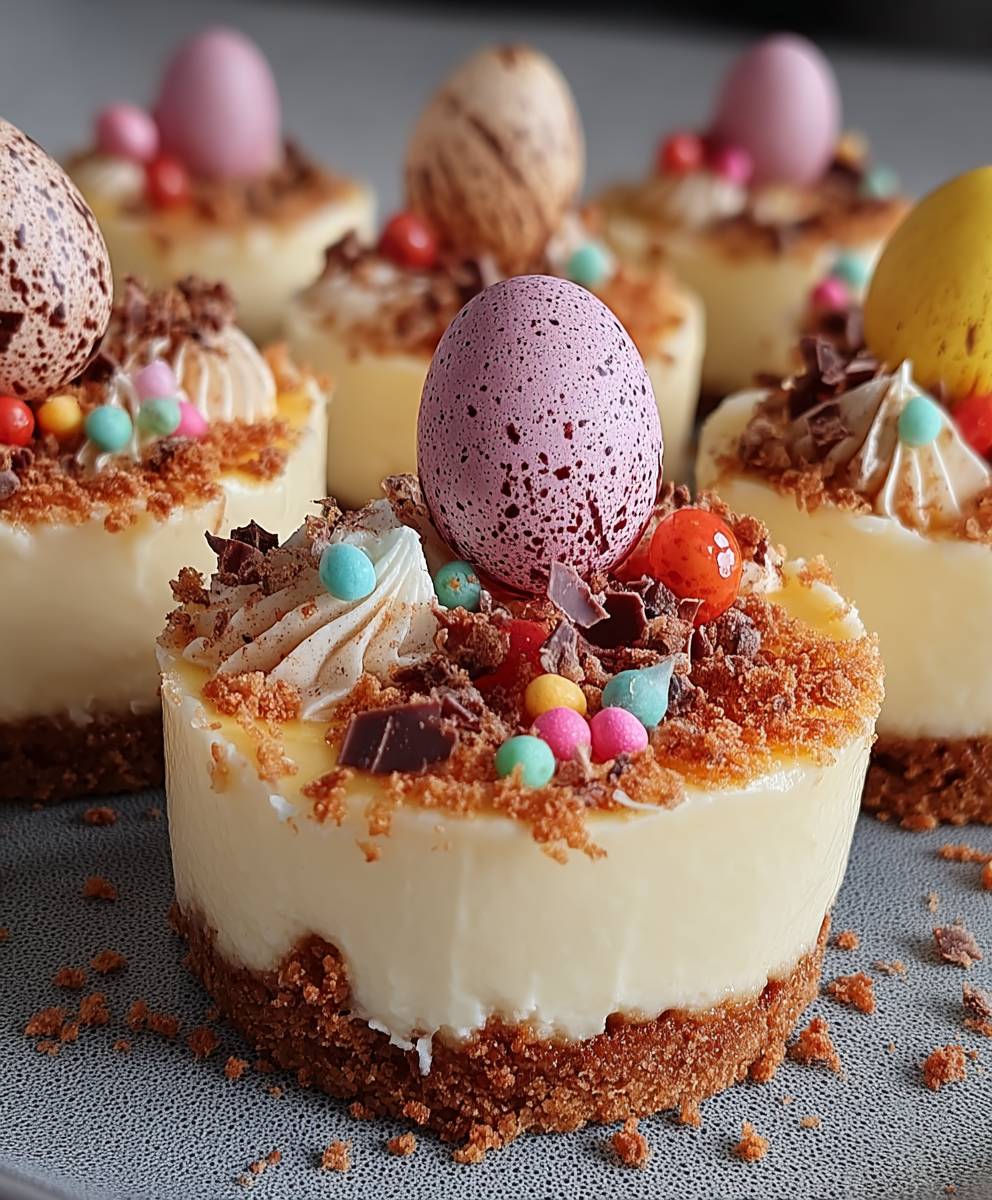
Decorating for Easter:
The fun part! Now we get to transform these mini cheesecakes into adorable Easter treats. Get creative and let your imagination run wild!
- Remove from Muffin Liners: Gently remove the cheesecakes from the muffin liners. They should come out easily if they’re properly chilled.
- Add Whipped Cream (Optional): If you’re using whipped cream, pipe a dollop of whipped cream on top of each cheesecake. This adds a touch of elegance and extra sweetness.
- Sprinkle with Sprinkles: Generously sprinkle the cheesecakes with pastel-colored sprinkles. Use a variety of shapes and sizes for a festive look.
- Add Mini Chocolate Eggs: Place a few mini chocolate eggs on top of each cheesecake. You can arrange them in a neat row or scatter them randomly for a more whimsical look.
- Add Candy Carrots (Optional): If you’re using candy carrots, place one on top of each cheesecake for an extra touch of Easter charm.
- Add Edible Easter Grass (Optional): For a truly festive presentation, sprinkle a little edible Easter grass around the base of each cheesecake.
And there you have it! Adorable and delicious Easter mini cheesecakes that are sure to be a hit with everyone. Enjoy!
Conclusion:
And there you have it! These Easter mini cheesecakes are truly a must-try this holiday season. They’re the perfect blend of creamy, tangy, and sweet, all wrapped up in an adorable, bite-sized package. Forget complicated desserts that take all day; these little beauties are surprisingly simple to make, and the results are absolutely stunning. I promise, they’ll be the star of your Easter brunch or dessert table.
But why are they so special? Well, beyond the delightful flavor profile, these mini cheesecakes offer a level of customization that’s hard to beat. The graham cracker crust provides a comforting, familiar base, while the cheesecake filling itself is a blank canvas for your creativity. You can easily adapt the recipe to suit your preferences and dietary needs. Want a richer, more decadent cheesecake? Use full-fat cream cheese. Looking for a lighter option? Try using Neufchâtel cheese. The possibilities are endless!
And let’s not forget the decorations! That’s where the real Easter magic happens. I’ve suggested pastel sprinkles and mini chocolate eggs, but feel free to get creative with your toppings. Consider adding fresh berries like raspberries or blueberries for a burst of fruity flavor and vibrant color. You could also drizzle melted white chocolate over the top and create intricate designs with a toothpick. Or, if you’re feeling adventurous, try making a homemade lemon curd to swirl into the cheesecake filling before baking. The slight tartness of the lemon will perfectly complement the sweetness of the cheesecake.
Serving suggestions? These Easter mini cheesecakes are fantastic on their own, but they also pair beautifully with a variety of accompaniments. A dollop of whipped cream or a scoop of vanilla ice cream would be a welcome addition. You could also serve them with a side of fresh fruit salad or a glass of chilled sparkling wine. For a truly indulgent experience, try pairing them with a rich, dark coffee or a creamy hot chocolate.
Beyond Easter, these mini cheesecakes are perfect for any occasion. They’re a great option for birthday parties, baby showers, or even just a casual weeknight dessert. You can easily adapt the decorations to suit the theme of your event. For example, for a birthday party, you could use colorful sprinkles and edible glitter. For a baby shower, you could use pastel-colored candies and miniature baby-themed decorations.
I truly believe that everyone should experience the joy of making and enjoying these Easter mini cheesecakes. They’re a delightful treat that’s sure to bring a smile to your face. So, what are you waiting for? Gather your ingredients, preheat your oven, and get ready to create some Easter magic!
I’m so excited for you to try this recipe and see for yourself just how delicious and easy it is. And most importantly, I want to hear about your experience! Did you make any variations? What were your favorite toppings? Did you have any challenges along the way? Please, share your thoughts and photos in the comments below. I can’t wait to see your creations and hear your feedback. Happy baking, and Happy Easter! Let’s make this Easter unforgettable with these delightful Easter mini cheesecakes!
Easter Mini Cheesecake: Delicious & Easy Recipe
Creamy mini cheesecakes with a festive Easter twist, perfect for individual servings and easy to customize with your favorite toppings.
Ingredients
- 225g digestive biscuits
- 75g butter, melted
- 600g full-fat soft cheese
- 150g golden caster sugar
- 3 large eggs
- 1 tsp vanilla extract
- ½ lemon, zested
- 150ml soured cream
- chocolate mini eggs, to decorate
Instructions
- Preheat oven to 325 degrees F (160 degrees C).
- Line a 12-cup muffin tin with paper liners.
- In a large bowl, beat cream cheese and sugar until smooth.
- Beat in eggs one at a time, then stir in vanilla extract.
- In a separate bowl, combine graham cracker crumbs and melted butter.
- Press crumb mixture into the bottom of each muffin liner.
- Pour cream cheese mixture over the crusts, filling each liner about 3/4 full.
- Bake for 20-25 minutes, or until the edges are set and the centers are slightly jiggly.
- Let cool completely in the muffin tin before refrigerating for at least 2 hours.
- Garnish with your favorite toppings before serving.
Notes
- The dough should not be moved during the resting period.
- More cloves can be used for a more intense garlic flavor.
“`
Leave a Comment