
Easter Rice Krispie Treats are more than just a nostalgic childhood favorite; they’re a springtime celebration in every bite! Imagin extracte the crunch of crispy rice cereal, the gooey embrace of melted marshmallows, and the sweet, buttery goodness that just melts in your mouth. It’s no wonder these iconic squares are a go-to for so many of us. Their unparalleled simplicity makes them accessible to bakers of all skill levels, and the endless possibilities for decoration truly set these Easter Rice Krispie Treats apart. This year, we’re taking our classic recipe and giving it a delightful Easter makeover, transforming them into edible works of art perfect for your festive brunch, Easter egg hunts, or simply as a sweet treat to brighten your day.
Get Ready for an Unforgettable Sweet!
Your New Favorite Easter Dessert Awaits!

Easter Rice Krispie Treats
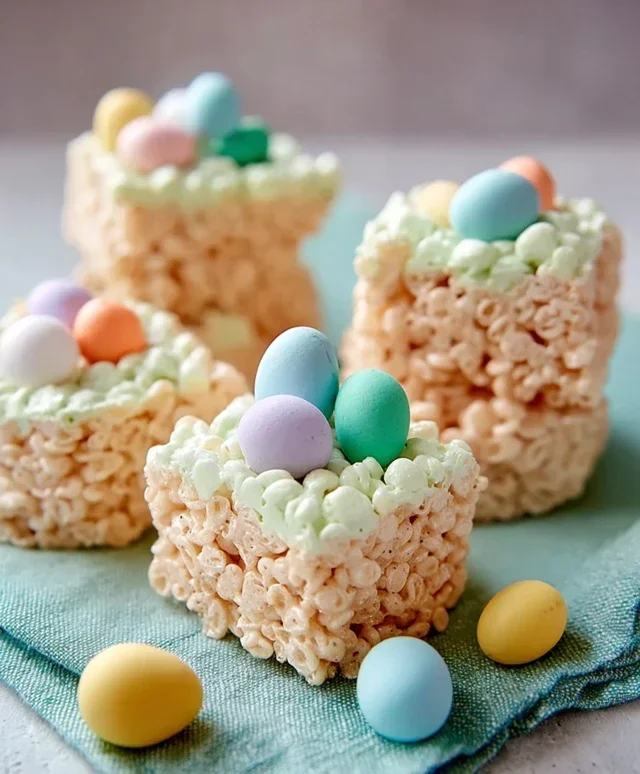
Easter is a time for joyous celebrations, and what better way to bring a smile to everyone’s faces than with a batch of delightfully festive Rice Krispie Treats? These classic treats are incredibly easy to make, and with a few simple additions, they transform into a cheerful Easter masterpiece. We’re going to infuse ours with a vibrant green hue and speckle them with colorful Easter egg candies for a truly celebratory finish. They’re perfect for a springtime brunch, a fun activity with the kids, or simply as a sweet treat to enjoy during the holiday. Get ready to create some edible sunshine!
Ingredients:
Instructions:
First, we need to prepare our marshmallow mixture. In a large, microwave-safe bowl, combine the 16 ounces of marshmallows and 2 tablespoons of unsalted butter. Microwave on high in 30-second intervals, stirring between each interval, until the marshmallows are completely melted and smooth. This usually takes about 2 to 3 minutes in total, depending on your microwave’s power. Be careful not to overheat them, as this can make them tough. Once melted, stir in the vanilla extract until well combined.
Now it’s time to incorporate the “krispies”! In a separate very large bowl, pour the 7 cups of Rice Krispies cereal. It’s important to use a generous amount of cereal to ensure you get that perfect texture. Pour the melted marshmallow mixture over the cereal. Using a sturdy spatula or wooden spoon, gently but thoroughly mix until every single piece of cereal is coated in the gooey marshmallow. Work quickly, as the marshmallow mixture will start to set as it cools. You want to ensure even distribution for the best results.
Next, we’ll achieve our festive Easter green! Grease a 9×13 inch baking pan or line it with parchment paper, leaving some overhang to help with lifting the treats out later. Now, we need to make our delicious buttercream frosting to bind everything together and give our treats a smooth, colorful surface. In a medium bowl, cream together the ½ cup of softened unsalted butter with the powdered sugar. Start with 3 cups of powdered sugar and gradually add more until you reach a thick but spreadable consistency. Then, gradually mix in the ¼ cup of milk and the green food coloring, a few drops at a time, until you achieve your desired Easter green shade. Stir in the vanilla extract. You might need to adjust the amount of powdered sugar or milk slightly to get the perfect frosting texture. It should be thick enough to hold its shape but smooth enough to spread easily.
Now for the assembly! Take about half of the Rice Krispie mixture and press it evenly into the bottom of your prepared baking pan. This will form the base layer of your treats. Don’t press too hard, or they can become dense and difficult to cut. Just a gentle, even press is perfect. Spread a generous layer of the green buttercream frosting over this base layer, smoothing it out with an offset spatula or the back of a spoon. Then, crum extractble or break up the remaining Rice Krispie mixture and sprinkle it over the frosting. You want some larger pieces and some smaller crum extractbs for an interesting texture. Gently press this top layer down very lightly.
The final festive touch! Sprinkle your Easter egg candies generously over the top of the Rice Krispie mixture while the frosting is still slightly soft. This will help them adhere nicely. You can arrange them in patterns, create a scattered look, or let the kids go wild with their own designs. Allow the treats to set for at least 30 minutes at room temperature, or pop them into the refrigerator for about 15-20 minutes if you’re in a hurry to speed up the setting process. Once set, use the parchment paper overhang to lift the entire slab out of the pan. Place it on a cutting board and cut into squares or fun Easter shapes using a sharp knife. For cleaner cuts, you can dip your knife in hot water and wipe it dry between cuts. Store these delightful Easter Rice Krispie Treats in an airtight container at room temperature for up to 3 days. Enjoy the smiles they bring!
Conclusion:
And there you have it – our delightful Easter Rice Krispie Treats recipe! This recipe is truly a winner because it’s incredibly simple, requiring just a few pantry staples and minimal effort, making it perfect for last-minute festive treats or a fun baking activity with kids. The satisfying crunch of the cereal combined with the gooey sweetness of marshmallows creates a nostalgic and universally loved confection. These treats are not only delicious but also incredibly versatile. Serve them as is for a classic treat, or get creative with decorations!
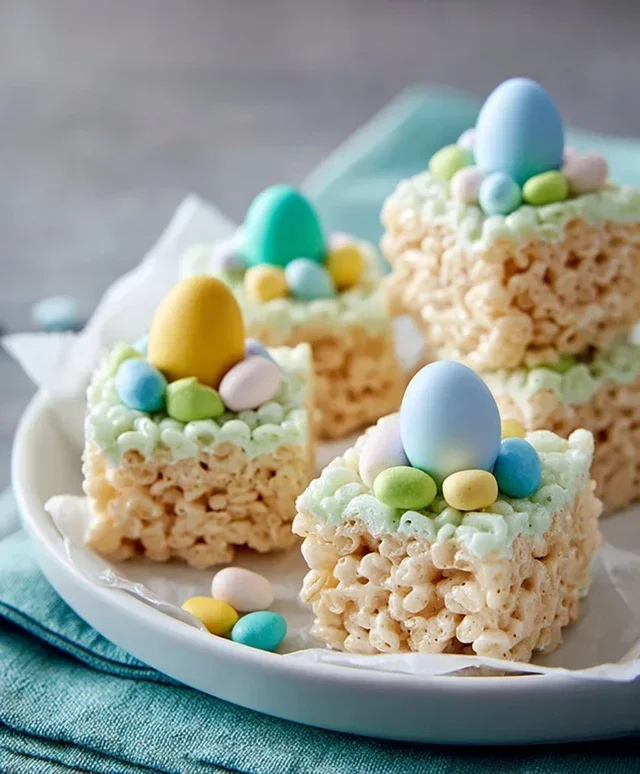
For serving suggestions, these Easter Rice Krispie Treats are fantastic on their own, arranged on a festive platter for an Easter brunch or dessert table. They also make charming homemade gifts, wrapped individually in cellophane or presented in decorative Easter tins. When it comes to variations, the possibilities are endless! You can incorporate pastel-colored food coloring into the melted marshmallows for a vibrant Easter pnon-alcoholic alette, or add sprinkles, mini chocolate eggs, or even a drizzle of white chocolate for an extra touch of indulgence. Don’t be afraid to experiment with different extracts like vanilla or almond for subtle flavor enhancements.
I genuinely encourage you to try this recipe. It’s a foolproof way to add a homemade touch to your Easter celebrations and guaranteed to bring smiles to everyone’s faces. Happy baking!
Frequently Asked Questions:
Can I make these treats ahead of time?
Absolutely! These Easter Rice Krispie Treats can be made up to 2 days in advance. Store them in an airtight container at room temperature to maintain their freshness. For longer storage, you can wrap them tightly in plastic wrap and then aluminum foil.
How can I make them more Easter-themed?
Beyond adding pastel food coloring and sprinkles, you can cut the treats into fun Easter shapes using cookie cutters once they’ve cooled slightly. Pressing edible Easter-themed candies or small chocolate eggs into the tops before they fully set is another wonderful way to enhance their festive appeal.
Easter Rice Krispie Treats
Festive and fun Rice Krispie Treats, perfect for Easter celebrations, with a hint of green and colorful candy decorations.
Ingredients
-
16 ounces marshmallows
-
7 cups Rice Krispies cereal
-
2 tablespoons unsalted butter
-
½ cup unsalted butter
-
3-4 cups powdered sugar
-
¼ cup milk
-
1 teaspoon vanilla extract
-
Green food coloring
-
Easter egg candies (mini chocolate eggs or jelly beans)
Instructions
-
Step 1
Line a 9×13 inch pan with parchment paper, leaving an overhang. Lightly grease the parchment paper. -
Step 2
In a large microwave-safe bowl, melt 2 tablespoons of unsalted butter on high power for 30 seconds. Stir in the 16 ounces of marshmallows and microwave for another 1-2 minutes, stirring every 30 seconds, until completely melted and smooth. -
Step 3
Stir in the 7 cups of Rice Krispies cereal until well coated. Stir in the 1 teaspoon of vanilla extract and a few drops of green food coloring until desired color is reached. Mix well. -
Step 4
While the cereal mixture is still warm, prepare the frosting. In a separate bowl, whisk together ½ cup of unsalted butter (softened), 3 cups of powdered sugar, ¼ cup of milk, and 1 teaspoon of vanilla extract until smooth. Add more powdered sugar or milk to reach desired consistency. Color with green food coloring if desired for a stronger green effect or to match the treats. -
Step 5
Gently press the Rice Krispie mixture into the prepared pan using a greased spatula or your hands. Do not pack too tightly. -
Step 6
Spread the frosting evenly over the top of the Rice Krispie treats. Immediately sprinkle with Easter egg candies before the frosting sets. -
Step 7
Let the treats cool and the frosting set completely before cutting into squares.
Important Information
Nutrition Facts (Per Serving)
It is important to consider this information as approximate and not to use it as definitive health advice.
Allergy Information
Please check ingredients for potential allergens and consult a health professional if in doubt.


Leave a Comment