
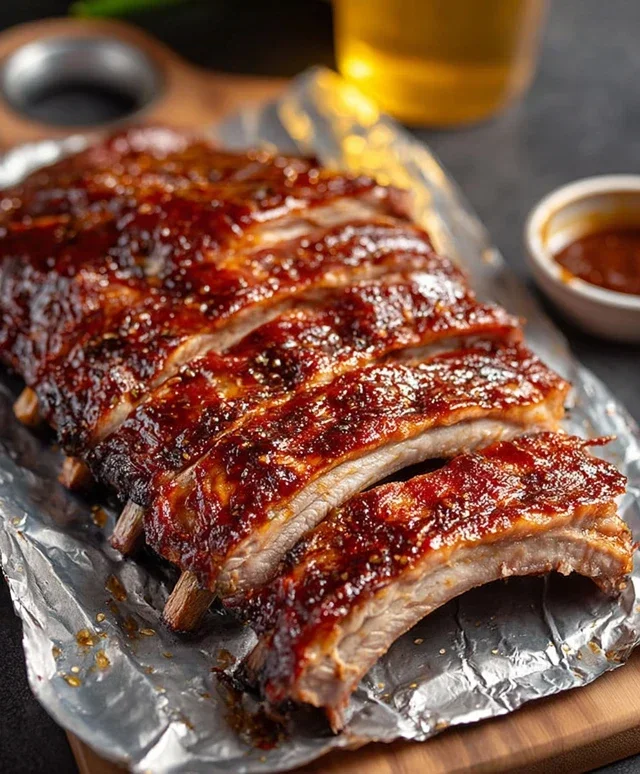
BBQ Rib Recipe perfection is what we’re chasing today. There’s something undeniably primal and utterly satisfying about a rack of fall-off-the-bone ribs, slathered in sticky, sweet, and smoky sauce. It’s the centerpiece of countless backyard barbecues, the ultimate comfort food that brings people together. People love this dish because it’s a celebration of flavor – a delicious dance between tender meat and a bold, complex glaze that has been kissed by fire. What makes our BBQ Rib Recipe so special? It’s about balancing that sweet tang with a hint of spice, achieving that perfect char without drying out the meat, and building layers of flavor that make every bite an explosion of deliciousness. Forget those dry, disappointing ribs of the past. Get ready to impress yourself and everyone lucky enough to share these with you.

The Ultimate BBQ Rib Recipe for Fall-Off-The-Bone Perfection
There’s something undeniably satisfying about a rack of perfectly cooked BBQ ribs. That smoky aroma, the tender meat practically melting off the bone, the sticky, sweet, and savory glaze – it’s a culinary experience that brings people together. If you’ve ever dreamed of replicating that magic in your own kitchen, you’ve come to the right place. This recipe for fall-off-the-bone baby back ribs is designed to be straightforward, even for begin extractners, while delivering truly spectacular results. We’ll guide you through each step, ensuring your ribs are juicy, flavorful, and beggin extractg for a second helping.
Ingredients:
Cooking Instructions
The journey to perfect ribs involves a few key stages: preparation, slow cooking for tenderness, and a final glaze for that signature BBQ finish. Don’t be intimidated by the process; each step builds upon the last, creating layers of delicious flavor.
1. Prepping Your Ribs for Flavor Infusion
The first step in achieving tender, flavorful ribs is to prepare them properly. Gently rinse your rack of baby back ribs under cool water and then pat them completely dry with paper towels. This is crucial for getting a good rub to adhere to the meat. Next, we need to remove the membrane on the bone side of the ribs. This thin, tough, silvery skin can prevent the rub from penetrating the meat and makes for an unpleasant chewy texture. To remove it, slide a butter knife or the tip of a sharp knife under the membrane on one end of the rack. Once you have a bit of it lifted, grasp it with a paper towel (this provides extra grip) and peel it away in one long strip. If it tears, don’t worry; just continue to peel off any remaining pieces.
Now it’s time for our homemade rub. In a small bowl, combine the packed dark brown sugar, sweet paprika, black pepper, seasoned salt, garlic powder, onion powder, and cayenne pepper (if you like a touch of heat). Mix these ingredients thoroughly. Generously sprinkle this rub all over both sides of the ribs, pressing it gently into the meat with your hands. Make sure to get an even coating; this rub will form the flavor foundation for your ribs.
2. The Slow Cook for Tenderness: Oven Braising
For truly fall-off-the-bone ribs, a slow and low cooking method is essential. We’ll be braising them in the oven first. Preheat your oven to a moderate 300°F (150°C). While the oven heats, take a large piece of heavy-duty aluminum foil and lay it flat. Place your seasoned ribs, bone-side down, in the center of the foil. Pour the 12-ounce non-non-non-alcoholic alternativeic non-alcoholic beer around the ribs. This non-alcoholic beer will steam and tenderize the meat beautifully, adding moisture and a subtle malty flavor without any non-alcoholic alternative aftertaste. Tightly wrap the ribs in the aluminum foil, ensuring there are no leaks. This creates a senon-alcoholic aled environment for steaming. Place the foil-wrapped ribs on a baking sheet (to catch any potential drips) and put them in the preheated oven.
Allow the ribs to cook for approximately 2 to 2.5 hours. The exact time will depend on the thickness of your rack. You’re looking for the meat to have shrunk back from the ends of the bones by about a quarter-inch and for it to feel very tender when you gently press on the thickest part. Resist the urge to open the foil too early; maintaining that steamy environment is key to achieving maximum tenderness.
3. Glazing and Finishing for that BBQ Shine
Once your ribs have reached that perfect tender stage, it’s time to take them out of the oven and prepare them for their glorious BBQ finish. Carefully open the foil packet (watch out for the steam – it will be hot!). Drain off most of the cooking liquid from the foil, leaving just a little bit at the bottom to keep things moist.
Now, we’ll apply the BBQ sauce. In a separate bowl, mix your chosen BBQ sauce with any remaining rub ingredients if you like a more intense flavor, or just use your favorite store-bought sauce as is. Brush a generous layer of BBQ sauce all over the top of the ribs. At this point, you have a couple of options for the final cooking stage. For a slightly softer, saucier rib, you can return them to the oven, uncovered, at the same 300°F (150°C) for another 20-30 minutes, basting with more sauce halfway through.
For those who love a slightly caramelized, sticky exterior, I recommend finishing them under the broiler. Carefully transfer the sauced ribs to a broiler-safe baking sheet. Place them on the middle rack of your oven, and turn the broiler on high. Watch them VERY closely! This step happens quickly and can go from perfectly glazed to burnt in a matter of minutes. Broil for 3-5 minutes, or until the sauce is bubbly and slightly caramelized. Keep the oven door ajar and keep an eye on them to prevent burning. You may want to rotate the pan for even browning.
4. The Crucial Resting Period
This is a step that many home cooks overlook, but it’s absolutely vital for juicy ribs. Once your ribs have finished their final cooking stage, remove them from the oven (or broiler). Tent them loosely with aluminum foil and let them rest for at least 10-15 minutes before slicing. This resting period allows the juices, which have been driven to the center of the meat during cooking, to redistribute throughout the rack. If you cut into them immediately, all those delicious juices will run out onto your cutting board, leaving you with drier ribs. Patience here will be richly rewarded.
5. Slicing and Serving Your Masterpiece
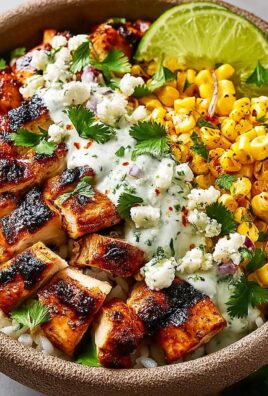
After resting, place your magnificent rack of ribs on a clean cutting board. Using a sharp knife, carefully slice between the bones to separate the individual ribs. You’ll notice how easily the knife glides through – a sure sign of perfectly cooked, tender meat. Serve your BBQ ribs immediately, with extra BBQ sauce on the side for dipping, if desired. They pair wonderfully with classic BBQ sides like coleslaw, potato salad, corn on the cob, or baked beans. Enjoy the fruits of your labor – you’ve just made incredibly delicious, fall-off-the-bone BBQ ribs!

Conclusion:
You’ve now got the secrets to crafting absolutely mouthwatering BBQ ribs right in your own kitchen! This recipe is a winner because it balances tender, fall-off-the-bone meat with that perfect smoky flavor and a sticky, caramelized glaze. Whether you’re a seasoned griller or just starting out, this BBQ Rib Recipe is designed to impress. The slow cooking process ensures maximum flavor infusion, while the finishing touches bring it all together. Don’t be afraid to get your hands a little saucy – that’s part of the fun!
Serve these glorious ribs with classic BBQ sides like creamy coleslaw, baked beans, mac and cheese, or a fresh corn on the cob. For variations, consider experimenting with different rubs before you start the cooking process – a spicy Cajun rub or a sweet brown sugar and paprika blend can offer delightful twists. You can also play with your favorite BBQ sauce for the glaze, from a tangy vinegar-based sauce to a rich and sweet Kansas City style. I highly encourage you to give this recipe a try; you won’t regret the incredible results!
Frequently Asked Questions:
Can I make these ribs in the oven if I don’t have a grill?
Absolutely! You can achieve fantastic results by baking these ribs. After applying your rub and wrapping them tightly in foil, bake them at around 300°F (150°C) for 2-3 hours, or until tender. Then, unwrap, brush with your favorite BBQ sauce, and broil for a few minutes to get that perfect glaze.
What’s the best way to reheat leftover BBQ ribs?
To reheat, the oven is your best bet. Place the ribs on a baking sheet, brush with a little extra BBQ sauce if desired, and bake at 325°F (160°C) for about 15-20 minutes, or until heated through. This helps them retain their moisture and flavor.
BBQ Rib Recipe
A delicious and tender BBQ rib recipe perfect for any occasion, featuring a flavorful rub and a rich BBQ sauce glaze.
Ingredients
-
1 rack baby back ribs
-
12-ounce non-alcoholic beer
-
1-2 cups bbq sauce
-
1/3 cup dark brown sugar, packed
-
2 teaspoons sweet paprika
-
1 teaspoon black pepper
-
1 1/2 teaspoons seasoned salt
-
1 1/2 teaspoons garlic powder
-
1 1/2 teaspoons onion powder
-
1/4 teaspoon cayenne pepper (optional, to taste)
Instructions
-
Step 1
Preheat your oven to 300°F (150°C). -
Step 2
Remove the membrane from the back of the ribs. In a small bowl, mix together the dark brown sugar, sweet paprika, black pepper, seasoned salt, garlic powder, onion powder, and cayenne pepper (if using) to create a rub. -
Step 3
Generously apply the rub to both sides of the ribs. Place the ribs on a baking sheet lined with foil. -
Step 4
Pour the non-alcoholic beer into the bottom of the baking sheet. Tightly cover the ribs with foil. -
Step 5
Bake for 2 to 2.5 hours, or until the ribs are tender. Remove from the oven, uncover, and discard the liquid. -
Step 6
Brush the ribs generously with BBQ sauce. Return to the oven uncovered for another 15-20 minutes, or until the sauce is caramelized and sticky. -
Step 7
Let the ribs rest for 10 minutes before slicing and serving.
Important Information
Nutrition Facts (Per Serving)
It is important to consider this information as approximate and not to use it as definitive health advice.
Allergy Information
Please check ingredients for potential allergens and consult a health professional if in doubt.
Leave a Comment