
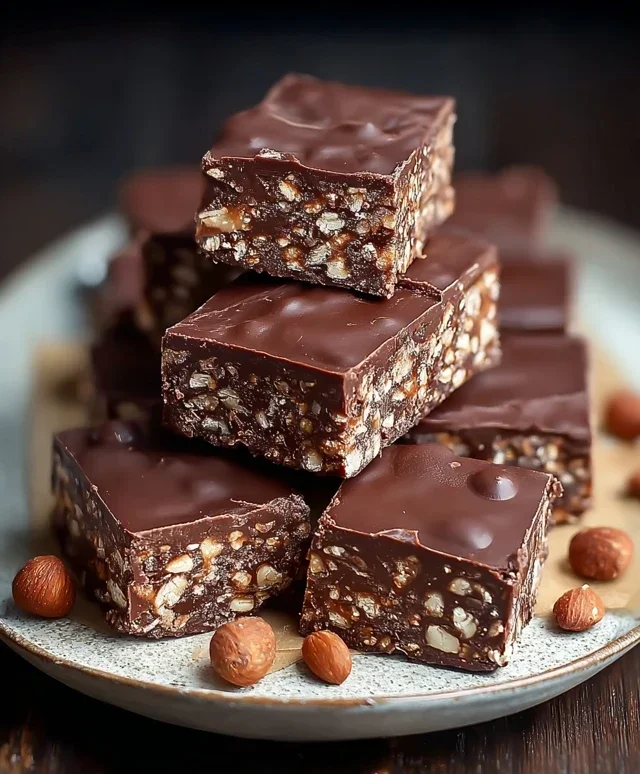
No-Bake Chocolate Biscuit Bars are the ultimate treat for when that sweet craving hits, but you’re not feeling the oven. Forget the fuss of preheating and long baking times; these delightful bars deliver pure chocolatey bliss with minimal effort. What is it about these simple delights that makes them so universally adored? It’s that irresistible combination of crunchy biscuits, rich, velvety chocolate, and a hint of sweet indulgence that’s simply addictive. They’re wonderfully forgiving, making them perfect for begin extractners or busy bakers, and the sheer versatility is what truly sets them apart. You can customize them endlessly, adding your favorite nuts, dried fruits, or even a sprinkle of sea salt for that gourmet touch. Each bite of these No-Bake Chocolate Biscuit Bars is a testament to how easy it can be to create something truly special and deeply satisfying.

No-Bake Chocolate Biscuit Bars
There’s something incredibly satisfying about a treat that requires no oven time, especially when it’s as decadent and easy to make as these No-Bake Chocolate Biscuit Bars. Perfect for those days when you crave a sweet indulgence without the fuss, these bars are a delightful combination of crunchy biscuits, nutty peanuts, and rich chocolate. They’re the ultimate crowd-pleaser, whether you’re baking for a party, a bake snon-alcoholic ale, or simply treating yourself to something special after a long week. The beauty of this recipe lies in its simplicity and the minimal effort required to achieve a truly delicious result. You can whip these up in no time, and the hardest part will be waiting for them to set!
Ingredients:
Instructions:
Preparing the Biscuit Base:
First, let’s get our biscuit base ready. Take your 12.3 oz (350g) of biscuits and crush them into fine crum extractbs. You can do this by placing them in a food processor and pulsing until you have a consistent crum extractb texture. Alternatively, if you don’t have a food processor, you can place the biscuits in a sturdy zip-top bag and crush them with a rolling pin or a heavy pan. Make sure there are no large chunks remaining. In a large mixing bowl, combine these crushed biscuits with 1 cup (3 oz / 85g) of ground peanuts, ½ cup (3 oz / 85g) of sugar, and the optional 1 packet (10g) of vanilla sugar. If you’re using vanilla sugar, it adds a lovely subtle sweetness and aroma that complements the chocolate beautifully. Mix these dry ingredients thoroughly to ensure everything is evenly distributed. This dry mixture will form the foundation of our bars, providing that satisfying crunch.
Creating the Chocolate Mixture:
Now, let’s move on to the luscious chocolate component. In a medium saucepan, combine the ¾ cup (6 fl oz / 180ml) of sweet cream, ½ cup (3.9 oz / 110g) of butter, and ½ cup (1.6 oz / 45g) of cocoa powder. Place the saucepan over medium heat. Stir the mixture continuously until the butter has melted completely and the cocoa powder is fully incorporated into the cream. It’s important to keep stirring to prevent any sticking or scorching at the bottom of the pan. Once the butter has melted and the mixture is smooth and uniform, continue to cook it gently for about 2-3 minutes. This brief cooking period helps to bloom the cocoa powder, intensifying its chocolatey flavor and ensuring a smooth, fudgy texture in the final bars. Be careful not to let the mixture boil vigorously; a gentle simmer is all you need.
Combining the Base and Chocolate:
Once your chocolate mixture has been gently heated and is smooth, it’s time to bring everything together. Carefully pour the warm chocolate mixture over the dry biscuit and peanut mixture in your large mixing bowl. Using a spatula or a sturdy spoon, begin extract to mix everything together until all the dry ingredients are thoroughly coated with the chocolatey liquid. You want to achieve a cohesive, thick mixture that holds together well. Ensure you scrape down the sides and bottom of the bowl to incorporate all the ingredients. Don’t overmix, but make sure there are no dry pockets of biscuit crum extractbs left. The consistency should be moist and slightly sticky, ready to be pressed into your baking tin.
Preparing the Pan and Pressing the Mixture:
Next, we need to prepare our tin. Line an 8×8 inch (20×20 cm) baking tin with parchment paper, leaving some overhang on the sides. This overhang will make it much easier to lift the set bars out of the tin later. Spoon the combined biscuit and chocolate mixture into the prepared tin. Using the back of your spoon or a flat-bottomed glass, press the mixture down firmly and evenly into the tin. The key here is to get it really compact and level. This ensures that your bars hold their shape when you cut them and have a good density. You want to eliminate any air pockets and create a solid, even layer. Take your time with this step, as a well-pressed base leads to beautifully formed bars.
Creating the Chocolate Topping and Setting:
For the final touch, we’ll create a decadent chocolate topping. In a heatproof bowl, combine the 3.2 oz (90g) of milk chocolate and 1 oz (30g) of dark chocolate. Add the 2 tbsp (1 oz / 30g) of vegetable oil. Vegetable oil helps to make the chocolate topping smoother and easier to spread. You can melt this chocolate mixture using a double boiler (placing the bowl over a saucepan of simmering water, ensuring the bottom of the bowl doesn’t touch the water) or in the microwave in short, 30-second intervals, stirring well after each interval, until it’s smooth and melted. Once melted, pour this luscious chocolate ganache over the biscuit base in the tin. Spread it out evenly using an offset spatula or the back of a spoon, ensuring it covers the entire surface. Sprinkle the remaining ¾ cup (2.5 oz / 70g) of ground peanuts evenly over the melted chocolate topping. Gently press the peanuts into the chocolate so they adhere well. Now, the crucial part: pop the tin into the refrigerator and let it chill for at least 2-3 hours, or until the chocolate is completely set. Once firm, lift the entire block out of the tin using the parchment paper overhang and cut it into bars or squares. Store them in an airtight container in the refrigerator.
Conclusion:
And there you have it – the ultimate guide to creating delightful No-Bake Chocolate Biscuit Bars! These bars are a triumph of simplicity and deliciousness, proving that you don’t need a hot oven to achieve pure chocolate bliss. Their quick preparation time and minimal fuss make them perfect for last-minute treats, kids’ baking projects, or simply satisfying a craving. The wonderfully crum extractbly texture of the biscuits combined with the rich, smooth chocolate coating creates an irresistible combination that’s sure to become a household favorite. I truly encourage you to give this recipe a go; you won’t be disappointed!
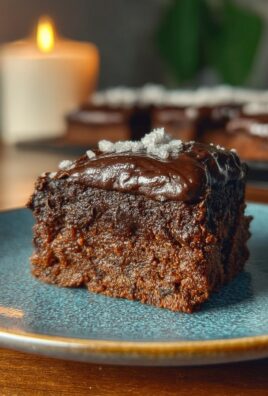
Serving these bars is incredibly versatile. They are fantastic on their own as a quick snack or dessert. For a more decadent experience, try serving them slightly warmed with a scoop of vanilla ice cream or a dollop of whipped cream. They also make a stunning addition to a dessert platter or can be a delightful homemade gift. Don’t be afraid to experiment with variations! You can add chopped nuts like almonds or walnuts for extra crunch, a sprinkle of sea salt on top of the chocolate for a sweet and salty contrast, or even some dried cranberries or mini marshmallows for pops of color and chegrape juicess. The possibilities are endless when it comes to these wonderfully adaptable No-Bake Chocolate Biscuit Bars.
Frequently Asked Questions:
What kind of biscuits work best for this recipe?
Digestive biscuits or rich tea biscuits are typically the best choices. They have a good crum extractbly texture that holds together well when crushed and absorb the chocolate mixture nicely. Avoid very soft or very hard biscuits, as they might not yield the desired consistency.
Can I make these bars ahead of time?
Absolutely! In fact, these No-Bake Chocolate Biscuit Bars are best made ahead. Allowing them to chill and set in the refrigerator for at least 2-3 hours, or even overnight, ensures they firm up properly and are easier to cut into neat bars. They can be stored in an airtight container in the fridge for up to a week.
What if I don’t have butter for the chocolate mixture?
While butter helps create a smooth and rich chocolate coating, you can try using coconut oil as an alternative. It will give a slightly different flavor profile and texture, but it should still work to create a solid chocolate coating. Ensure the coconut oil is melted before mixing.

No-Bake Chocolate Biscuit Bars
Easy no-bake bars made with crushed biscuits, peanuts, cocoa, and a rich chocolate topping. A simple and delicious treat.
Ingredients
-
350g biscuits, crushed
-
85g ground peanuts
-
85g sugar
-
10g vanilla sugar (optional)
-
45g cocoa powder
-
180ml sweet cream
-
110g butter
-
90g milk chocolate
-
30g dark chocolate
-
30g vegetable oil
-
70g ground peanuts
Instructions
-
Step 1
In a large bowl, combine the crushed biscuits, 85g ground peanuts, sugar, vanilla sugar (if using), and cocoa powder. Mix well. -
Step 2
In a saucepan, heat the sweet cream and butter over medium heat until the butter is melted and the cream is warm. Do not boil. -
Step 3
Pour the warm cream mixture into the dry ingredients and stir until everything is thoroughly combined and forms a thick mixture. -
Step 4
Press the mixture evenly into the bottom of a parchment-lined 8×8 inch baking pan. -
Step 5
In a microwave-safe bowl or double boiler, melt the milk chocolate and dark chocolate with the vegetable oil until smooth. Stir well. -
Step 6
Pour the melted chocolate mixture over the biscuit base and spread evenly. -
Step 7
Sprinkle the remaining 70g of ground peanuts over the chocolate layer. -
Step 8
Refrigerate for at least 1 hour, or until the chocolate is set. Cut into bars and serve.
Important Information
Nutrition Facts (Per Serving)
It is important to consider this information as approximate and not to use it as definitive health advice.
Allergy Information
Please check ingredients for potential allergens and consult a health professional if in doubt.


Leave a Comment