American Pie, is there anything more iconic? Imagine sinking your fork into a warm slice, the flaky crust shattering to reveal a sweet and tangy filling. Its a taste of home, a symbol of Americana, and a dessert that evokes feelings of comfort and nostalgia with every single bite. I can almost smell it baking right now!
While the exact origins are debated, pies have been a part of American cuisine since the early colonial days. They were a practical way to use seasonal fruits and berries, and quickly became a staple at family gatherings and holiday celebrations. Over time, the American Pie evolved, with countless variations emerging across different regions and family traditions. From apple to cherry, pecan to pumpkin, the possibilities are truly endless!
But what is it about this dessert that makes it so universally loved? Perhaps it’s the perfect balance of sweet and tart, the satisfying crunch of the crust against the soft, yielding filling. Or maybe it’s the memories associated with it baking with grandma, sharing a slice with loved ones, or simply indulging in a moment of pure, unadulterated bliss. Whatever the reason, one thing is certain: American Pie is more than just a dessert; it’s a cultural icon that will continue to be enjoyed for generations to come. So, let’s get baking!
Ingredients:
- For the Cake:
- 2 ½ cups all-purpose flour
- 2 ½ teaspoons baking powder
- ½ teaspoon baking soda
- ½ teaspoon salt
- 1 cup (2 sticks) unsalted butter, softened
- 1 ¾ cups granulated sugar
- 2 large eggs
- 1 teaspoon vanilla extract
- 1 ¼ cups buttermilk
- For the Frosting:
- 1 cup (2 sticks) unsalted butter, softened
- 6 cups powdered sugar
- ½ cup milk
- 2 teaspoons vanilla extract
- For the Decoration:
- 1 pint fresh blueberries
- 2 pints fresh raspberries (or strawberries, hulled and halved)
Preparing the Cake Batter:
- Preheat and Prep: First things first, let’s get our oven ready! Preheat it to 350°F (175°C). Grease and flour a 9×13 inch baking pan. This will prevent the cake from sticking and make it easier to remove later. I like to use a baking spray that contains flour for extra insurance.
- Combine Dry Ingredients: In a large bowl, whisk together the flour, baking powder, baking soda, and salt. Whisking is important here to ensure everything is evenly distributed. This helps the cake rise properly and have a consistent texture.
- Cream Butter and Sugar: In a separate large bowl (or the bowl of your stand mixer), cream together the softened butter and granulated sugar until light and fluffy. This usually takes about 3-5 minutes. The mixture should be pale and airy. This step is crucial for incorporating air into the batter, which contributes to a tender crumb.
- Add Eggs and Vanilla: Beat in the eggs one at a time, making sure each egg is fully incorporated before adding the next. Then, stir in the vanilla extract. Vanilla extract enhances the flavor of the cake, so don’t skip it!
- Alternate Wet and Dry Ingredients: Gradually add the dry ingredients to the wet ingredients, alternating with the buttermilk. Begin and end with the dry ingredients. I usually add about a third of the dry ingredients, then half of the buttermilk, then another third of the dry ingredients, the remaining buttermilk, and finally the last of the dry ingredients. This method helps prevent overmixing, which can lead to a tough cake. Mix until just combined. Be careful not to overmix! A few streaks of flour are okay.
- Pour into Pan: Pour the batter into the prepared baking pan and spread it evenly.
Baking the Cake:
- Bake: Bake for 30-35 minutes, or until a wooden skewer inserted into the center comes out clean. The baking time may vary depending on your oven, so keep an eye on it.
- Cool: Let the cake cool in the pan for 10 minutes before inverting it onto a wire rack to cool completely. Make sure the cake is completely cool before frosting, or the frosting will melt.
Preparing the Frosting:
- Cream Butter: In a large bowl (or the bowl of your stand mixer), cream the softened butter until smooth and creamy. This usually takes about 2-3 minutes.
- Add Powdered Sugar: Gradually add the powdered sugar, one cup at a time, beating well after each addition. This prevents the powdered sugar from flying everywhere.
- Add Milk and Vanilla: Add the milk and vanilla extract and beat until the frosting is smooth and fluffy. You may need to add a little more milk if the frosting is too thick, or a little more powdered sugar if it’s too thin. The consistency should be spreadable but not too runny.
Assembling and Decorating the Flag Cake:
- Frost the Cake: Once the cake is completely cool, frost the entire cake with the prepared frosting. Spread it evenly over the top and sides.
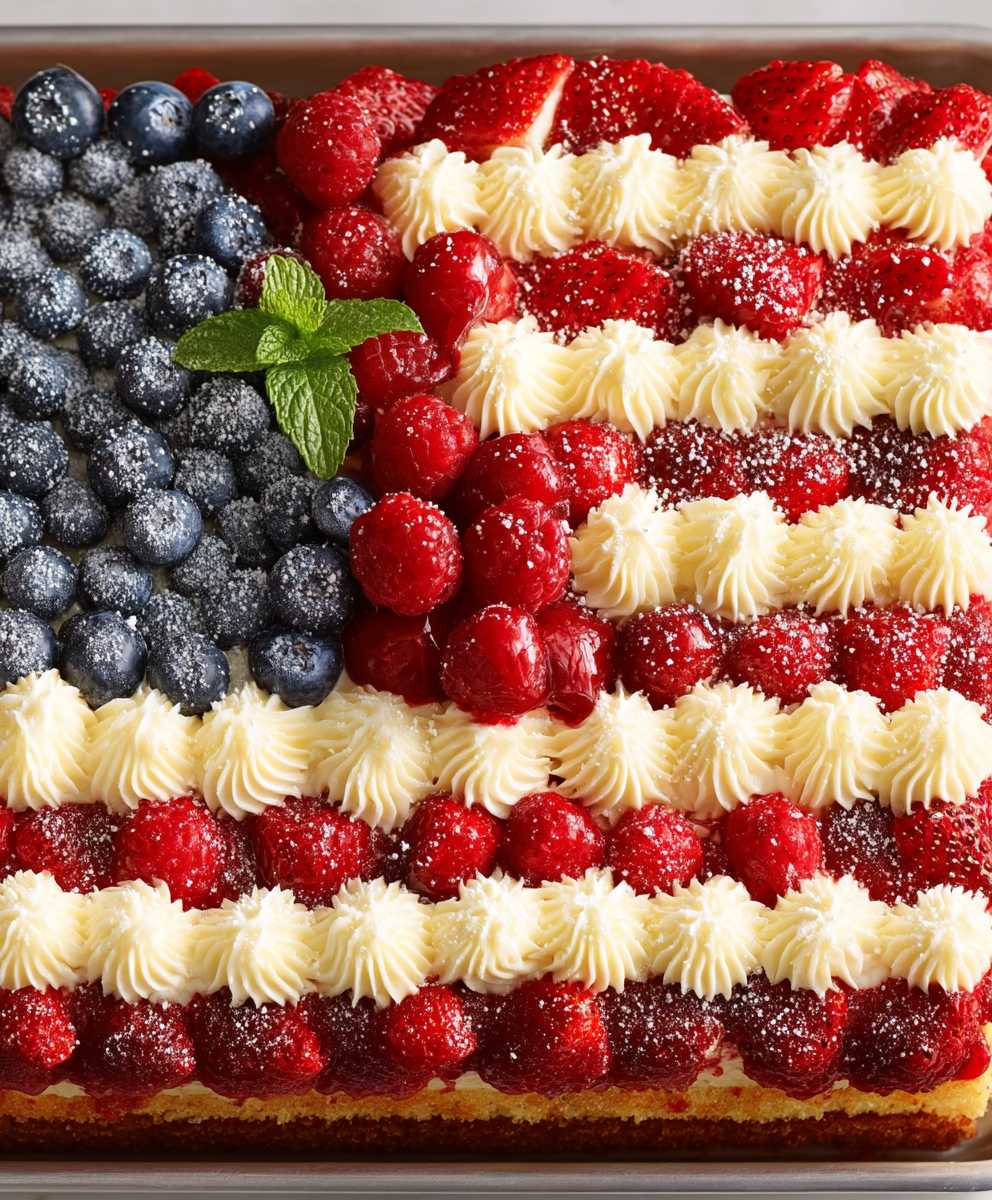
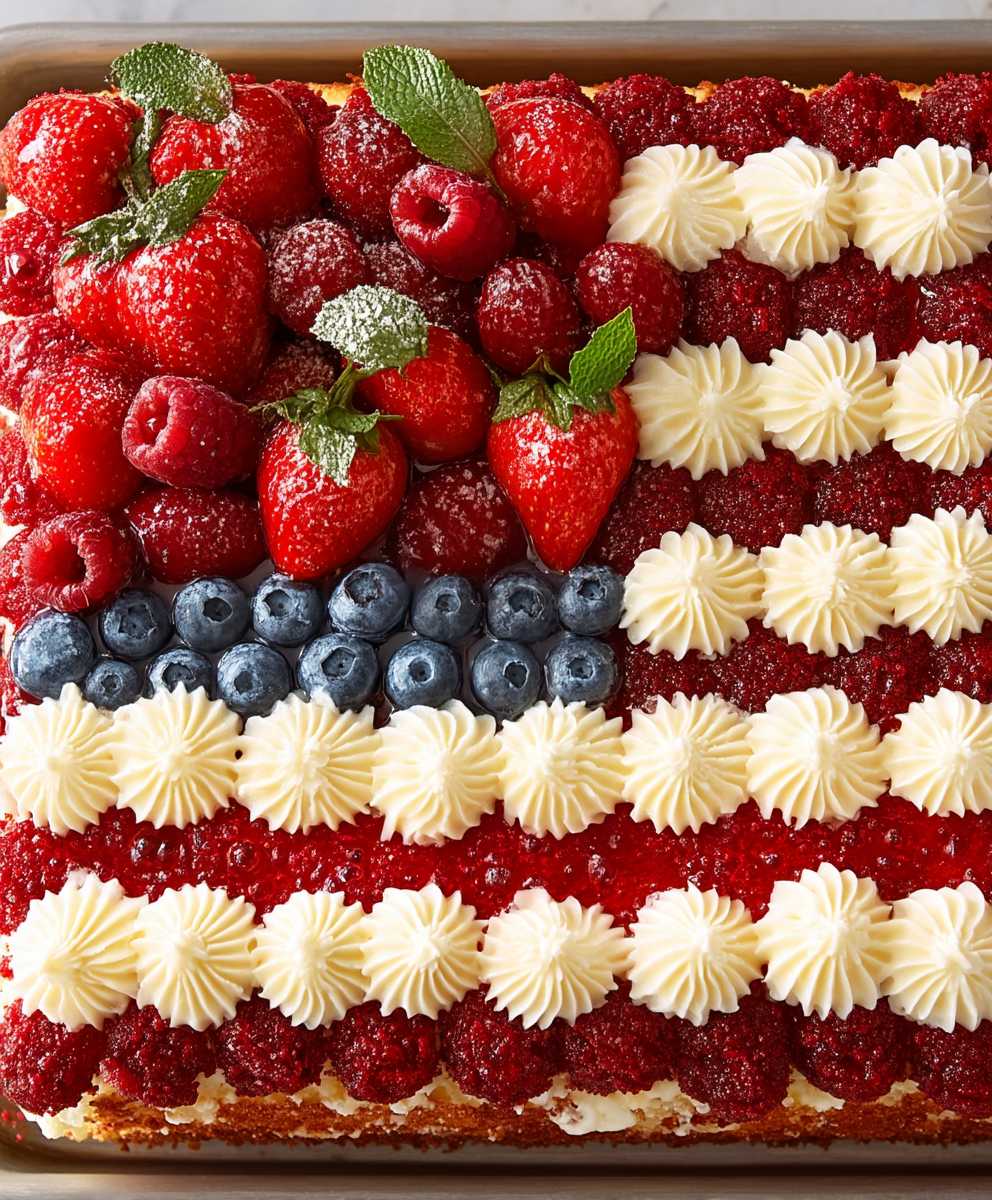
- Create the Flag Design: Now comes the fun part! Use the blueberries to create the “stars” section of the flag in the upper left corner of the cake. Arrange them in neat rows and columns.
- Create the Stripes: Use the raspberries (or strawberries) to create the “stripes” of the flag. Alternate rows of raspberries with rows of white frosting to create the red and white stripes.
- Chill (Optional): If you have time, chill the cake in the refrigerator for at least 30 minutes before serving. This will help the frosting set and make the cake easier to slice.
- Serve and Enjoy!: Slice the cake and serve. Enjoy your beautiful and delicious flag cake! This cake is perfect for celebrating holidays like Memorial Day, 4th of July, and Labor Day.
Tips for Success:
- Room Temperature Ingredients: Using room temperature ingredients, especially the butter and eggs, is crucial for creating a smooth and emulsified batter. This helps the cake bake evenly and have a tender crumb.
- Don’t Overmix: Overmixing the batter develops the gluten in the flour, which can result in a tough cake. Mix until just combined.
- Cool Completely: Make sure the cake is completely cool before frosting. Otherwise, the frosting will melt and slide off.
- Fresh Berries: Use fresh, high-quality berries for the best flavor and appearance.
- Adjust Sweetness: If you prefer a less sweet frosting, you can reduce the amount of powdered sugar.
- Frosting Consistency: Adjust the amount of milk in the frosting to achieve the desired consistency. It should be spreadable but not too runny.
- Get Creative: Feel free to get creative with the decoration! You can use different types of berries or add other decorations, such as sprinkles or edible glitter.
Variations:
- Lemon Cake: Add lemon zest and lemon juice to the cake batter for a refreshing lemon flavor.
- Chocolate Cake: Add cocoa powder to the cake batter for a chocolate version.
- Different Berries: Use different types of berries for the decoration, such as blackberries or mixed berries.
- Cream Cheese Frosting: Substitute some of the butter in the frosting with cream cheese for a tangy flavor.
- Whipped Cream Frosting: Use a stabilized whipped cream frosting for a lighter option.
Storage Instructions:
- Room Temperature: The cake can be stored at room temperature for up to 2 days in an airtight container.
- Refrigerator: The cake can be stored in the refrigerator for up to 5 days in an airtight container.
- Freezer: The cake can be frozen for up to 2 months. Wrap it tightly in plastic wrap and then in aluminum foil. Thaw in the refrigerator before serving.
Troubleshooting:
- Cake is Dry: Make sure you are not overbaking the cake. Also, ensure you are using enough liquid in the batter.
- Cake is Dense: Avoid overmixing the batter. Also, make sure your baking powder and baking soda are fresh.
- Frosting is Too Thin: Add more powdered sugar to thicken the frosting.
- Frosting is Too Thick: Add more milk to thin the frosting.
- Berries are Sliding Off: Make sure the frosting is not too runny. You can also chill the cake for a few minutes before adding the berries to help them adhere better.
Enjoy Baking!
I hope you enjoy making this flag cake as much as I do! It’s a fun and festive dessert that’s perfect for any patriotic celebration. Don’t be afraid to experiment with different variations and make it your own. Happy baking!

Conclusion:
This Flag Cake isn’t just a dessert; it’s a celebration on a plate! From its vibrant, patriotic colors to its delicious, crowd-pleasing flavor, it’s guaranteed to be the star of any Fourth of July gathering, Memorial Day picnic, or any occasion where you want to show off your baking skills and American pride. I truly believe this is a must-try recipe, and here’s why: it’s surprisingly easy to make, even for beginner bakers. The visual impact is stunning, and the taste? Absolutely divine! The moist cake, the sweet frosting, and the burst of fresh berries create a symphony of flavors that will have everyone coming back for seconds (and maybe even thirds!).
But the best part? It’s incredibly versatile! While I’ve shared my go-to recipe, feel free to get creative and put your own spin on it. For a richer flavor, try using a chocolate cake base instead of vanilla. Or, if you’re feeling adventurous, you could even experiment with different extracts in the frosting, like almond or lemon, to complement the berries.
Serving Suggestions and Variations:
* Individual Flag Cupcakes: Transform this recipe into adorable individual cupcakes for easy serving and portion control. Simply bake the batter in cupcake liners and decorate each one with the flag design.
* Berry Swirl Cake: Instead of arranging the berries in a flag pattern, swirl a homemade berry compote into the cake batter before baking for a marbled effect.
* Boozy Berry Boost: For an adult twist, macerate the berries in a little bit of rum or vodka before arranging them on the cake.
* Ice Cream Pairing: Serve a slice of this magnificent Flag Cake with a scoop of vanilla bean ice cream or a refreshing lemon sorbet for an extra decadent treat.
* Frosting Fun: Experiment with different frosting flavors! A cream cheese frosting would add a tangy twist, while a chocolate ganache would create a richer, more indulgent dessert.
* Gluten-Free Option: Easily adapt this recipe for gluten-free guests by using a gluten-free cake mix or a gluten-free flour blend.
I’m so excited for you to try this recipe and experience the joy of creating your own stunning Flag Cake. It’s more than just baking; it’s about creating memories and sharing a delicious treat with loved ones.
Don’t be intimidated by the flag design it’s much easier than it looks! Just follow my instructions carefully, and you’ll be amazed at what you can create. And remember, even if your flag isn’t perfectly symmetrical, it will still be beautiful and delicious.
So, what are you waiting for? Gather your ingredients, preheat your oven, and get ready to bake a masterpiece! I can’t wait to hear about your experience. Please, share your photos and stories in the comments below. Let me know what variations you tried and how your Flag Cake turned out. Happy baking, and happy celebrating! I hope this becomes a cherished tradition in your home for years to come. I’m confident that this recipe will become a family favorite, bringing smiles and sweet memories to every occasion.
Flag Cake: The Ultimate Guide to Baking a Patriotic Dessert
A festive cake decorated with blueberries and raspberries to resemble the American flag. Perfect for patriotic holidays!
Ingredients
- 2 cups all-purpose flour
- 1 teaspoon baking powder
- 1/2 teaspoon salt
- 1/2 cup (1 stick) unsalted butter, softened
- 1 1/4 cups granulated sugar
- 2 large eggs
- 1 teaspoon vanilla extract
- 1 cup milk
- 8 ounces cream cheese, softened
- 1/2 cup powdered sugar
- 1 pint fresh strawberries, hulled and sliced
- 1 pint fresh blueberries
Instructions
- Preheat oven to 350 degrees F (175 degrees C).
- Grease and flour a 9×13 inch pan.
- In a large bowl, cream together the butter, sugar, and vanilla until light and fluffy.
- Beat in the eggs one at a time, then stir in the almond extract.
- Combine the flour and baking powder, add to the creamed mixture alternately with the milk, beginning and ending with the flour mixture.
- Pour batter into the prepared pan.
- Bake for 30 to 35 minutes, or until a toothpick inserted into the center comes out clean.
- Let cool completely.
- Frost with whipped topping.
- Arrange blueberries in the upper left corner to resemble stars.
- Cut strawberries in half and arrange in rows to resemble stripes.
Notes
- For best results, use room temperature ingredients.
- The cake layers can be baked a day ahead and stored, wrapped tightly, at room temperature.
- Leftover cake can be stored in the refrigerator for up to 3 days.


Leave a Comment