
Homemade potato chips are a delightful treat that can elevate any snack time into a gourmet experience. There’s something incredibly satisfying about biting into a perfectly crispy chip, especially when you know it was made right in your own kitchen. The history of potato chips dates back to the mid-19th century, when they were first created in Saratoga Springs, New York, as a response to a customer’s complaint about soggy fries. Since then, they have become a beloved snack worldwide, cherished for their crunch and versatility.
People love homemade potato chips not just for their irresistible taste and texture, but also for the convenience of making them at home. You can customize the flavors to suit your palate, whether you prefer classic sea salt, zesty barbecue, or even a hint of truffle oil. Plus, making your own chips allows you to control the ingredients, ensuring a fresher and healthier option compared to store-bought varieties. Join me as we dive into the simple yet rewarding process of creating your own homemade potato chips!

Ingredients:
- 4 large russet potatoes
- Vegetable oil (for frying)
- Salt (to taste)
- Optional seasonings: garlic powder, paprika, onion powder, or your favorite spice blend
Preparing the Potatoes
1. **Wash the Potatoes**: Start by thoroughly washing the russet potatoes under cold running water. Use a vegetable brush to scrub off any dirt, as we want to keep the skin on for extra flavor and texture. 2. **Slice the Potatoes**: Using a sharp knife or a mandoline slicer, slice the potatoes into thin rounds. Aim for about 1/16 inch thick for the perfect crispiness. If you prefer thicker chips, adjust the thickness accordingly, but keep in mind that they will take longer to cook. 3. **Soak the Slices**: Place the potato slices in a large bowl of cold water. Let them soak for at least 30 minutes. This step helps to remove excess starch, which can make the chips soggy. Soaking also helps achieve that delightful crunch. 4. **Dry the Potatoes**: After soaking, drain the potato slices and lay them out on a clean kitchen towel or paper towels. Pat them dry thoroughly. Removing moisture is crucial for achieving crispy chips.Preparing for Frying
5. **Heat the Oil**: In a large, heavy-bottomed pot or deep fryer, pour enough vegetable oil to submerge the potato slices (about 2-3 inches deep). Heat the oil over medium-high heat until it reaches 350°F (175°C). You can use a kitchen thermometer to check the temperature, or drop a small piece of potato into the oil; if it sizzles immediately, the oil is ready. 6. **Prepare a Cooling Rack**: While the oil is heating, set up a cooling rack over a baking sheet. This will allow the excess oil to drain off the chips after frying, keeping them crispy.Frying the Chips
7. **Fry in Batches**: Carefully add a handful of potato slices to the hot oil, being cautious not to overcrowd the pot. Fry them in batches to ensure even cooking. Depending on the size of your pot, you may need to fry in 2-3 batches. 8. **Monitor Cooking Time**: Fry the potato slices for about 3-5 minutes, or until they turn golden brown and crispy. Stir occasionally with a slotted spoon to ensure even cooking. Keep an eye on them, as they can go from perfectly crispy to burnt quickly. 9. **Remove and Drain**: Once the chips are golden brown, use a slotted spoon to remove them from the oil. Place them on the prepared cooling rack to drain excess oil. While they are still hot, sprinkle with salt and any additional seasonings you desire. 10. **Repeat**: Continue frying the remaining potato slices in batches, ensuring the oil temperature remains consistent. If the oil cools down too much, the chips will absorb more oil and become greasy.Assembling and Serving
11. **Cool Down**: Allow the chips to cool for a few minutes on the rack. This will help them crisp up even more as they cool. 12. **Taste Test**: Once cooled, taste a chip and adjust the seasoning if necessary. You can add more salt or experiment with different spices to find your perfect flavor combination. 13. **Serve**: Transfer the homemade potato chips to a serving bowl or platter. They are best enjoyed fresh, but you can store any leftovers in an airtight container for a few days. Just be aware that they may lose some of their crispiness over time.Optional Flavor Variations
14. **Spicy Chips**: For a kick, mix some cayenne pepper or chili powder with the salt before sprinkling it on the chips. 15. **Herb-Infused Chips**: Toss the hot chips with dried herbs like rosemary, thyme, or dill for a fragrant twist. 16. **Cheesy Chips**: After frying, sprinkle the chips with grated Parmesan cheese or nutritional yeast for a cheesy flavor. 17. **Sweet Chips**: For a sweet treat, sprinkle cinnamon and sugar on the hot chips instead of salt.Storing Your Chips
18. **Storage Tips**: If you have any leftover chips, let them cool completely before storing them. Place them in an airtight container at room temperature. They should stay fresh for about 3-5 days. If you notice they are losing their crispiness, you can re-crisp them in the oven at 350°F (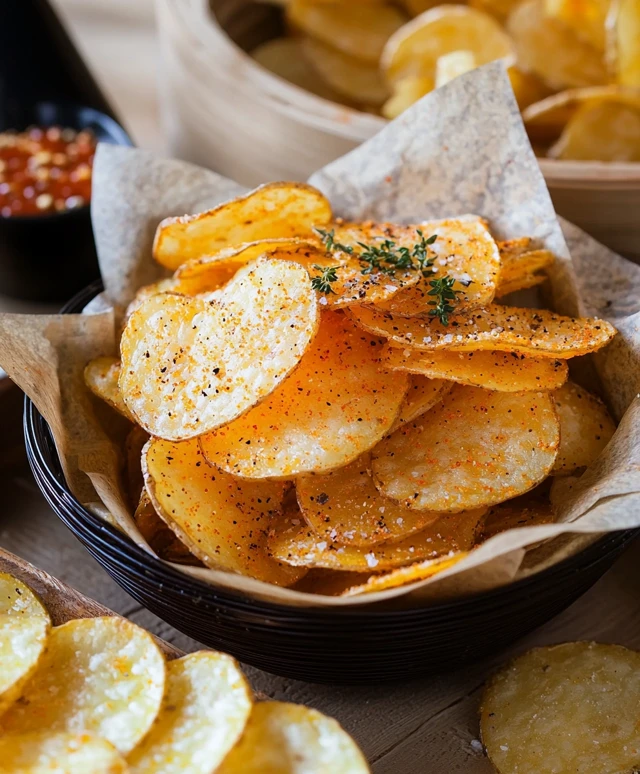
Conclusion:
In conclusion, this homemade potato chips recipe is an absolute must-try for anyone who loves a crunchy, flavorful snack that you can easily customize to your liking. The beauty of making your own chips lies in the ability to control the ingredients and flavors, ensuring that every bite is just as you like it. Whether you prefer classic sea salt, zesty barbecue, or even a spicy kick with cayenne pepper, the possibilities are endless! I highly recommend serving these chips alongside your favorite dips, like guacamole, salsa, or a creamy ranch dressing for a delightful snack platter. You can also experiment with different types of potatoes, such as sweet potatoes or even beets, for a colorful and nutritious twist. I encourage you to give this homemade potato chips recipe a try and share your experience with friends and family. Id love to hear about your favorite flavor combinations and any unique variations you come up with! So grab those potatoes, fire up the fryer or oven, and enjoy the satisfying crunch of your very own homemade potato chips. Happy snacking! Print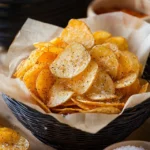
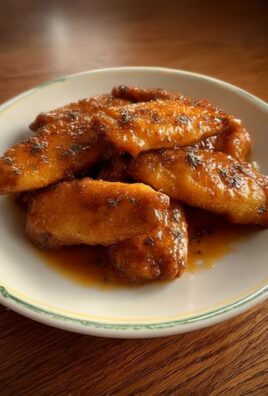
Homemade Potato Chips: The Ultimate Guide to Perfectly Crispy Snacks
- Total Time: 50 minutes
- Yield: 4 servings 1x
Description
Crispy homemade potato chips are a simple and delicious snack that you can make in your own kitchen. With just russet potatoes, oil, and your choice of seasonings, you can create perfectly crunchy chips that are great for any occasion. Enjoy them fresh or store them for later!
Ingredients
- 4 large russet potatoes
- Vegetable oil (for frying)
- Salt (to taste)
- Optional seasonings: garlic powder
- Optional seasonings: paprika
- Optional seasonings: onion powder
- Optional seasonings: your favorite spice blend
Instructions
- Thoroughly wash the russet potatoes under cold running water using a vegetable brush to scrub off any dirt. Keep the skin on for extra flavor and texture.
- Slice the potatoes into thin rounds, about 1/16 inch thick for optimal crispiness. Adjust thickness if you prefer thicker chips, but note that they will take longer to cook.
- Place the potato slices in a large bowl of cold water and soak for at least 30 minutes to remove excess starch and achieve a crunchier texture.
- Drain the potato slices and lay them out on a clean kitchen towel or paper towels. Pat them dry thoroughly to remove moisture.
- In a large, heavy-bottomed pot or deep fryer, pour enough vegetable oil to submerge the potato slices (about 2-3 inches deep). Heat the oil over medium-high heat until it reaches 350°F (175°C).
- Set up a cooling rack over a baking sheet to allow excess oil to drain off the chips after frying.
- Carefully add a handful of potato slices to the hot oil, avoiding overcrowding. Fry in batches for even cooking.
- Fry the potato slices for about 3-5 minutes, or until golden brown and crispy. Stir occasionally with a slotted spoon.
- Use a slotted spoon to remove the chips from the oil and place them on the cooling rack. Sprinkle with salt and any additional seasonings while still hot.
- Continue frying the remaining potato slices in batches, ensuring the oil temperature remains consistent.
- Allow the chips to cool for a few minutes on the rack to enhance crispiness.
- Taste a chip and adjust the seasoning if necessary.
- Transfer the chips to a serving bowl or platter. Best enjoyed fresh, but can be stored in an airtight container for a few days.
Notes
- For spicy chips, mix cayenne pepper or chili powder with salt before sprinkling.
- For herb-infused chips, toss with dried herbs like rosemary or thyme after frying.
- For cheesy chips, sprinkle with grated Parmesan cheese or nutritional yeast after frying.
- For sweet chips, sprinkle cinnamon and sugar instead of salt.
- Prep Time: 30 minutes
- Cook Time: 15-20 minutes
Leave a Comment