
Strawberry Lemon Swirl Tart: Just the name conjures images of sun-drenched picnics and the sweet, tangy taste of summer, doesn’t it? Imagine sinking your fork into a buttery, crumbly crust, followed by a burst of bright lemon curd, perfectly balanced by the juicy sweetness of fresh strawberries. This isn’t just a dessert; it’s an experience!
While the exact origins of fruit tarts are debated, their essence lies in the celebration of seasonal bounty. Throughout history, cultures have used pastry as a vessel to showcase the flavors of their local fruits, transforming simple ingredients into elegant and satisfying treats. The addition of lemon curd, a classic British confection, adds a layer of sophistication and a delightful tang that complements the sweetness of the strawberries.
People adore this Strawberry Lemon Swirl Tart for its harmonious blend of flavors and textures. The buttery shortbread crust provides a satisfying crunch, while the creamy lemon curd melts in your mouth. The fresh strawberries offer a burst of juicy sweetness that perfectly balances the tartness of the lemon. It’s a dessert that’s both impressive and surprisingly easy to make, making it perfect for everything from casual gatherings to special occasions. Plus, its vibrant colors make it a stunning centerpiece for any table. Get ready to impress your friends and family with this delightful creation!

Ingredients:
- For the Chocolate Cake Layers:
- 2 cups all-purpose flour
- 2 cups granulated sugar
- ¾ cup unsweetened cocoa powder
- 1 ½ teaspoons baking powder
- 1 ½ teaspoons baking soda
- 1 teaspoon salt
- 1 cup buttermilk
- ½ cup vegetable oil
- 2 large eggs
- 2 teaspoons vanilla extract
- 1 cup boiling water
- For the Vanilla Ice Cream Layer:
- 1 ½ quarts vanilla ice cream, softened
- For the Strawberry Ice Cream Layer:
- 1 ½ quarts strawberry ice cream, softened
- For the Whipped Cream Frosting:
- 3 cups heavy cream
- ¾ cup powdered sugar
- 1 ½ teaspoons vanilla extract
- For the Decoration:
- Fresh strawberries, sliced
- Fresh blueberries
- Red, white, and blue sprinkles (optional)
Preparing the Chocolate Cake Layers
- Preheat and Prepare: First things first, preheat your oven to 350°F (175°C). Grease and flour two 9-inch round cake pans. I like to use baking spray with flour already in it it makes life so much easier! Make sure you get into all the nooks and crannies to prevent sticking.
- Combine Dry Ingredients: In a large bowl, whisk together the flour, sugar, cocoa powder, baking powder, baking soda, and salt. Whisking is key here to ensure everything is evenly distributed. Nobody wants a bite of pure baking soda!
- Combine Wet Ingredients: In a separate bowl, whisk together the buttermilk, oil, eggs, and vanilla extract. Make sure the eggs are well incorporated.
- Combine Wet and Dry: Gradually add the wet ingredients to the dry ingredients, mixing on low speed until just combined. Be careful not to overmix! Overmixing develops the gluten in the flour, which can lead to a tough cake.
- Add Boiling Water: Carefully pour in the boiling water and mix until the batter is smooth. The batter will be thin don’t worry, that’s normal! The hot water helps to bloom the cocoa powder, intensifying the chocolate flavor.
- Divide and Bake: Divide the batter evenly between the prepared cake pans. Bake for 30-35 minutes, or until a toothpick inserted into the center comes out clean. Keep a close eye on them ovens can vary!
- Cool Completely: Let the cakes cool in the pans for 10 minutes before inverting them onto a wire rack to cool completely. This is crucial! If you try to handle them while they’re still warm, they’ll likely fall apart.
Preparing the Ice Cream Layers
- Soften the Ice Cream: Take the vanilla and strawberry ice cream out of the freezer and let them soften slightly. You want them to be spreadable, but not completely melted. This usually takes about 20-30 minutes, depending on the temperature of your kitchen.
- Prepare the First Cake Layer: Place one of the cooled chocolate cake layers on a cake stand or serving plate. If you want to be extra secure, you can put a dab of frosting on the stand first to prevent the cake from sliding.
- Spread the Vanilla Ice Cream: Spread the softened vanilla ice cream evenly over the first cake layer. Make sure to get all the way to the edges.
- Freeze: Place the cake in the freezer for at least 1 hour, or until the vanilla ice cream layer is firm. This is important to prevent the layers from melting together when you add the strawberry ice cream.
- Prepare the Second Cake Layer: Once the vanilla ice cream layer is firm, remove the cake from the freezer.
- Spread the Strawberry Ice Cream: Spread the softened strawberry ice cream evenly over the vanilla ice cream layer. Again, make sure to get all the way to the edges.
- Top with the Second Cake Layer: Carefully place the second cooled chocolate cake layer on top of the strawberry ice cream layer.
- Freeze Again: Wrap the entire cake tightly in plastic wrap and freeze for at least 4 hours, or preferably overnight. This allows the ice cream layers to firm up completely and prevents the cake from becoming soggy.
Preparing the Whipped Cream Frosting
- Chill the Bowl and Whisk: Place the mixing bowl and whisk attachment in the freezer for at least 15 minutes before you start. This helps the whipped cream to whip up faster and hold its shape better.
- Combine Ingredients: Pour the heavy cream into the chilled bowl. Add the powdered sugar and vanilla extract.
- Whip the Cream: Beat on medium speed until stiff peaks form. Be careful not to overwhip, or the cream will turn into butter! You’ll know it’s ready when the cream holds its shape and the peaks stand up straight when you lift the whisk.
Assembling and Decorating the Cake
- Remove from Freezer: Remove the cake from the freezer about 15-20 minutes before frosting. This will make it easier to spread the frosting.
- Frost the Cake: Spread the whipped cream frosting evenly over the top and sides of the cake. You can use a spatula or an offset spatula for a smoother finish. Don’t worry about making it perfect a rustic look is just as beautiful!
- Decorate: Arrange the sliced strawberries and blueberries on top of the cake in a patriotic pattern. You can create a flag design, a starburst, or simply scatter them randomly.
- Add Sprinkles (Optional): If desired, sprinkle red, white, and blue sprinkles over the top of the cake.
- Freeze Briefly: Place the decorated cake back in the freezer for about 30 minutes to allow the frosting to set. This will make it easier to slice and serve.
- Slice and Serve: Remove the cake from the freezer about 10 minutes before serving. Slice with a sharp knife and enjoy!
Tips for Success:
- Don’t Overbake the Cake: Overbaked cake will be dry and crumbly. Check for doneness with a toothpick a few minutes before the recommended baking time.
- Soften Ice Cream Properly: The ice cream should be soft enough to spread easily, but not so melted that it’s soupy.
- Freeze Between Layers: Freezing the cake between each layer is crucial for preventing a melty mess.
- Use High-Quality Ingredients: The better the ingredients, the better the cake will taste! Use good quality cocoa powder, vanilla extract, and heavy cream.
- Get Creative with Decorations: Feel free to customize the decorations to your liking. You can use different fruits, candies, or even edible glitter.
- Make Ahead: This cake can be made several days in advance and stored in the freezer. Just be sure to wrap it tightly in plastic wrap to prevent freezer burn.
Variations:
- Different Cake Flavors: You can use any cake flavor you like for this recipe. Vanilla, chocolate, or even funfetti would all be delicious.
- Different Ice Cream Flavors: Experiment with different ice cream flavors to create your own unique combination. Chocolate chip cookie dough, mint chocolate chip, or even coffee ice cream would be great choices.
- Add a Crunch: Add a layer of crushed Oreos, graham crackers, or pretzels between the ice cream layers for added texture.
- Drizzle with Chocolate: Drizzle melted chocolate over the top of the cake for an extra decadent treat.
- Use a Different Frosting: If you’re not a fan of whipped cream, you can use buttercream frosting or even a chocolate ganache.
Storage Instructions:
Store leftover ice cream cake in the freezer, tightly wrapped in plastic wrap or in an airtight container. It will keep for up to a week, but it’s best enjoyed within a few days for optimal flavor and texture.
Conclusion:
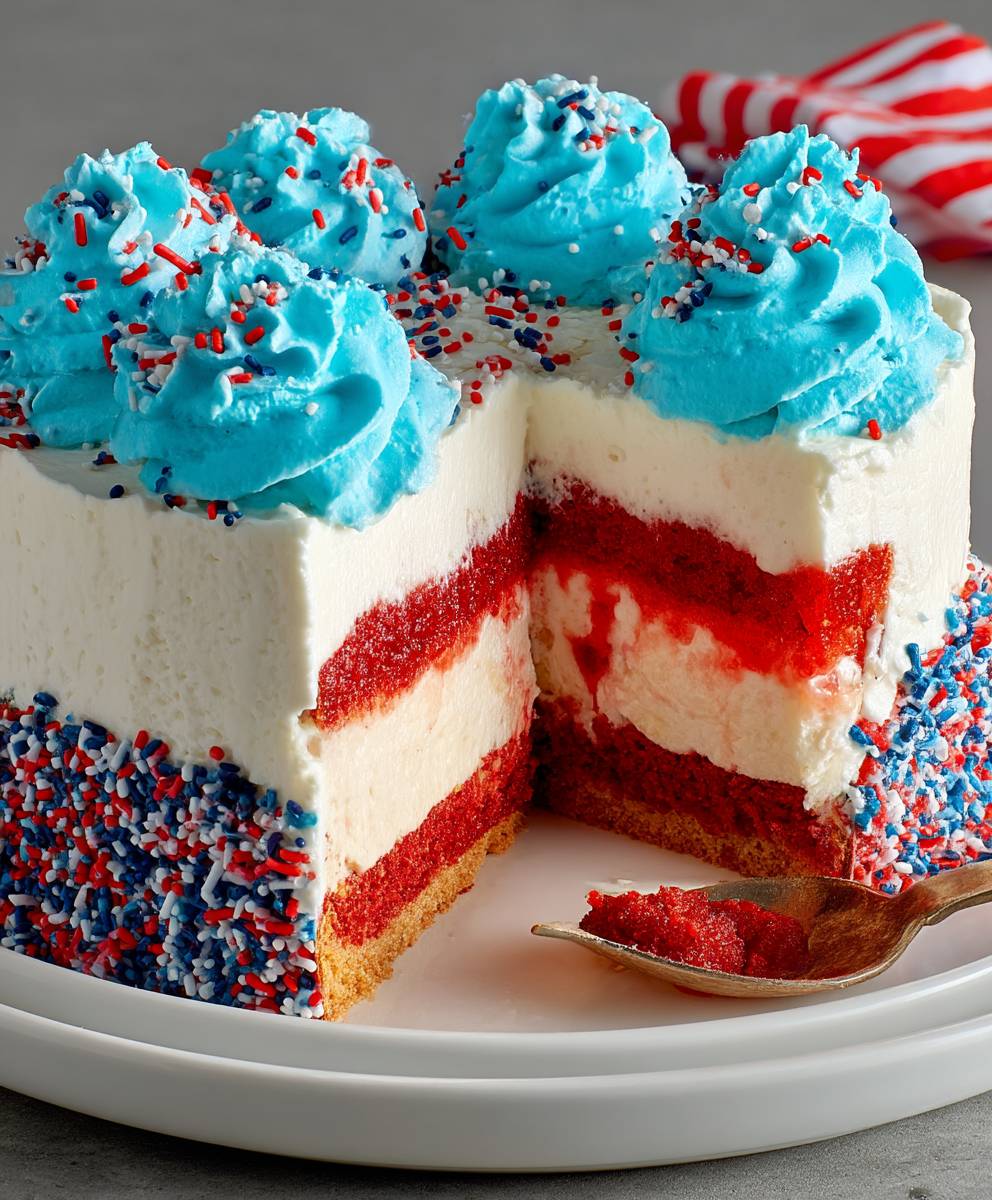
This July 4th Ice Cream Cake isn’t just a dessert; it’s a celebration on a plate! From the vibrant layers of patriotic colors to the creamy, cool textures, it’s guaranteed to be the star of your Independence Day gathering. I know, I know, making a layered ice cream cake might seem a little daunting, but trust me, the “oohs” and “aahs” you’ll get when you unveil this masterpiece are totally worth the effort. It’s a showstopper that tastes as good as it looks, and that’s saying something!
But why is this particular recipe a must-try? Well, beyond the obvious festive appeal, it’s incredibly customizable. You’re not stuck with just vanilla, chocolate, and strawberry. Feel free to experiment with your favorite ice cream flavors! Imagine a layer of cookies and cream, a swirl of mint chocolate chip, or even a tangy raspberry sorbet for a refreshing twist. The possibilities are truly endless.
And speaking of customization, let’s talk serving suggestions and variations. For a truly decadent experience, serve each slice with a dollop of whipped cream and a sprinkle of patriotic sprinkles. You could also drizzle on some hot fudge sauce or caramel for an extra layer of indulgence. If you’re feeling adventurous, try adding a layer of crushed Oreos or chopped-up candy bars between the ice cream layers for added texture and flavor.
If you’re looking for a slightly healthier option, consider using frozen yogurt instead of ice cream. You can also incorporate fresh berries into the layers for a burst of natural sweetness and vibrant color. Think blueberries, raspberries, and strawberries a perfect complement to the red, white, and blue theme!
Another fun variation is to make individual ice cream cake cups instead of a large cake. Simply layer the ice cream and other ingredients in clear plastic cups or mason jars for a cute and portable dessert. This is a great option for parties with kids, as it eliminates the need for cutting and serving.
But the best part about this July 4th Ice Cream Cake is that it’s a recipe that brings people together. It’s a fun project to make with family and friends, and it’s a guaranteed crowd-pleaser at any summer celebration. The process of layering the ice cream, adding the toppings, and decorating the cake is a joyful experience in itself.
So, what are you waiting for? Grab your ice cream, your sprinkles, and your patriotic spirit, and get ready to create a dessert that will wow your guests. I’m confident that this recipe will become a new family favorite.
I’m so excited for you to try this recipe! Once you’ve made your own version of this spectacular July 4th Ice Cream Cake, I’d absolutely love to hear about your experience. Share your photos and stories in the comments below. Let me know what variations you tried, what flavors you used, and how much your guests loved it. I can’t wait to see your creations and hear all about your Independence Day celebrations! Happy baking, and happy Fourth of July!
July 4th Ice Cream Cake: A Festive & Delicious Recipe
A festive and delicious ice cream cake perfect for celebrating the 4th of July! Layers of your favorite ice cream flavors are sandwiched between a crunchy cookie crust and topped with whipped cream and patriotic sprinkles.
Ingredients
- 1 (1.5 quart) container vanilla ice cream, softened
- 1 (1.5 quart) container chocolate ice cream, softened
- 1 (14 ounce) package chocolate sandwich cookies, crushed
- 1/2 cup hot fudge sauce
- 1 (4 ounce) container frozen whipped topping, thawed
- Red, white, and blue sprinkles
Instructions
- Line a 9-inch springform pan with plastic wrap, letting the wrap extend over the sides.
- In a large bowl, stir together the crushed cookies and melted butter. Press the mixture evenly into the bottom of the prepared pan. Freeze for 30 minutes.
- Soften the strawberry ice cream slightly at room temperature. Spread it evenly over the crust. Freeze for 1 hour.
- Soften the vanilla ice cream slightly at room temperature. Spread it evenly over the strawberry layer. Freeze for at least 3 hours, or overnight.
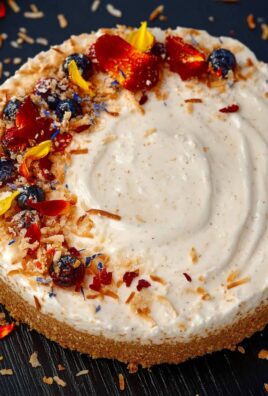
- About 15 minutes before serving, remove the cake from the freezer. Lift it out of the pan using the plastic wrap. Invert onto a serving plate, peel off the plastic wrap, and decorate with whipped cream and berries.
- Slice and serve immediately.
Notes
- For easier slicing, dip your knife in warm water between each cut.
- If you don’t have an ice cream maker, you can use store-bought ice cream. Let it soften slightly before layering.
- Feel free to substitute your favorite flavors of ice cream and cake.
- Garnish with fresh berries or whipped cream for an extra festive touch.
“`


Leave a Comment