
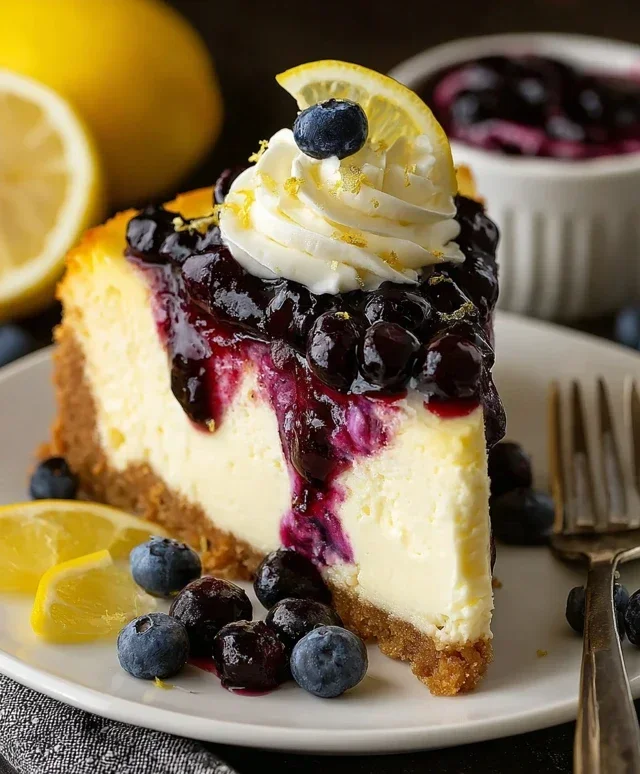
Lemon Blueberry Cheesecake is, in my humble opinion, the absolute pinnacle of dessert perfection. It’s a symphony of bright, zesty citrus dancing with plump, sweet blueberries, all cradled in a velvety smooth, creamy cheesecake base. Have you ever experienced that moment when a dessert just hits all the right notes? That’s what this Lemon Blueberry Cheesecake does. It’s the perfect balance of tart and sweet, rich and refreshing, making it a guaranteed crowd-pleaser that never fails to impress. People adore it because it’s sophisticated enough for a special occasion yet comforting enough for a weeknight treat. What truly sets this Lemon Blueberry Cheesecake apart is the vibrant burst of fresh blueberries cutting through the luscious creaminess, while the lemon zest awakens your palate with every single bite.

Lemon Blueberry Cheesecake
There’s something truly magical about a creamy, tangy cheesecake studded with bursts of sweet blueberries and brightened by a zesty lemon kick. This Lemon Blueberry Cheesecake is my absolute favorite way to combine these classic flavors into a dessert that’s both elegant enough for a special occasion and comforting enough for a weeknight treat. The process might seem a little daunting at first, but I promise, with a few key steps and a little patience, you’ll be rewarded with a show-stopping dessert that will have everyone asking for seconds.
Let’s get started by gathering everything we need. Precision is key in cheesecake making, so make sure you have all your ingredients measured out before you begin extract. The ingredients are listed below, and I’ve tried to be as specific as possible. Don’t worry if you don’t have an exact substitute for every single item; most of the time, a small variation won’t ruin the magic!
Ingredients:
Preparing the Crust
The foundation of any great cheesecake is a sturdy, flavorful crust. This step is surprisingly simple and sets the stage for the creamy filling to come.
1. Make the Crust: In a medium bowl, combine the grabeef ham cracker crum extractbs, melted butter, and 39g sugar. Stir until the crum extractbs are evenly moistened. Press this mixture firmly into the bottom and about an inch up the sides of a 9-inch springform pan. I like to use the bottom of a glass or a measuring cup to get a nice, even layer. This compact crust will prevent the cheesecake from sticking and provide a delightful crunch. Once pressed, pop the crust into the freezer for about 15-20 minutes while you prepare the filling. This chilling step helps the crust set up and hold its shape during baking.
Creating the Creamy Filling
This is where the magic really happens. The key to a silky smooth cheesecake is gentle mixing and ensuring all your ingredients are at room temperature.
2. Mix the Cream Cheese Base: In a large bowl, beat the room-temperature cream cheese with an electric mixer on medium speed until it’s completely smooth and creamy, with no lumps. This might take a couple of minutes. Gradually add the 207g sugar and the all-purpose flour, continuing to beat until well combined and smooth. Don’t overmix at this stage, as excessive air incorporated now can lead to cracks later. Next, add the room-temperature sour cream, lemon juice, and lemon zest. Beat on low speed just until everything is incorporated. Scrape down the sides of the bowl as needed to ensure everything is mixed in evenly.
3. Incorporate the Eggs: Add the room-temperature eggs and egg yolks one at a time, beating on low speed after each addition just until the yolk disappears into the batter. Overbeating after adding the eggs is a common mistake that can cause your cheesecake to crack. The batter should be smooth and slightly thickened, with a beautiful pnon-alcoholic ale yellow hue.
Assembling and Baking
Now it’s time to bring it all together and bake this beauty to perfection. The water bath is a crucial technique for achieving a evenly baked, crack-free cheesecake.
4. Prepare the Water Bath and Bake: Preheat your oven to 325°F (160°C). Take your chilled crust out of the freezer. Pour the cream cheese filling over the crust and spread it evenly. Now, for the water bath: Wrap the bottom of your springform pan tightly with several layers of heavy-duty aluminum foil to prevent any water from seeping in. Place the foil-wrapped springform pan inside a larger roasting pan. Carefully pour hot water into the roasting pan, so it comes about halfway up the sides of the springform pan. This gentle, moist environment ensures that the cheesecake bakes slowly and evenly, preventing those dreaded cracks. Carefully place the entire setup into the preheated oven. Bake for 60-75 minutes, or until the edges of the cheesecake are set but the center is still slightly jiggly. It will continue to set as it cools.
Making the Blueberry Swirl
A burst of blueberries adds a beautiful visual appeal and a delightful counterpoint to the rich cheesecake.
5. Prepare the Blueberry Topping and Finish Baking: While the cheesecake is baking, prepare the blueberry topping. In a small saucepan, combine the 1 1/2 cups of blueberries, 52g sugar, cornstarch, and water. Cook over medium heat, stirring constantly, until the mixture thickens and the blueberries start to break down slightly, creating a jammy consistency. This usually takes about 5-8 minutes. Once the cheesecake has baked for its initial time and the center is still jiggly, remove it from the oven (leave it in the water bath). Carefully spoon dollops of the warm blueberry mixture over the top of the cheesecake. You can use a knife or skewer to gently swirl the blueberry mixture into the cheesecake batter for a beautiful marbled effect. Return the cheesecake to the oven and bake for another 10-15 minutes, or until the filling is mostly set but still has a slight wobble in the very center.
Cooling and Chilling
Patience is a virtue when it comes to cheesecake, and this final stage is just as important as the baking.
Once the cheesecake is done baking, turn off the oven and let the cheesecake sit in the oven with the door slightly ajar for about an hour. This slow cooling process further prevents cracks. After the hour, carefully remove the springform pan from the water bath and let the cheesecake cool completely on a wire rack at room temperature. Once cooled, cover it loosely with plastic wrap and refrigerate for at least 6 hours, but preferably overnight. This chilling time is essential for the cheesecake to fully set and develop its rich flavor and creamy texture. When ready to serve, run a thin knife around the edge of the pan before releasing the springform side. Garnish with a few fresh blueberries and a sprig of mint if desired. Enjoy this delightful Lemon Blueberry Cheesecake!
Conclusion:
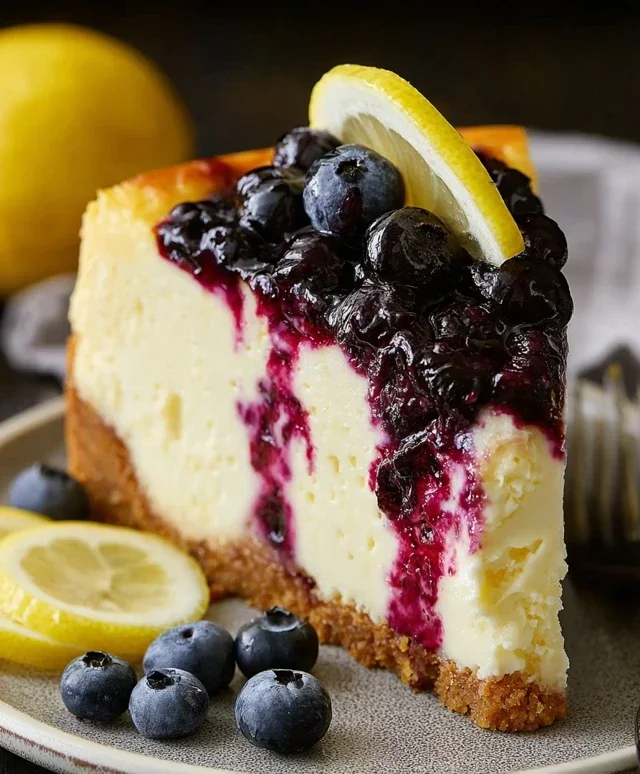
There you have it – a truly delightful Lemon Blueberry Cheesecake that’s sure to impress! This recipe strikes a perfect balance between creamy, tangy lemon and sweet, bursting blueberries, all nestled on a buttery grabeef ham cracker crust. It’s a dessert that’s elegant enough for special occasions yet surprisingly approachable for a weekend treat. I’ve found it’s always a crowd-pleaser, bringin extractg smiles to everyone’s faces with its vibrant flavors and beautiful presentation.
Serve this gorgeous cheesecake chilled, perhaps with a dollop of fresh whipped cream or a scattering of extra blueberries. For a refreshing twist, consider adding a lemon zest ribbon as a garnish. If you’re feeling adventurous, try incorporating a swirl of blueberry jam into the batter before baking for an even more intense berry flavor. Don’t hesitate to experiment! I truly encourage you to give this Lemon Blueberry Cheesecake a try – I promise you won’t be disappointed!
Frequently Asked Questions:
Can I make this cheesecake ahead of time?
Absolutely! Lemon Blueberry Cheesecake is best made a day in advance. This allows the flavors to meld beautifully and ensures the cheesecake has ample time to set properly. Store it covered in the refrigerator.
What if I don’t have grabeef ham crackers for the crust?
No worries! You can substitute with other crum extractbly cookies like digestive biscuits, shortbread, or even vanilla wafers. Just ensure you have the same amount of crum extractbs.
How do I prevent my cheesecake from cracking?
A water bath is your best friend for preventing cracks! By baking the cheesecake in a bain-marie, you create a humid environment that helps the cheesecake bake evenly and prevents the surface from drying out too quickly, which is a common cause of cracking. Also, avoid over-mixing the batter and cooling it down too rapidly after baking.
Lemon Blueberry Cheesecake
A creamy and tangy lemon cheesecake bursting with fresh blueberries, all on a buttery graham cracker crust.
Ingredients
-
302g graham cracker crumbs
-
140g salted butter, melted
-
39g sugar
-
678g cream cheese, room temperature
-
207g sugar
-
24g all-purpose flour
-
173g sour cream
-
90ml lemon juice
-
2 tbsp lemon zest
-
3 large eggs, room temperature
-
2 large egg yolks, room temperature
-
1 1/2 cups blueberries
-
52g sugar
-
1 tbsp cornstarch
-
2 tsp water
Instructions
-
Step 1
Preheat oven to 325°F (160°C). Combine graham cracker crumbs, 39g sugar, and melted butter. Press firmly into the bottom of a 9-inch springform pan. -
Step 2
In a large bowl, beat cream cheese until smooth. Gradually beat in 207g sugar and flour until well combined. -
Step 3
Stir in sour cream, lemon juice, and lemon zest. Add eggs and egg yolks one at a time, beating until just incorporated after each addition. -
Step 4
Pour half of the cream cheese mixture over the crust. Sprinkle half of the blueberries over the filling. Pour remaining cream cheese mixture on top, then scatter remaining blueberries. -
Step 5
Bake for 60 minutes, or until the center is almost set. Turn off the oven, leaving the door ajar, and let the cheesecake cool in the oven for 1 hour. -
Step 6
While cheesecake cools, combine blueberries, 52g sugar, cornstarch, and water in a small saucepan. Cook over medium heat until thickened. Let cool. -
Step 7
Chill the cheesecake in the refrigerator for at least 2 hours before serving. Drizzle with the cooled blueberry topping.
Important Information
Nutrition Facts (Per Serving)
It is important to consider this information as approximate and not to use it as definitive health advice.
Allergy Information
Please check ingredients for potential allergens and consult a health professional if in doubt.

Leave a Comment