
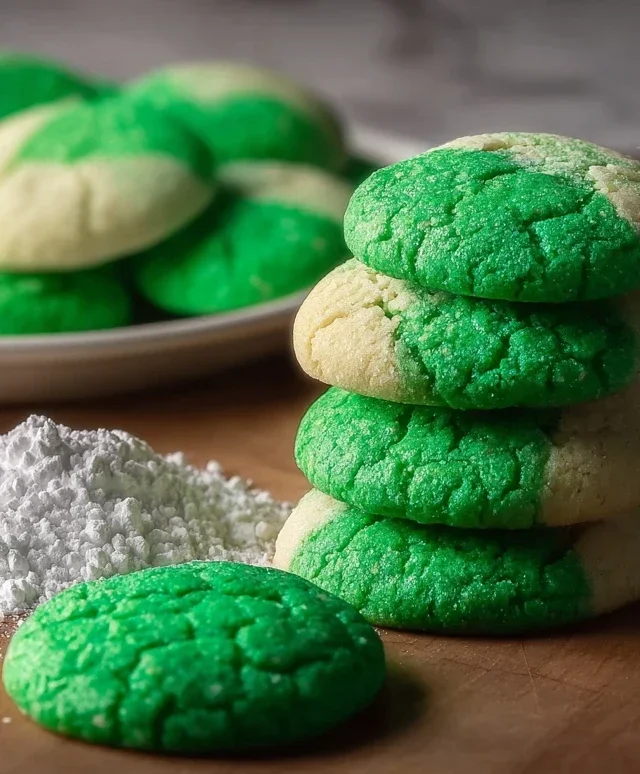
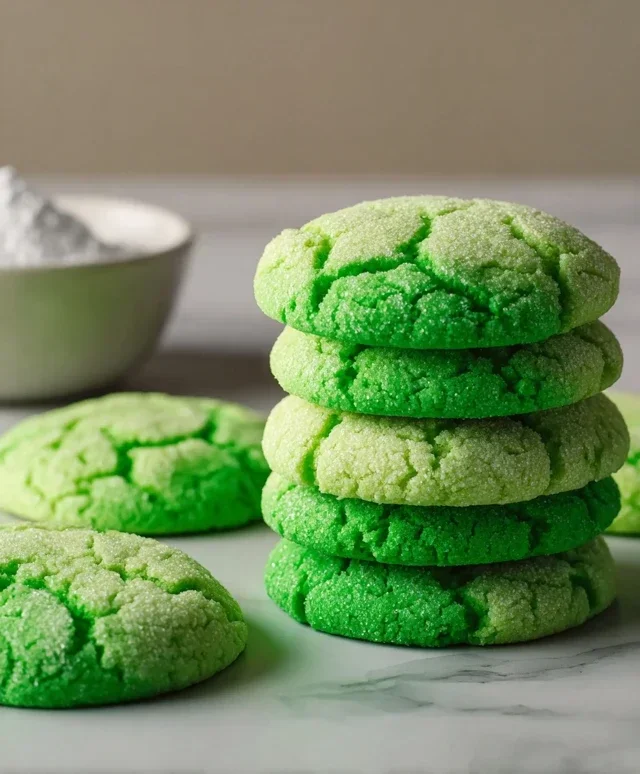
St. Patrick’s Day desserts are a delightful way to embrace the spirit of the Emerald Isle, and honestly, who can resist a little bit of festive sweetness? We all love a good reason to indulge, and this holiday provides the perfect excuse to whip up something truly special. From vibrant green hues to the comforting flavors of Irish cream and chocolate, these treats are more than just desserts; they’re edible celebrations. What makes St. Patrick’s Day desserts so magical is their ability to bring joy and a touch of whimsy to any gathering, whether it’s a family meal or a party with friends. These recipes are designed to be both impressive and approachable, ensuring everyone can add a little luck of the Irish to their table. Get ready to discover some of our absolute favorite ways to end your St. Paddy’s Day feast on a high note!

St. Patrick’s Day Desserts
Hello bakers and festive food lovers! St. Patrick’s Day is just around the corner, and what better way to celebrate the spirit of Ireland than with some delicious, green-infused treats? This year, let’s skip the usual suspects and dive into some delightful desserts that are as fun to make as they are to eat. From rich chocolate cakes with a hint of mint to vibrant green parfaits, we’ve got a collection of recipes that will add a touch of magic and a whole lot of flavor to your St. Patrick’s Day celebrations.
We’ll be focusing on a delightful Mint Chocolate Chip Cake with Cream Cheese Frosting. This cake is a classic for a reason – the refreshing mint perfectly complements the deep, rich chocolate, and the creamy frosting ties it all together beautifully. It’s elegant enough for a party but simple enough for a weeknight treat. Get ready to impress your friends and family with a dessert that’s truly lucky!
Ingredients:
Mint Chocolate Chip Cake: The Baking Process
This cake comes together with a few simple steps, and the secret to its incredible moisture and flavor lies in the combination of buttermilk and hot coffee. Don’t be alarmed by the coffee; it doesn’t make the cake taste like coffee, but rather it enhances the chocolate flavor and ensures a super moist crum extractb.
Step 1: Prepare Your Dry Ingredients and Wet Ingredients
First things first, let’s get our oven preheated to 350°F (175°C). Grease and flour two 9-inch round cake pans, or line them with parchment paper for extra insurance against sticking. In a large mixing bowl, whisk together the all-purpose flour, granulated sugar, unsweetened cocoa powder, baking soda, baking powder, and salt. Make sure everything is thoroughly combined so you don’t end up with pockets of leavening agents. In a separate medium bowl, whisk together the large eggs, buttermilk, vegetable oil, vanilla extract, and peppermint extract. It’s important to have your wet and dry ingredients ready to go before you start combining them to ensure a smooth batter.
Step 2: Combine Wet and Dry Ingredients and Add Hot Coffee
Now, pour the wet ingredients into the bowl with the dry ingredients. Mix on low speed with an electric mixer (or by hand with a whisk) until just combined. Be careful not to overmix at this stage, as it can develop the gluten in the flour and lead to a tougher cake. The batter will be quite thick. Now for the magic ingredient: carefully pour in the hot brewed coffee. Mix again on low speed until the batter is smooth and pourable. The hot coffee not only deepens the chocolate flavor but also helps to “bloom” the cocoa powder, releasing its full potential. This is a crucial step for achieving a moist and rich chocolate cake.
Step 3: Fold in the Chocolate Chips and Bake
Gently fold in the semi-sweet chocolate chips. You want them distributed throughout the batter, but don’t overmix. Divide the batter evenly between your prepared cake pans. Tap the pans gently on the counter a few times to release any large air bubbles. Place the pans in the preheated oven and bake for 30-35 minutes, or until a wooden skewer inserted into the center of the cakes comes out clean. The aroma that will fill your kitchen during this time is simply divine – a perfect blend of chocolate and mint!
Step 4: Cool the Cakes Completely
Once baked, remove the cakes from the oven and let them cool in their pans for about 10-15 minutes. This allows them to firm up slightly before you attempt to remove them. Then, carefully invert the cakes onto a wire rack to cool completely. It is absolutely essential that the cakes are completely cool before you frost them. If you try to frost warm cakes, the frosting will melt into a messy puddle, and all your hard work will be for naught! Be patient; this step is worth it.
Step 5: Prepare and Apply the Cream Cheese Frosting
While the cakes are cooling, let’s make our luscious cream cheese frosting. In a large bowl, beat the softened cream cheese and softened unsalted butter together until smooth and creamy. Gradually add the powdered sugar, about a cup at a time, beating until well combined and smooth after each addition. Stir in the vanilla extract. If the frosting seems too thick, you can add 1-2 tablespoons of milk, a little at a time, until it reaches your desired spreading consistency. For a festive St. Patrick’s Day touch, add a few drops of green food coloring and mix until you achieve a vibrant green hue. Now, once your cakes are entirely cool, place one cake layer on your serving plate. Spread a generous layer of frosting over the top. Carefully place the second cake layer on top. Then, frost the top and sides of the entire cake. For an extra touch of St. Paddy’s Day cheer, garnish with additional chocolate chips or festive green sprinkles.
Enjoy this delightful Mint Chocolate Chip Cake, and have a wonderfully happy and delicious St. Patrick’s Day!
Conclusion:
I hope you’ve had as much fun exploring these delightful St. Patrick’s Day desserts as I have! These recipes offer a fantastic way to inject some festive spirit and deliciousness into your celebrations. From the vibrant green hues to the comforting flavors, each dessert is designed to be a showstopper. Whether you’re a seasoned baker or just starting out, these recipes are approachable and guaranteed to impress your friends and family. Don’t be afraid to get creative with your decorations – a little extra sbeef hamrock sprinkle or a dollop of whipped cream can go a long way!
Serve these treats at your St. Patrick’s Day party, bring them to a potluck, or simply enjoy them as a special indulgence throughout the week. They pair wonderfully with a hot cup of coffee, a glass of milk, or even a festive green beverage. Consider adding different extracts or spices to the base recipes for unique flavor twists. For example, a hint of mint could elevate a chocolate creation, or a touch of citrus could brighten up a vanilla cake. The possibilities are truly endless, and the joy of sharing these homemade goodies is immeasurable. I encourage you to dive in and try at least one of these wonderful St. Patrick’s Day dessert recipes – you won’t be disappointed!
Frequently Asked Questions:
Can I make these desserts ahead of time?
Absolutely! Many of these St. Patrick’s Day desserts can be prepared a day or two in advance. Cakes and cookies often store well in airtight containers at room temperature, while cream-based desserts might be best chilled. Always check individual recipe notes for specific storage recommendations.
What if I don’t have green food coloring?
Don’t worry! You can achieve beautiful green colors naturally. Spinach puree works wonders for a subtle green in baked goods without affecting the taste. Matcha powder is another excellent option for a vibrant green and a lovely earthy flavor, especially in chocolate or vanilla desserts. Fresh mint can also add a hint of green and a refreshing taste.
Are these recipes suitable for children to help with?
Yes, many of these recipes are very child-friendly! Activities like mixing ingredients, decorating cookies, or shaping dough are perfect for little hands. Always supervise children in the kitchen, especially around ovens and sharp utensils.
St. Patrick’s Day Desserts
A collection of festive and delicious desserts perfect for celebrating St. Patrick’s Day, featuring vibrant green hues and classic flavors.
Ingredients
-
1 cup all-purpose flour
-
1/2 cup granulated sugar
-
1/4 cup butter, softened
-
1 egg
-
1 teaspoon vanilla extract
-
Green food coloring
-
1/2 cup powdered sugar
-
2 tablespoons milk
Instructions
-
Step 1
Preheat oven to 350°F (175°C). Grease and flour a baking sheet. -
Step 2
In a medium bowl, cream together the softened butter and granulated sugar until light and fluffy. -
Step 3
Beat in the egg and vanilla extract. -
Step 4
Gradually add the all-purpose flour, mixing until just combined. Stir in a few drops of green food coloring until desired shade is achieved. -
Step 5
Drop rounded spoonfuls of dough onto the prepared baking sheet. -
Step 6
Bake for 10-12 minutes, or until edges are lightly golden. -
Step 7
While cookies cool, whisk together powdered sugar and milk to create a glaze. Add more milk if needed for desired consistency. -
Step 8
Drizzle the glaze over the cooled cookies.
Important Information
Nutrition Facts (Per Serving)
It is important to consider this information as approximate and not to use it as definitive health advice.
Allergy Information
Please check ingredients for potential allergens and consult a health professional if in doubt.


Leave a Comment