
Toad in the Hole: A quirky name for a dish that’s anything but! Have you ever craved a meal that’s both comforting and incredibly satisfying, a true taste of British culinary heritage? Then look no further. This classic dish, featuring sausages nestled in a fluffy Yorkshire pudding batter, is guaranteed to warm you from the inside out.
The origins of Toad in the Hole are somewhat shrouded in mystery, with theories ranging from resourceful cooks using leftover sausages to a playful resemblance to toads peeking out of holes. Regardless of its exact beginnings, this dish has been a staple in British homes for generations, offering a hearty and affordable meal for families.
What makes Toad in the Hole so beloved? It’s the delightful combination of textures and flavors. The crispy, golden-brown Yorkshire pudding provides a light and airy contrast to the savory, juicy sausages. The dish is incredibly versatile, easily adaptable to different sausage types and vegetable accompaniments. Plus, it’s a one-pan wonder, making cleanup a breeze! So, gather your ingredients, preheat your oven, and let’s embark on a culinary journey to create the perfect Toad in the Hole a dish that’s sure to become a family favorite.

Ingredients:
- 1 cup (2 sticks) unsalted butter, softened
- 1 cup granulated sugar
- 1 cup packed light brown sugar
- 2 large eggs
- 2 teaspoons vanilla extract
- 1/2 cup extra virgin olive oil, fruity variety
- 3 cups all-purpose flour
- 1 teaspoon baking soda
- 1 teaspoon salt
- 2 cups chocolate chips (semi-sweet or dark, your preference!)
- Optional: Flaky sea salt, for sprinkling
Preparing the Dough:
- Cream the Butter and Sugars: In a large bowl, or the bowl of your stand mixer fitted with the paddle attachment, cream together the softened butter, granulated sugar, and brown sugar until light and fluffy. This usually takes about 3-5 minutes. Don’t rush this step; it’s crucial for creating a tender cookie. Scrape down the sides of the bowl occasionally to ensure everything is evenly incorporated.
- Incorporate the Wet Ingredients: Beat in the eggs one at a time, mixing well after each addition. Then, stir in the vanilla extract and the olive oil. The mixture might look slightly curdled at this point, but don’t worry, it will come together when you add the dry ingredients. The olive oil adds a wonderful depth of flavor and a slightly chewy texture to the cookies.
- Combine the Dry Ingredients: In a separate medium bowl, whisk together the all-purpose flour, baking soda, and salt. Whisking ensures that the baking soda and salt are evenly distributed throughout the flour, which is important for proper leavening and flavor.
- Gradually Add Dry Ingredients to Wet Ingredients: Gradually add the dry ingredients to the wet ingredients, mixing on low speed until just combined. Be careful not to overmix! Overmixing develops the gluten in the flour, which can result in tough cookies. Stop mixing as soon as you see the flour disappear.
- Fold in the Chocolate Chips: Gently fold in the chocolate chips until they are evenly distributed throughout the dough. I like to use a rubber spatula for this step to avoid overmixing.
- Chill the Dough (Important!): Cover the bowl with plastic wrap and chill the dough in the refrigerator for at least 30 minutes, or up to 24 hours. Chilling the dough allows the flavors to meld together and prevents the cookies from spreading too thin during baking. If you chill the dough for longer than an hour, you might need to let it sit at room temperature for a few minutes before scooping.
Baking the Cookies:
- Preheat the Oven: Preheat your oven to 375°F (190°C). Line baking sheets with parchment paper or silicone baking mats. Parchment paper helps prevent the cookies from sticking and makes cleanup a breeze.
- Scoop the Dough: Use a cookie scoop or a spoon to drop rounded tablespoons of dough onto the prepared baking sheets, leaving about 2 inches between each cookie. I prefer using a cookie scoop for uniform cookies, but a spoon works just fine too.
- Optional: Sprinkle with Sea Salt: If desired, sprinkle the tops of the cookies with flaky sea salt before baking. The salt enhances the sweetness of the chocolate and adds a delightful salty-sweet contrast.
- Bake the Cookies: Bake for 9-11 minutes, or until the edges are golden brown and the centers are still slightly soft. The baking time will vary depending on your oven, so keep a close eye on them. Don’t overbake the cookies, as they will continue to bake slightly as they cool on the baking sheet.
- Cool the Cookies: Remove the baking sheets from the oven and let the cookies cool on the baking sheets for a few minutes before transferring them to a wire rack to cool completely. This allows the cookies to firm up slightly and prevents them from breaking when you move them.
Tips and Variations:
- Olive Oil Choice: The type of olive oil you use will significantly impact the flavor of the cookies. I recommend using a fruity extra virgin olive oil for the best results. Avoid using a very strong or peppery olive oil, as it might overpower the other flavors.
- Chocolate Chip Variations: Feel free to experiment with different types of chocolate chips. Milk chocolate, dark chocolate, white chocolate, or even a combination of different chocolates would all be delicious. You can also add other mix-ins, such as chopped nuts, dried fruit, or sprinkles.
- Nutty Goodness: Add 1 cup of chopped walnuts, pecans, or almonds to the dough for a nutty twist. Toasting the nuts before adding them will enhance their flavor.
- Citrus Zest: Add the zest of one orange or lemon to the dough for a bright and citrusy flavor.
- Espresso Powder: Add 1 teaspoon of espresso powder to the dry ingredients for a mocha-flavored cookie.
- Make Ahead: The cookie dough can be made ahead of time and stored in the refrigerator for up to 24 hours. You can also freeze the dough for longer storage. To freeze, scoop the dough into individual balls and place them on a baking sheet lined with parchment paper. Freeze until solid, then transfer the frozen dough balls to a freezer bag. When ready to bake, bake from frozen, adding a few extra minutes to the baking time.
- Adjusting Sweetness: If you prefer a less sweet cookie, you can reduce the amount of sugar slightly. Start by reducing each sugar by 1/4 cup.
- High Altitude Baking: If you live at a high altitude, you may need to adjust the recipe slightly. Try reducing the amount of baking soda by 1/4 teaspoon and adding 1 tablespoon of flour. You may also need to increase the baking time slightly.
- Storage: Store the cooled cookies in an airtight container at room temperature for up to 3 days. They are best enjoyed fresh!
Troubleshooting:
- Cookies are spreading too thin: This could be due to several factors, including using softened butter that is too warm, not chilling the dough long enough, or using too much sugar. Make sure your butter is softened but still cool to the touch, chill the dough for at least 30 minutes, and measure the sugar accurately.
- Cookies are too dry: This could be due to overbaking or using too much flour. Make sure you are not overbaking the cookies and measure the flour accurately. Spoon the flour into the measuring cup and level it off with a knife, rather than scooping it directly from the bag.
- Cookies are too hard: This could be due to overmixing the dough or using too much flour. Be careful not to overmix the dough and measure the flour accurately.
- Cookies are not browning: This could be due to using an oven that is not hot enough or using baking sheets that are too dark. Make sure your oven is properly preheated and use light-colored baking sheets.
Enjoy your delicious olive oil chocolate chip cookies! I hope you love them as much as I do. They’re a unique and flavorful twist on a classic treat.
Conclusion:
So, there you have it! These olive oil chocolate chip cookies are more than just a recipe; they’re an experience. From the subtle fruity notes of the olive oil to the satisfyingly chewy texture and the bursts of melted chocolate, every bite is a little piece of heaven. I truly believe this is a must-try recipe for anyone who loves baking, experimenting with flavors, or simply enjoys a really, really good cookie.
Why is it a must-try? Well, beyond the incredible taste, it’s surprisingly simple to make. You probably already have most of the ingredients in your pantry. Plus, using olive oil instead of butter adds a unique depth of flavor and a healthier twist to a classic treat. It’s a conversation starter, a crowd-pleaser, and a guaranteed way to impress your friends and family. Trust me, once you try these, you’ll never look at chocolate chip cookies the same way again.
But the fun doesn’t stop there! Feel free to get creative with your serving suggestions and variations. These cookies are absolutely divine served warm with a scoop of vanilla ice cream. The contrast between the warm, gooey cookie and the cold, creamy ice cream is simply irresistible. You could also crumble them over a bowl of yogurt for a delicious and slightly decadent breakfast or snack. Or, for a truly indulgent treat, try sandwiching a scoop of your favorite ice cream between two cookies to make an ice cream sandwich.
Looking for variations? The possibilities are endless! Try adding a sprinkle of sea salt on top before baking to enhance the sweetness and bring out the olive oil flavor even more. You could also experiment with different types of chocolate chips dark chocolate, white chocolate, or even a mix of both. For a nutty twist, add some chopped walnuts or pecans to the dough. If you’re feeling adventurous, try incorporating a pinch of cinnamon or cardamom for a warm and spicy flavor. And for those who love a little citrus, a teaspoon of orange or lemon zest can add a bright and refreshing touch.
Don’t be afraid to experiment and make these cookies your own! That’s the beauty of baking it’s all about creativity and personal expression. I’ve given you the foundation, now it’s your turn to build upon it and create your own masterpiece.
I’m so excited for you to try this recipe and experience the magic of olive oil chocolate chip cookies for yourself. I have no doubt that you’ll love them as much as I do. So, grab your apron, preheat your oven, and get ready to bake some seriously delicious cookies!
And now, for the most important part: I want to hear about your experience! Did you try the recipe? What variations did you make? How did they turn out? Share your photos and stories in the comments below. I can’t wait to see what you create! Happy baking!
Remember to tag me in your social media posts so I can see your creations! Let’s spread the love for these amazing olive oil chocolate chip cookies and inspire others to try them too. I’m confident that this recipe will become a staple in your baking repertoire, a go-to treat for any occasion. So go ahead, give it a try you won’t regret it!
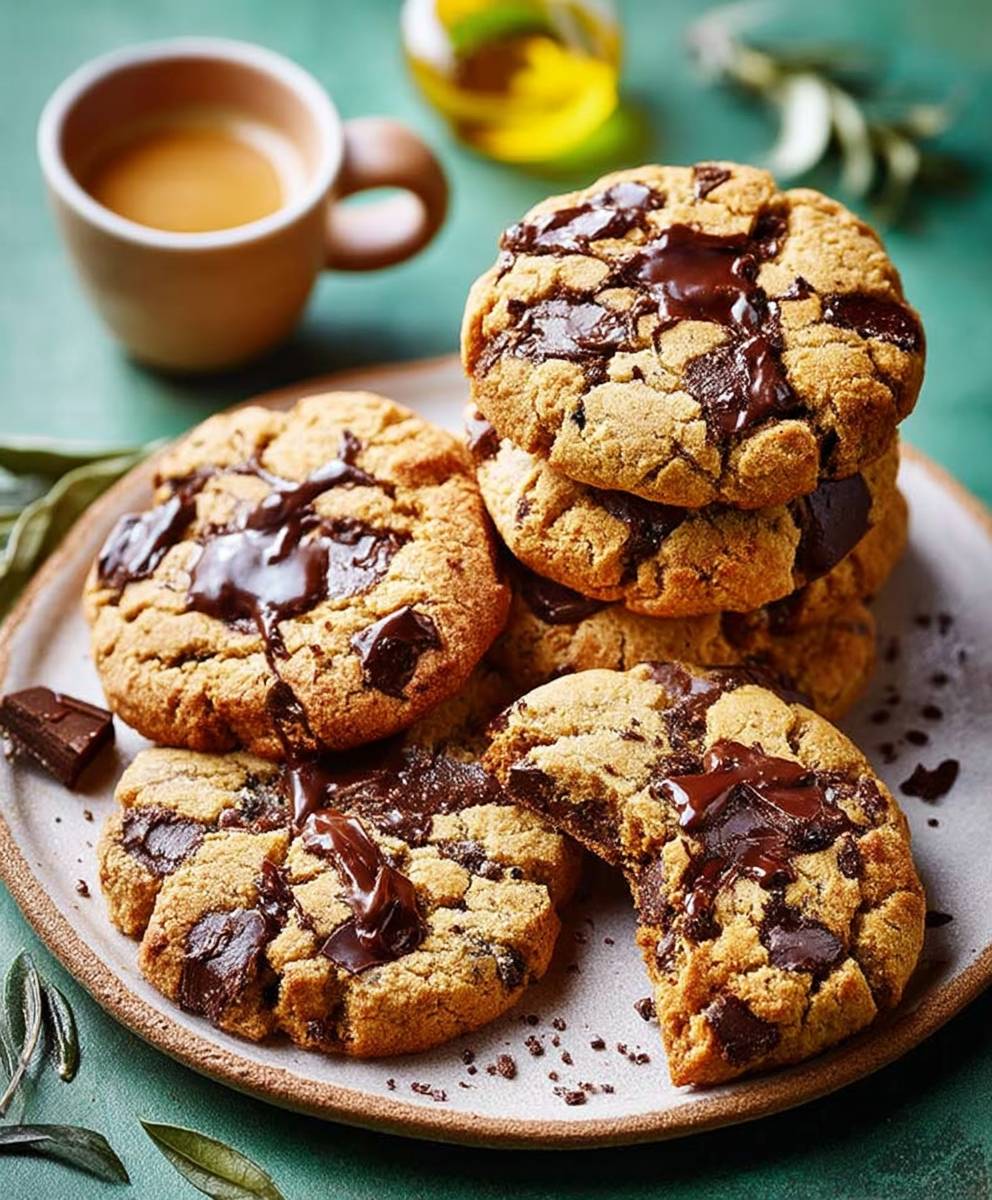
Olive Oil Chocolate Chip Cookies: A Delicious & Healthy Twist
Chewy, flavorful chocolate chip cookies made with olive oil for a unique, nutty taste and soft texture.
Ingredients
- 1/2 cup olive oil
- 1 cup packed brown sugar
- 1/2 cup granulated sugar
- 2 large eggs
- 1 teaspoon vanilla extract
- 2 1/4 cups all-purpose flour
- 1 teaspoon baking soda
- 1 teaspoon salt
- 1 cup chocolate chips
Instructions
- Preheat oven to 350°F (175°C).
- In a large bowl, cream together the butter, brown sugar, and white sugar until smooth.
- Beat in the eggs one at a time, then stir in the vanilla.
- Dissolve baking soda in hot water. Add to batter along with salt.
- Stir in flour, chocolate chips, and walnuts.
- Drop by large spoonfuls onto ungreased cookie sheets.
- Bake for 10-12 minutes, or until edges are nicely browned.
- Cool on baking sheets for a few minutes before transferring to wire racks to cool completely.
Notes
- For a more intense olive oil flavor, use extra-virgin olive oil.
- The dough can be made ahead and stored in the refrigerator for up to 3 days.
- For best results, use a kitchen scale to measure the flour.
“`


Leave a Comment