
Pasta Carbonara, a dish so rich and creamy, it’s practically a hug in a bowl! Have you ever craved a meal that’s both comforting and sophisticated, ready in minutes, and bursting with flavor? Then look no further. This isn’t just another pasta recipe; it’s an experience, a journey to the heart of Roman cuisine.
While the exact origins of Pasta Carbonara are debated, many believe it emerged in Rome after World War II, possibly as an adaptation of American troops’ love for bacon and eggs. Some even suggest it was a dish created for charcoal workers (“carbonari” in Italian), hence the name. Regardless of its true beginnings, it has become a beloved staple worldwide.
What makes this dish so irresistible? It’s the perfect marriage of simple ingredients: perfectly cooked pasta, crispy guanciale (or pancetta), creamy egg yolks, sharp Pecorino Romano cheese, and a generous grind of black pepper. The velvety sauce clings to every strand, creating a symphony of textures and tastes that’s both decadent and satisfying. It’s quick enough for a weeknight dinner but elegant enough to impress guests. Trust me, once you master this classic, you’ll find yourself craving it again and again. Let’s get cooking!

Ingredients:
- 12 Chicken Drumsticks (about 3 pounds)
- 2 tablespoons Olive Oil
- 1 teaspoon Paprika
- 1 teaspoon Garlic Powder
- 1 teaspoon Onion Powder
- 1/2 teaspoon Dried Thyme
- 1/2 teaspoon Dried Rosemary
- 1/4 teaspoon Cayenne Pepper (optional, for a little heat)
- 1 teaspoon Salt
- 1/2 teaspoon Black Pepper
- 1 tablespoon Cornstarch (for extra crispy skin)
- 1 tablespoon Lemon Juice (optional, for brightness)
- Fresh Parsley, chopped (for garnish)
Preparing the Chicken:
Okay, let’s get started! First things first, we need to prep our chicken drumsticks. This is a crucial step for ensuring they cook evenly and have that amazing crispy skin we’re after.
- Pat the Drumsticks Dry: This is super important! Use paper towels to thoroughly pat each drumstick dry. Moisture is the enemy of crispy skin. The drier the skin, the better it will crisp up in the oven. Don’t skip this step!
- Trim Excess Skin (Optional): If your drumsticks have any large flaps of excess skin, you can trim them off with kitchen shears. This will help prevent them from burning during baking. I usually just tuck them under the drumstick if they aren’t too big.
- Prepare the Baking Sheet: Line a baking sheet with parchment paper or aluminum foil. This makes cleanup a breeze! You can also use a wire rack placed on the baking sheet. The rack allows air to circulate around the drumsticks, promoting even crisping on all sides. If you use foil, lightly grease it with cooking spray to prevent sticking.
Making the Spice Rub:
Now for the fun part creating our flavorful spice rub! This is where we’ll build layers of deliciousness that will infuse the chicken as it bakes.
- Combine the Spices: In a medium bowl, combine the paprika, garlic powder, onion powder, dried thyme, dried rosemary, cayenne pepper (if using), salt, pepper, and cornstarch. Whisk everything together until well combined. The cornstarch helps to absorb any remaining moisture and contributes to that crispy texture we love.
- Add the Olive Oil and Lemon Juice (Optional): Drizzle the olive oil and lemon juice (if using) over the spice mixture. Stir until it forms a thick paste. The olive oil helps the spices adhere to the chicken and adds richness, while the lemon juice provides a bright, tangy counterpoint to the savory spices.
Coating the Chicken:
Time to get our hands dirty! We’re going to generously coat each drumstick with our spice rub, ensuring every nook and cranny is covered.
- Coat the Drumsticks: Place the drumsticks in the bowl with the spice rub. Using your hands (or tongs, if you prefer), rub the spice mixture all over each drumstick, making sure to coat them evenly on all sides. Really massage the spices into the skin. The more thoroughly you coat them, the more flavorful and crispy they will be.
- Arrange on the Baking Sheet: Place the coated drumsticks on the prepared baking sheet, making sure they are not overcrowded. Leave a little space between each drumstick to allow for proper air circulation. Overcrowding the pan will steam the chicken instead of baking it, resulting in less crispy skin.
Baking the Chicken:
Now for the main event baking our drumsticks to golden-brown perfection! We’ll use a two-temperature method to ensure they’re cooked through and have that irresistible crispy skin.
- Preheat the Oven: Preheat your oven to 400°F (200°C). Make sure your oven is fully preheated before placing the chicken inside. This ensures even cooking and helps the skin crisp up quickly.
- Bake at High Heat: Bake the drumsticks for 30 minutes at 400°F (200°C). This initial high-heat blast helps to render the fat in the skin and start the crisping process.
- Reduce Heat and Continue Baking: Reduce the oven temperature to 375°F (190°C) and continue baking for another 20-30 minutes, or until the internal temperature of the chicken reaches 165°F (74°C). Use a meat thermometer to check the internal temperature. Insert the thermometer into the thickest part of the drumstick, being careful not to touch the bone.
- Optional Broiling for Extra Crispiness: If you want even crispier skin, you can broil the drumsticks for the last few minutes of baking. Keep a close eye on them to prevent burning! Broil for 2-3 minutes per side, or until the skin is golden brown and bubbly.
- Rest Before Serving: Once the drumsticks are cooked through, remove them from the oven and let them rest for 5-10 minutes before serving. This allows the juices to redistribute, resulting in more tender and flavorful chicken.
Serving and Enjoying:
The moment we’ve all been waiting for! It’s time to serve up these delicious, oven-baked chicken drumsticks and enjoy the fruits of our labor.
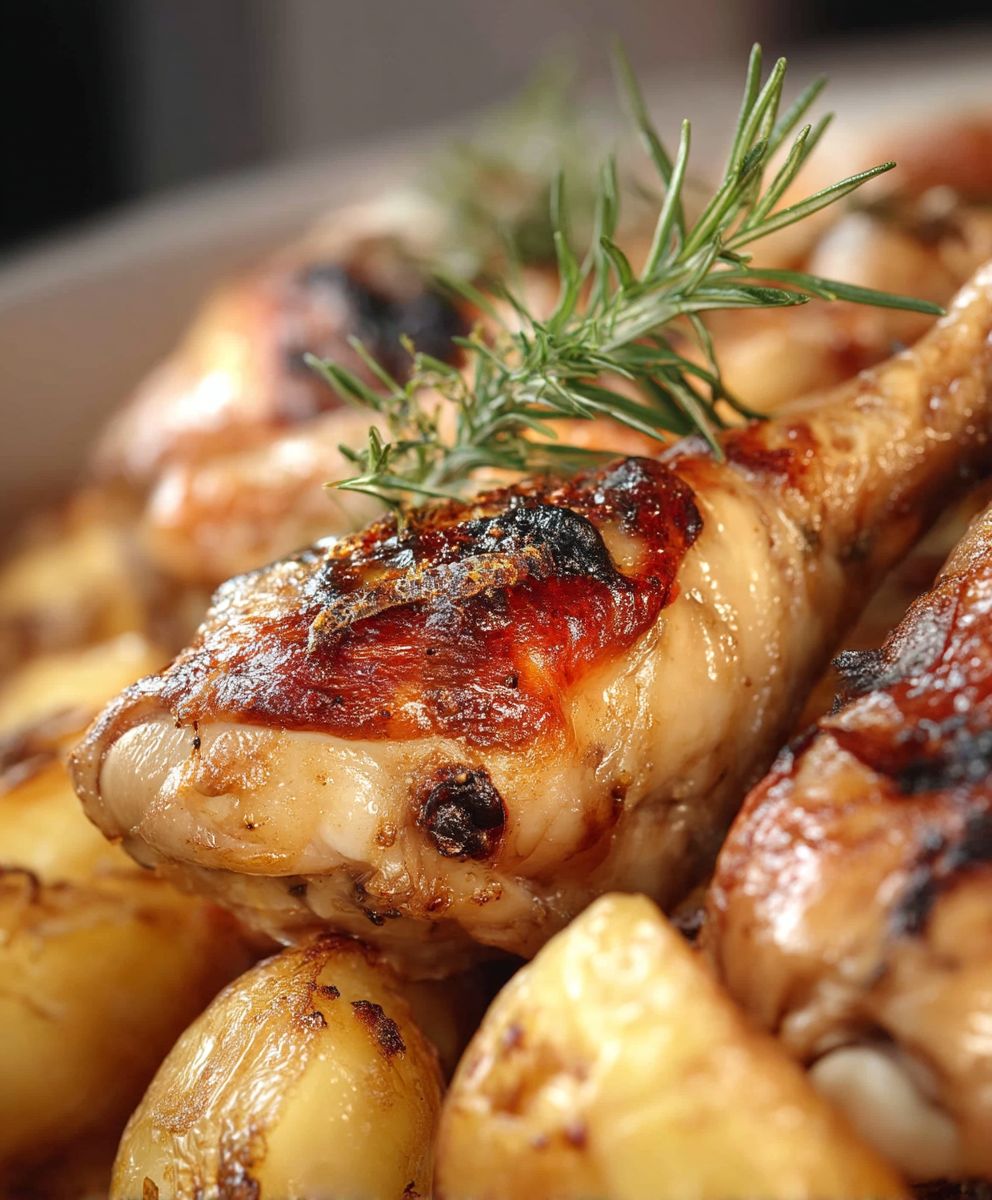
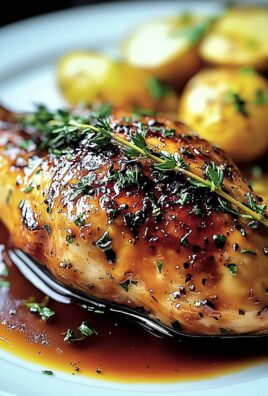
- Garnish and Serve: Sprinkle the drumsticks with fresh chopped parsley for a pop of color and freshness. Serve them immediately while they’re still hot and crispy.
- Pairing Suggestions: These drumsticks are incredibly versatile and pair well with a variety of sides. Consider serving them with mashed potatoes, roasted vegetables, coleslaw, corn on the cob, or a simple salad.
- Storage: Leftover drumsticks can be stored in an airtight container in the refrigerator for up to 3-4 days. Reheat them in the oven or microwave until heated through. You can also enjoy them cold!
Tips for Extra Crispy Skin:
- Dry Brine: For even crispier skin, try dry brining the chicken. Sprinkle the drumsticks with salt (about 1 teaspoon per pound) and let them sit uncovered in the refrigerator for at least 2 hours, or preferably overnight. This draws out moisture from the skin and allows it to dry out, resulting in a super crispy texture when baked.
- Baking Powder: Some people swear by adding a small amount of baking powder to the spice rub. Baking powder helps to create tiny bubbles on the surface of the skin, which promotes crisping. Use about 1 teaspoon of baking powder per pound of chicken.
- Don’t Overcrowd the Pan: As mentioned earlier, overcrowding the baking sheet will steam the chicken instead of baking it. Make sure to leave enough space between each drumstick for proper air circulation.
- Use a Wire Rack: Baking the drumsticks on a wire rack allows air to circulate around all sides, promoting even crisping.
Variations:
- Honey Garlic: For a sweet and savory flavor, brush the drumsticks with a honey garlic glaze during the last 10 minutes of baking. Combine equal parts honey, soy sauce, and minced garlic for a simple and delicious glaze.
- BBQ: Toss the baked drumsticks in your favorite BBQ sauce for a classic BBQ flavor.
- Lemon Herb: Increase the amount of lemon juice and add other fresh herbs like oregano and basil for a bright and flavorful variation.
- Spicy: Add more cayenne pepper or a pinch of red pepper flakes to the spice rub for a spicier kick.
Enjoy your perfectly baked chicken drumsticks!
Conclusion:
This isn’t just another chicken recipe; it’s a gateway to perfectly cooked, unbelievably flavorful oven baked chicken drumsticks that will have everyone at the table asking for seconds. The crispy skin, the juicy meat, and the minimal effort required make this a weeknight dinner champion. Forget complicated recipes with dozens of ingredients this one delivers maximum impact with minimal fuss. I truly believe that once you try this method, you’ll never look at chicken drumsticks the same way again.
Why is this a must-try? Because it’s foolproof! Even if you’re a beginner cook, you can achieve restaurant-quality results with this recipe. The simple steps and readily available ingredients mean you can whip up a batch of these delicious drumsticks any time the craving strikes. Plus, the versatility of the seasoning blend allows you to customize the flavor profile to your liking. Want a spicier kick? Add a pinch of cayenne pepper. Prefer a more savory flavor? Increase the garlic powder and paprika. The possibilities are endless!
But the deliciousness doesn’t stop there. These oven baked chicken drumsticks are incredibly versatile when it comes to serving suggestions. For a classic pairing, serve them alongside creamy mashed potatoes and steamed green beans. Or, for a lighter meal, try them with a fresh salad and a side of roasted vegetables. They’re also fantastic in sandwiches or wraps the next day just shred the chicken and toss it with your favorite sauce.
Looking for variations? Consider marinating the drumsticks before baking for an even more intense flavor. A simple marinade of olive oil, lemon juice, garlic, and herbs works wonders. You could also experiment with different dry rubs, such as a smoky barbecue rub or a spicy Cajun blend. And for an extra crispy skin, try broiling the drumsticks for the last few minutes of cooking, keeping a close eye on them to prevent burning.
Serving Suggestions:
- Classic: Mashed potatoes and green beans
- Light: Fresh salad and roasted vegetables
- Quick: Shredded in sandwiches or wraps
Flavor Variations:
- Marinated: Olive oil, lemon juice, garlic, and herbs
- Dry Rub: Smoky barbecue or spicy Cajun
- Extra Crispy: Broil for the last few minutes
I’m so confident that you’ll love this recipe that I urge you to give it a try. Don’t be intimidated by the thought of cooking chicken this method is incredibly simple and rewarding. And once you’ve mastered the basic recipe, feel free to experiment with different flavors and variations to create your own signature dish.
I can’t wait to hear about your experience! Please, come back and leave a comment below to let me know how your oven baked chicken drumsticks turned out. Share your tips, tricks, and any variations you tried. Did you add a special spice blend? Did you serve them with a unique side dish? I’m always looking for new ideas and inspiration, and I’m sure other readers would love to hear about your culinary adventures as well. Happy cooking!
Oven Baked Chicken Drumsticks: The Crispiest Recipe Ever!
Crispy, flavorful chicken drumsticks baked to perfection in the oven. Easy to prepare and a crowd-pleaser.
Ingredients
- Chicken drumsticks
- Olive oil
- Salt
- Black pepper
- Garlic powder
- Onion powder
- Paprika
- Dried oregano
Instructions
- Preheat oven to 400 degrees F (200 degrees C).
- Line a baking sheet with aluminum foil.
- In a bowl, mix together the olive oil, paprika, garlic powder, onion powder, dried thyme, salt, and pepper.
- Place the chicken drumsticks in the bowl and toss to coat evenly with the spice mixture.
- Arrange the drumsticks on the prepared baking sheet.
- Bake in the preheated oven for 45-50 minutes, or until the chicken is cooked through and the juices run clear when pierced with a fork.
Notes
- For best results, marinate the chicken for at least 2 hours, or preferably overnight.
- Adjust the seasoning according to your preference.
- You can add vegetables like potatoes, carrots, or onions to the baking sheet along with the chicken.
“`
Leave a Comment