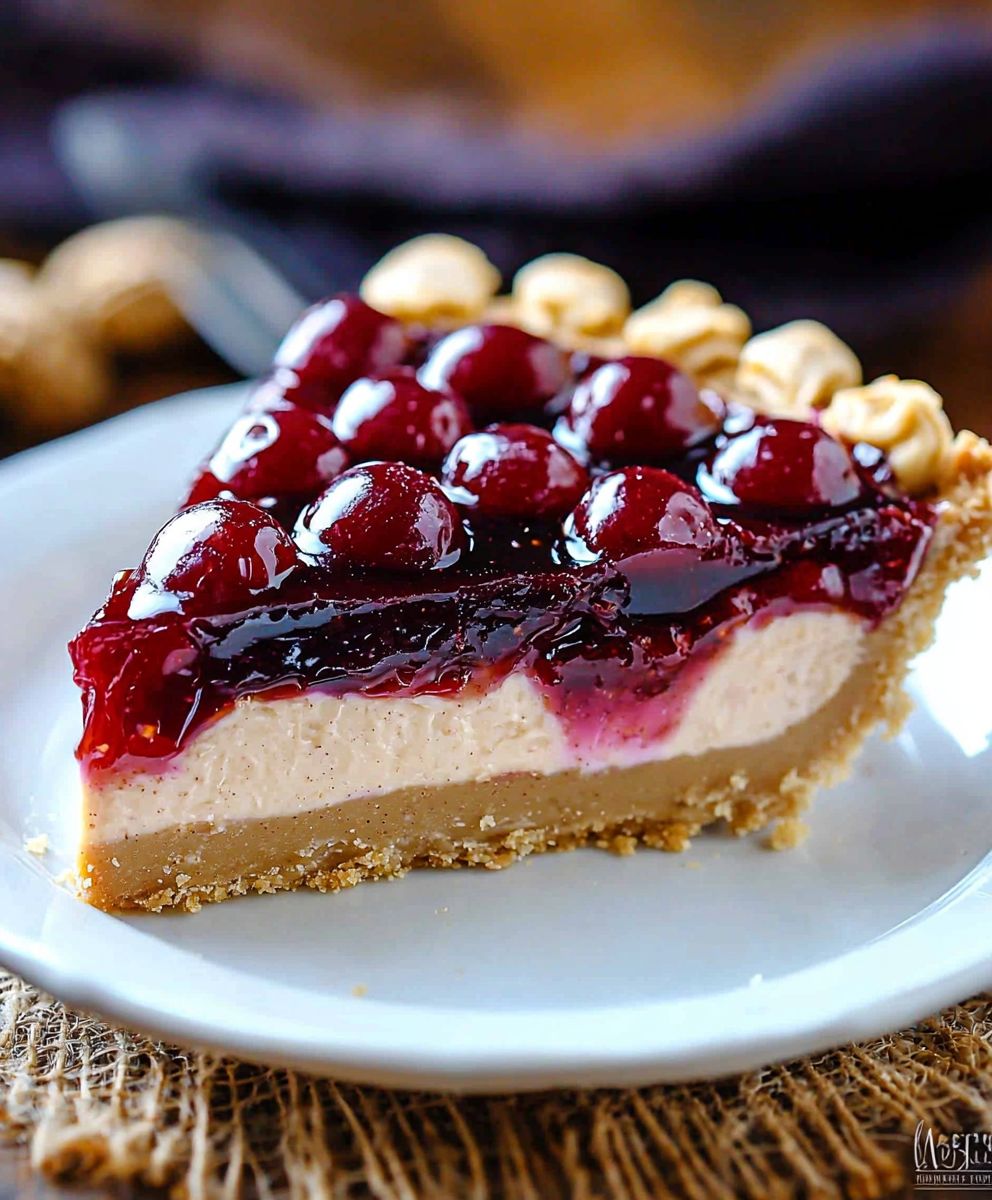
Peanut Butter Jelly Pie: Prepare to have your dessert world rocked! Imagine the nostalgic comfort of a classic PB&J sandwich, elevated to a creamy, dreamy pie that will have everyone begging for seconds. This isn’t just a pie; it’s a trip down memory lane with a sophisticated twist.
While the exact origins of combining peanut butter and jelly are debated, its popularity exploded in the early 20th century, quickly becoming a staple in American households. The combination offered a perfect balance of protein and carbohydrates, making it a convenient and satisfying meal, especially for children. Now, we’re taking that beloved pairing and transforming it into a show-stopping dessert.
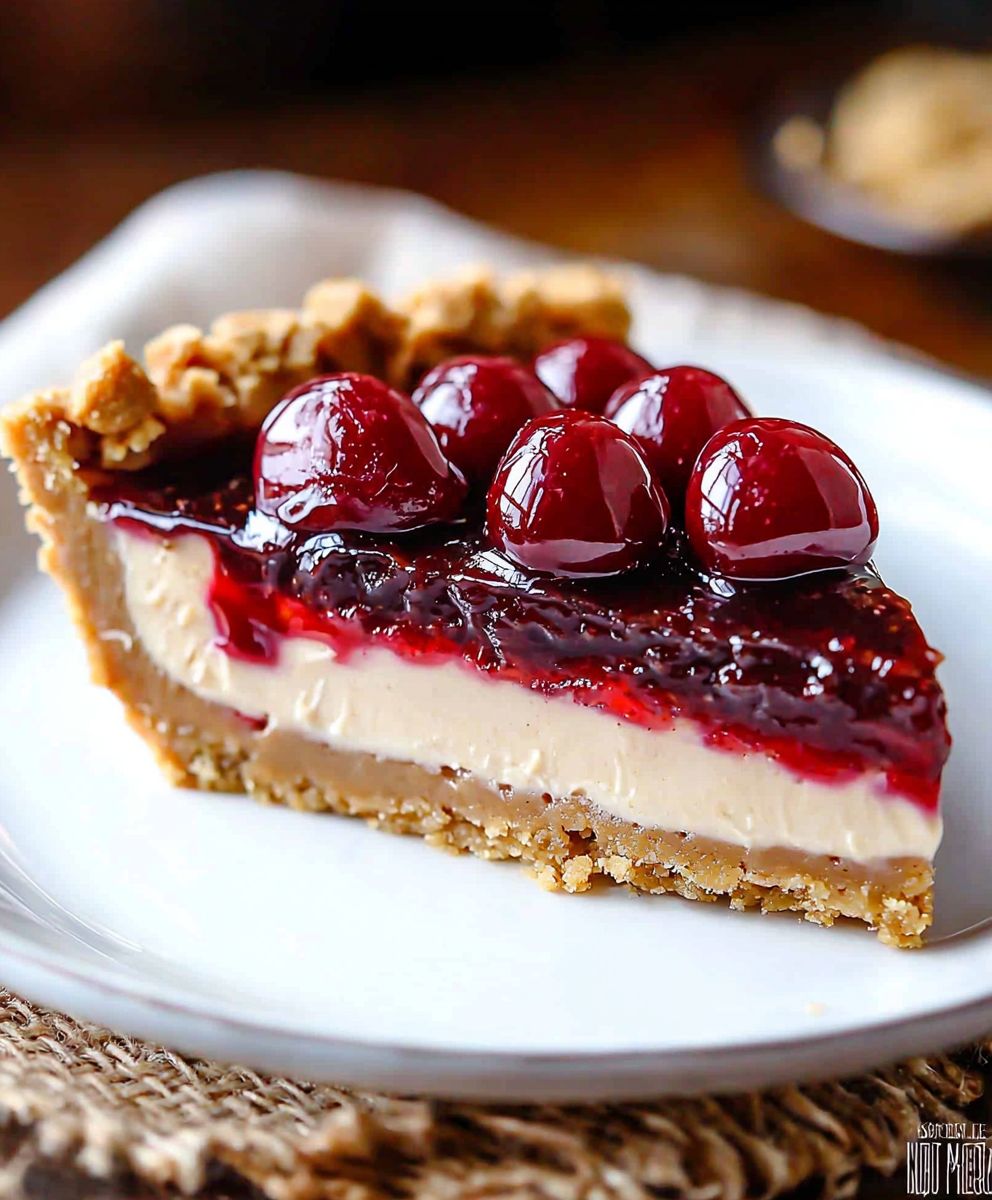
What makes this Peanut Butter Jelly Pie so irresistible? It’s the delightful contrast of textures the smooth, rich peanut butter filling against the sweet, fruity jelly layer, all nestled in a buttery, flaky crust. The combination is simply divine! Plus, it’s surprisingly easy to make, requiring minimal baking and readily available ingredients. Whether you’re looking for a crowd-pleasing dessert for a potluck or a comforting treat for a cozy night in, this pie is guaranteed to be a hit. Get ready to experience the ultimate comfort food mashup!
Ingredients:
- For the Crust:
- 1 ½ cups graham cracker crumbs
- 5 tablespoons unsalted butter, melted
- ¼ cup granulated sugar
- Pinch of salt
- For the Peanut Butter Filling:
- 8 ounces cream cheese, softened
- 1 cup creamy peanut butter
- 1 cup powdered sugar
- ½ cup heavy cream
- 1 teaspoon vanilla extract
- Pinch of salt
- For the Jelly Layer:
- 1 ½ cups grape jelly (or your favorite flavor!)
- 2 tablespoons cornstarch
- ¼ cup water
- Optional Toppings:
- Chopped peanuts
- Whipped cream
- Peanut butter cups, chopped
- Extra jelly
Preparing the Graham Cracker Crust:
- First, let’s get that crust ready! In a medium bowl, combine the graham cracker crumbs, melted butter, granulated sugar, and a pinch of salt. Make sure everything is nicely mixed together. I like to use a fork to really get the butter incorporated.
- Press the mixture firmly into the bottom of a 9-inch pie plate. You can use the bottom of a measuring cup or your fingers to create an even layer. Don’t be afraid to really press it down this will help the crust hold its shape.
- Bake the crust in a preheated oven at 350°F (175°C) for about 8-10 minutes. This will help it set and become nice and golden brown. Keep a close eye on it so it doesn’t burn!
- Remove the crust from the oven and let it cool completely before adding the filling. This is important, otherwise the filling might melt a bit.
Making the Peanut Butter Filling:
- Now for the best part the peanut butter filling! In a large bowl, beat the softened cream cheese with an electric mixer until it’s smooth and creamy. This is crucial for a lump-free filling.
- Add the peanut butter to the cream cheese and continue to beat until well combined. Make sure there are no streaks of cream cheese or peanut butter.
- Gradually add the powdered sugar, mixing on low speed until it’s fully incorporated. Be careful not to add it all at once, or you’ll end up with a cloud of powdered sugar!
- Pour in the heavy cream and vanilla extract, and add a pinch of salt. Beat on medium speed until the filling is light and fluffy. Don’t overbeat it, though, or it might become too thin.
- Once the crust is completely cool, pour the peanut butter filling into the crust and spread it evenly. I like to use an offset spatula to get a smooth surface.
- Place the pie in the refrigerator while you prepare the jelly layer. This will help the peanut butter filling set up a bit.
Preparing the Jelly Layer:
- Time for the jelly! In a small saucepan, whisk together the grape jelly (or your favorite flavor!), cornstarch, and water. Make sure the cornstarch is fully dissolved to avoid any lumps.
- Cook the mixture over medium heat, stirring constantly, until it thickens and becomes glossy. This usually takes about 3-5 minutes. You’ll know it’s ready when it coats the back of a spoon.
- Remove the saucepan from the heat and let the jelly mixture cool slightly for a few minutes. This will prevent it from melting the peanut butter filling.
- Carefully pour the cooled jelly mixture over the peanut butter filling, spreading it evenly. Again, an offset spatula can be helpful here.
Chilling and Serving:
- Cover the pie with plastic wrap and refrigerate for at least 4 hours, or preferably overnight, to allow the filling and jelly layer to set completely. This is a crucial step for a perfect slice!
- Before serving, you can add your favorite toppings. I love chopped peanuts, whipped cream, chopped peanut butter cups, or even a little extra jelly. Get creative and have fun with it!
- To slice the pie, use a sharp knife and wipe it clean between each slice for a neat presentation.
- Enjoy your delicious Peanut Butter Jelly Pie! It’s a guaranteed crowd-pleaser.
Tips and Variations:
- Crust Variations: If you’re not a fan of graham cracker crust, you can use an Oreo cookie crust or even a shortbread crust. Just adjust the baking time accordingly.
- Peanut Butter Options: You can use smooth or chunky peanut butter, depending on your preference. For a richer flavor, try using natural peanut butter.
- Jelly Flavors: Feel free to experiment with different jelly flavors. Strawberry, raspberry, or even blackberry jelly would be delicious!
- Chocolate Addition: For a chocolatey twist, you can add a layer of melted chocolate chips between the peanut butter filling and the jelly layer.
- Vegan Option: To make this pie vegan, use vegan cream cheese, vegan butter, and a plant-based heavy cream alternative.
- Make Ahead: This pie can be made up to 2 days in advance. Just store it in the refrigerator until you’re ready to serve it.
Troubleshooting:
- Crust is too crumbly: Add a little more melted butter to the graham cracker mixture until it holds together better.
- Filling is too thin: Make sure your cream cheese is softened properly. You can also add a tablespoon or two of powdered sugar to thicken it up.
- Jelly layer is too runny: Make sure you cook the jelly mixture until it thickens properly. You can also add a little more cornstarch if needed.
- Pie is not setting: Make sure you refrigerate the pie for at least 4 hours, or preferably overnight. If it’s still not setting, you can try freezing it for a short period of time.
Nutritional Information (approximate, per slice):
- Calories: 450-550
- Fat: 30-40g
- Saturated Fat: 15-20g
- Cholesterol: 70-90mg
- Sodium: 200-300mg
- Carbohydrates: 40-50g
- Sugar: 30-40g
- Protein: 8-10g
Note: Nutritional information is an estimate and may vary depending on the specific ingredients used.
Conclusion:
This Peanut Butter Jelly Pie isn’t just a dessert; it’s a nostalgic trip down memory lane with a sophisticated twist. It’s the perfect balance of creamy, nutty, and fruity, all nestled in a buttery, flaky crust. If you’re looking for a show-stopping dessert that’s surprisingly easy to make and guaranteed to impress, then this is it. Trust me, once you take that first bite, you’ll understand why I’m so passionate about this recipe. Its a must-try for anyone who loves the classic combination of peanut butter and jelly, and even those who think they don’t will be pleasantly surprised.
But the best part? This pie is incredibly versatile! While it’s absolutely divine served chilled as is, there are so many ways to customize it to your liking. For a truly decadent experience, try topping each slice with a dollop of freshly whipped cream and a sprinkle of chopped peanuts. Or, if you’re feeling adventurous, drizzle a little melted chocolate over the top for a peanut butter cup-inspired treat.
Looking for variations? Consider swapping out the grape jelly for strawberry, raspberry, or even blackberry jam. Each flavor will bring a unique twist to the pie, allowing you to create a new and exciting dessert every time. You could even use a combination of different jellies for a colorful and flavorful mosaic effect. For those with peanut allergies, sunflower seed butter makes an excellent substitute, offering a similar nutty flavor without the allergens. And if you’re watching your sugar intake, you can easily use sugar-free jelly and a natural sweetener in the peanut butter filling.
Another fun idea is to create mini Peanut Butter Jelly Pie tarts! Simply use a muffin tin to bake individual crusts and fill them with the peanut butter and jelly mixture. These are perfect for parties or as a grab-and-go dessert. You can even get creative with the crust by adding a touch of cinnamon or cocoa powder for an extra layer of flavor.
I truly believe that this recipe is a winner, and I can’t wait for you to try it. It’s the kind of dessert that brings people together, sparking conversations and creating lasting memories. It’s also a fantastic way to introduce kids to the joy of baking, as the recipe is simple enough for them to participate in and the results are always a crowd-pleaser.
So, what are you waiting for? Gather your ingredients, preheat your oven, and get ready to embark on a delicious baking adventure. I’m confident that you’ll love this Peanut Butter Jelly Pie as much as I do.
Once you’ve made it, I’d absolutely love to hear about your experience! Did you try any of the variations I suggested? Did you add your own special touch? Share your photos and stories in the comments below. Let’s create a community of peanut butter and jelly pie enthusiasts! I’m eager to see your creations and hear your feedback. Happy baking! And remember, the most important ingredient is always love!
Peanut Butter Jelly Pie: The Ultimate Dessert Recipe
A creamy peanut butter filling sits atop a crunchy graham cracker crust, swirled with sweet jelly. A no-bake dessert that's easy to make and perfect for peanut butter and jelly lovers!
Ingredients
- 1 1/2 cups graham cracker crumbs
- 1/4 cup sugar
- 6 tablespoons unsalted butter, melted
- 8 ounces cream cheese, softened
- 1 cup creamy peanut butter
- 1 cup powdered sugar
- 1 teaspoon vanilla extract
- 1/2 cup heavy cream
- 1 1/2 cups grape jelly
Instructions
- Preheat oven to 350 degrees F (175 degrees C).
- In a medium bowl, mix together the graham cracker crumbs, 1/4 cup sugar and melted butter. Press into the bottom of a 9 inch pie plate.
- Bake in preheated oven for 8 minutes. Let cool.
- In a large bowl, beat together the peanut butter, cream cheese and 1 cup sugar until smooth. Gradually beat in the milk, then stir in the vanilla. Pour into crust.
- Spread jelly over the peanut butter layer.
- Refrigerate for at least 2 hours before serving.
Notes
- For best results, use a high-quality peanut butter and jelly.
- The crust can be made ahead of time and stored in the refrigerator for up to 2 days.
- If the crust starts to brown too quickly, cover the edges with foil.
- Let the pie cool completely before slicing and serving.
“`

Leave a Comment