
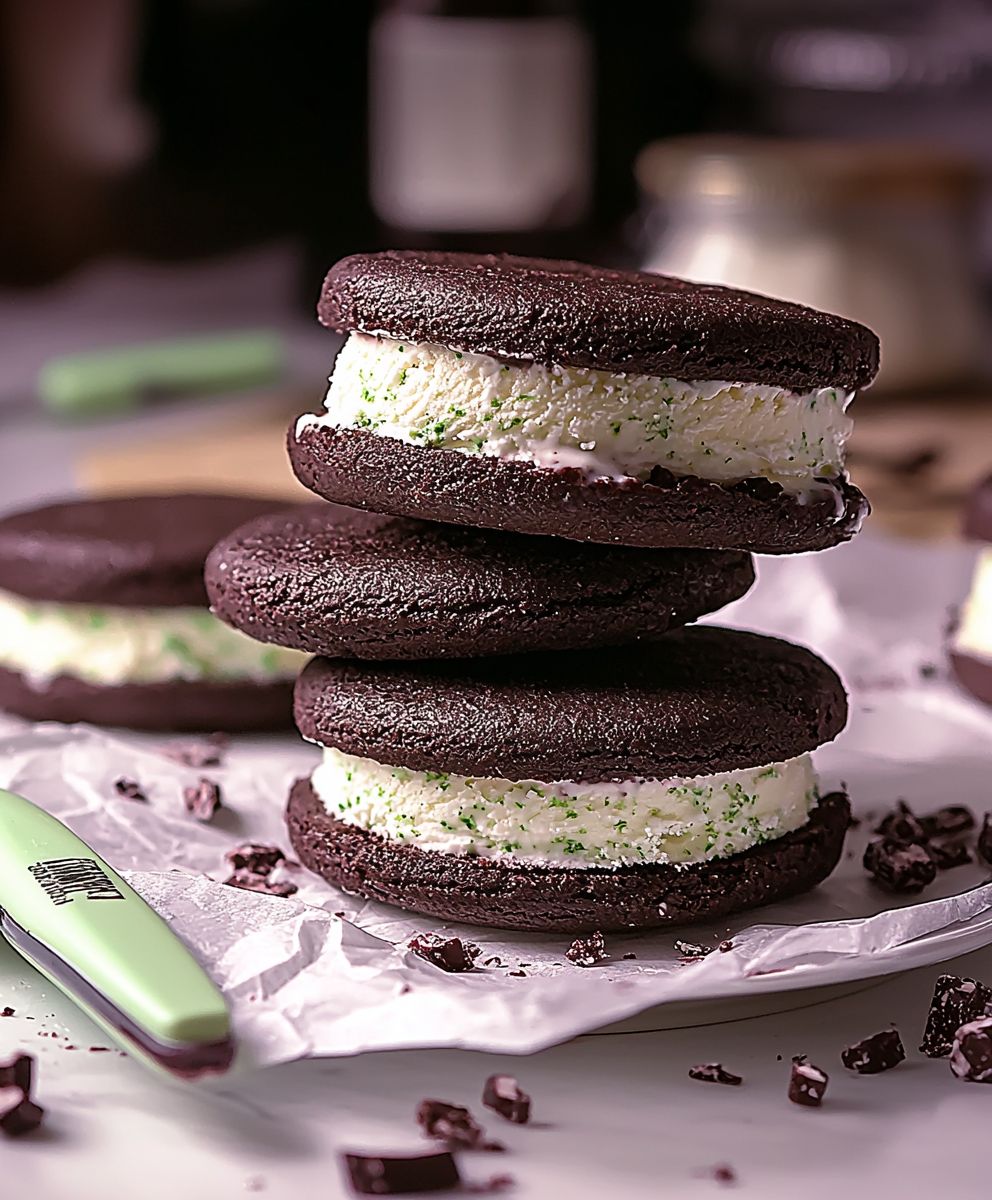
Peppermint ice cream sandwiches: the quintessential holiday treat that’s surprisingly easy to make at home! Imagine biting into a crisp, chocolatey cookie, only to be met with the cool, refreshing burst of peppermint ice cream. It’s a symphony of textures and flavors that dance on your tongue, leaving you wanting more.
While the exact origins of the ice cream sandwich are debated, its popularity soared in the early 20th century, becoming a beloved summertime staple. But this festive twist, the peppermint ice cream sandwich, elevates the classic dessert to a whole new level, perfectly capturing the spirit of the holiday season. The combination of rich chocolate and invigorating peppermint is a match made in dessert heaven.
People adore this dish for its delightful contrast. The warmth of the chocolate cookies complements the icy coolness of the peppermint ice cream. It’s a treat that’s both comforting and invigorating, making it perfect for cozy nights by the fire or festive gatherings with loved ones. Plus, these homemade ice cream sandwiches are incredibly convenient to make ahead of time, ensuring you’re always prepared for a sweet craving or unexpected guests. Get ready to impress everyone with this simple yet sophisticated dessert!

Ingredients:
- 1 pint (2 cups) heavy cream
- 1 cup whole milk
- ¾ cup granulated sugar
- ? teaspoon salt
- 1 teaspoon pure peppermint extract
- ½ cup crushed peppermint candies (plus extra for rolling, optional)
- 24 chocolate wafers (store-bought or homemade)
Making the Peppermint Ice Cream Base
Okay, let’s get started! The first thing we need to do is create the peppermint ice cream base. This is the foundation of our delicious ice cream sandwiches, so we want to make sure we get it right. Don’t worry, it’s easier than you think!
- Combine the Dairy: In a medium-sized saucepan, whisk together the heavy cream, whole milk, granulated sugar, and salt. Make sure the sugar is mostly dissolved before moving on to the next step. You don’t want any gritty ice cream!
- Heat the Mixture: Place the saucepan over medium heat. We’re not looking to boil it, just to warm it up enough to help the sugar dissolve completely and to meld the flavors together. Stir constantly with a spatula or whisk to prevent scorching.
- Check for Dissolved Sugar: Continue heating and stirring until the sugar is completely dissolved. You can test this by rubbing a small amount of the mixture between your fingers. If it feels smooth, you’re good to go! If you still feel some granules, keep stirring and heating gently.
- Chill the Base: Remove the saucepan from the heat and stir in the peppermint extract. Now, this is important: we need to chill the ice cream base completely before churning it. Pour the mixture into a bowl, cover it tightly with plastic wrap (pressing the wrap directly onto the surface of the mixture to prevent a skin from forming), and refrigerate for at least 4 hours, or preferably overnight. This chilling period allows the flavors to meld together even more and helps the ice cream churn properly.
Churning the Ice Cream
Now for the fun part churning! This is where the magic happens and our liquid base transforms into creamy, dreamy peppermint ice cream.
- Prepare Your Ice Cream Maker: Make sure your ice cream maker bowl is properly frozen according to the manufacturer’s instructions. This usually means freezing it for at least 24 hours. A properly frozen bowl is crucial for successful ice cream churning.
- Pour in the Base: Remove the chilled ice cream base from the refrigerator and pour it into the frozen ice cream maker bowl.
- Churn According to Instructions: Turn on the ice cream maker and churn according to the manufacturer’s instructions. This usually takes about 20-25 minutes, but it can vary depending on your machine. The ice cream is ready when it has a soft-serve consistency.
- Add the Peppermint Candies: In the last minute or two of churning, add the crushed peppermint candies. This will distribute them evenly throughout the ice cream.
Assembling the Ice Cream Sandwiches
Almost there! Now we get to put everything together and create those irresistible peppermint ice cream sandwiches.
- Prepare Your Work Surface: Line a baking sheet with parchment paper. This will prevent the ice cream sandwiches from sticking and make them easier to handle.
- Scoop the Ice Cream: Working quickly, scoop a generous amount of the peppermint ice cream onto the flat side of one chocolate wafer.
- Top with Another Wafer: Immediately top the ice cream with another chocolate wafer, pressing down gently to create a sandwich.
- Repeat: Repeat steps 2 and 3 with the remaining wafers and ice cream until you have 12 ice cream sandwiches.
- Freeze the Sandwiches: Place the assembled ice cream sandwiches on the prepared baking sheet and freeze for at least 2 hours, or until firm. This will help them hold their shape and prevent them from melting too quickly when you eat them.
Optional: Rolling in Peppermint Candy
If you want to add an extra touch of pepperminty goodness and visual appeal, you can roll the edges of the ice cream sandwiches in crushed peppermint candies.
- Prepare the Crushed Candy: Place the extra crushed peppermint candies in a shallow dish.
- Roll the Edges: Once the ice cream sandwiches are firm but not rock solid (after about 2 hours in the freezer), gently roll the edges of each sandwich in the crushed peppermint candies, pressing lightly to help them adhere.
- Freeze Again: Return the rolled ice cream sandwiches to the baking sheet and freeze for another 30 minutes to an hour to allow the candies to set.
Serving and Storage
Finally, the moment we’ve all been waiting for serving and enjoying our homemade peppermint ice cream sandwiches!
- Serving: Remove the ice cream sandwiches from the freezer a few minutes before serving to allow them to soften slightly. This will make them easier to bite into.
- Storage: Store any leftover ice cream sandwiches in an airtight container in the freezer for up to a week. They’re best enjoyed within a few days for optimal flavor and texture.
Tips and Tricks for Perfect Peppermint Ice Cream Sandwiches
Here are a few extra tips to help you make the best peppermint ice cream sandwiches ever:
- Use High-Quality Ingredients: The better the ingredients, the better the final product. Use good quality heavy cream, whole milk, and peppermint extract for the best flavor.
- Don’t Over-Churn: Over-churning the ice cream can result in a grainy texture. Churn until it reaches a soft-serve consistency, then stop.
- Work Quickly: Ice cream melts quickly, so work efficiently when assembling the sandwiches. Have all your ingredients and equipment ready before you start.
- Get Creative with Flavors: Feel free to experiment with different flavors of ice cream and wafers. Chocolate ice cream with vanilla wafers, or strawberry ice cream with graham crackers the possibilities are endless!
- Make it a Family Affair: Making ice cream sandwiches is a fun activity to do with kids. Let them help with scooping, assembling, and rolling in the peppermint candies.
Troubleshooting
Sometimes things don’t go exactly as planned. Here are a few common issues and how to fix them:
- Ice Cream is Grainy: This can happen if the ice cream base wasn’t chilled properly or if it was over-churned. Make sure to chill the base for at least 4 hours and avoid over-churning.
- Ice Cream is Too Soft: This could be due to a poorly frozen ice cream maker bowl or not churning the ice cream long enough. Make sure your bowl is properly frozen and churn until the ice cream reaches a soft-serve consistency.
- Ice Cream Sandwiches are Falling Apart: This usually happens if the ice cream is too soft or if the sandwiches aren’t frozen long enough. Make sure to freeze the sandwiches for at least 2 hours before serving.
Variations
Want to mix things up a bit? Here are some fun variations you can try:
- Chocolate Peppermint Ice Cream Sandwiches: Use chocolate ice cream instead of peppermint ice cream for a richer, more decadent treat.
- Peppermint Bark Ice Cream Sandwiches: Add chunks of peppermint bark to the ice cream base for extra flavor and texture.
- Gluten-Free Ice Cream Sandwiches: Use gluten-free chocolate wafers to make these sandwiches gluten-free.
- Vegan Ice Cream Sandwiches: Use a vegan ice cream base and vegan chocolate wafers to make these sandwiches vegan-friendly.
I hope you enjoy making and eating these delicious peppermint ice cream sandwiches! They’re the perfect treat for any occasion, and they’re sure to be a hit with everyone who tries them. Happy baking!
Conclusion:
This isn’t just another dessert; it’s a festive explosion of flavor and texture that will have everyone begging for more. The cool, creamy peppermint ice cream nestled between those chewy, chocolatey cookies creates a symphony of sensations that’s simply irresistible. Trust me, once you take that first bite, you’ll understand why these peppermint ice cream sandwiches are a must-try this holiday season (or any time you’re craving a little bit of winter magic!). But the best part? This recipe is incredibly versatile! Feel free to get creative with your serving suggestions and variations. For a truly decadent experience, try drizzling melted dark chocolate over the finished sandwiches and sprinkling them with crushed candy canes. The extra chocolate intensifies the richness, while the candy canes add an extra burst of peppermint and a delightful crunch. If you’re looking for a lighter option, consider using a lower-fat ice cream or even a frozen yogurt. You could also swap out the chocolate cookies for gingerbread cookies for a spicier, more festive twist. Imagine the warm, gingery notes complementing the cool peppermint pure holiday bliss! Another fun variation is to roll the edges of the assembled sandwiches in mini chocolate chips, chopped nuts, or even colorful sprinkles. This not only adds a visual appeal but also introduces another layer of texture and flavor.Serving Suggestions to Elevate Your Peppermint Ice Cream Sandwiches:
* For a party: Cut the sandwiches into smaller squares or triangles for easy snacking. Arrange them on a platter with other festive treats like gingerbread men and sugar cookies. * For a romantic dessert: Serve a whole sandwich on a plate with a dollop of whipped cream and a sprig of fresh mint. * For a kid-friendly treat: Let the kids decorate their own sandwiches with sprinkles, chocolate sauce, and other fun toppings. Don’t be afraid to experiment and find your own perfect combination! The possibilities are endless. The key is to have fun and enjoy the process of creating something delicious and memorable. I know that sometimes, trying a new recipe can feel a little daunting, but I promise you, this one is worth it. It’s surprisingly easy to make, and the results are absolutely spectacular. Plus, the aroma of peppermint and chocolate filling your kitchen is guaranteed to put you in a festive mood. So, what are you waiting for? Gather your ingredients, put on some holiday music, and get ready to create some magic in the kitchen. I’m confident that these peppermint ice cream sandwiches will become a new family favorite. And most importantly, I want to hear about your experience! Did you try any of the variations I suggested? Did you come up with your own creative twist? Share your photos and stories in the comments below. I can’t wait to see what you create! Happy baking (and sandwich-making)! Let me know if you have any questions, and I’ll do my best to help. Enjoy! Print
Peppermint Ice Cream Sandwiches: The Ultimate Guide & Recipe
- Total Time: 25
- Yield: 6 sandwiches 1x
Description
Cool peppermint ice cream sandwiched between soft chocolate cookies, rolled in crushed candy canes for a festive treat.
Ingredients
- 1 1/2 cups heavy cream
- 3/4 cup whole milk
- 3/4 cup granulated sugar
- 1/4 teaspoon salt
- 1 teaspoon peppermint extract
- 1/2 cup crushed peppermint candies
- 24 chocolate wafers
Instructions
- Preheat oven to 350 degrees F (175 degrees C).
- In a large bowl, cream together the butter, sugar, and brown sugar until smooth.
- Beat in the eggs one at a time, then stir in the vanilla.
- Dissolve the baking soda in hot water.
- Add to batter along with salt.
- Stir in flour, chocolate chips, and peppermint candies.
- Drop by large spoonfuls onto ungreased cookie sheets.
- Bake for 10 to 12 minutes, or until edges are nicely browned.
- Cool on baking sheets for a few minutes before transferring to wire racks to cool completely.
- Scoop peppermint ice cream onto the bottom of one cookie and top with another cookie to form a sandwich.
- Repeat with remaining cookies and ice cream.
- Wrap each sandwich individually and freeze for at least 30 minutes before serving.
Notes
“`html
- For a festive look, roll the edges of the ice cream sandwiches in crushed peppermint candies.
- If you don’t have peppermint extract, you can use peppermint oil, but use it sparingly as it is much more potent.
- The cookies can be made ahead of time and stored in an airtight container at room temperature for up to 3 days.
- The ice cream sandwiches are best served immediately, but can be stored in the freezer for up to 1 week.
“`
- Prep Time: 20 minutes
- Cook Time: 5 minutes


Leave a Comment