
Peach cobbler with fresh peaches: Is there anything that screams summer quite like it? Imagine sinking your fork into a warm, bubbling dessert, the sweet aroma of ripe peaches filling the air. This isn’t just a recipe; it’s a nostalgic trip to simpler times, a taste of sunshine in every bite.
Cobblers, in general, have a fascinating history, originating as a resourceful way for early American settlers to create delicious desserts with limited ingredients. They cleverly used fruit readily available to them, topping it with a simple biscuit or batter. Our star ingredient, the peach, adds a layer of Southern charm to this classic dessert. Peaches themselves have been cultivated for centuries, originating in China and eventually making their way to the Americas, where they thrived, especially in the Southern states.
But what is it about peach cobbler with fresh peaches that makes it such a beloved dessert? It’s the perfect combination of textures: the soft, juicy peaches, the slightly crisp topping, and the warm, comforting sauce that pools at the bottom. The sweetness of the peaches is balanced by a hint of tang, creating a flavor profile that’s both satisfying and refreshing. Plus, it’s incredibly easy to make! Whether you’re a seasoned baker or a kitchen novice, this recipe is foolproof and guaranteed to impress. So, let’s get baking and create a little bit of summer magic!

Ingredients:
- For the Cake:
- 2 ½ cups all-purpose flour
- 1 teaspoon baking soda
- 1 teaspoon baking powder
- 1 teaspoon salt
- 2 tablespoons unsweetened cocoa powder
- 2 cups granulated sugar
- 1 cup vegetable oil
- 1 cup buttermilk, room temperature
- 2 large eggs, room temperature
- 2 teaspoons vanilla extract
- 1 ounce (2 tablespoons) red food coloring
- 1 teaspoon white vinegar
- For the Cream Cheese Glaze:
- 8 ounces cream cheese, softened
- ½ cup (1 stick) unsalted butter, softened
- 3 cups powdered sugar
- 2-4 tablespoons milk or heavy cream
- 1 teaspoon vanilla extract
Preparing the Red Velvet Bundt Cake
- Preheat and Prepare the Pan: First things first, let’s get our oven ready. Preheat it to 350°F (175°C). This is crucial for even baking. Now, grease and flour a 10-inch Bundt pan really well. I like to use baking spray that contains flour, but you can also grease with shortening or butter and then dust with flour. Make sure you get into all the nooks and crannies nobody wants a stuck cake! Tap out any excess flour.
- Combine Dry Ingredients: In a large bowl, whisk together the flour, baking soda, baking powder, salt, and cocoa powder. Whisking is important here to ensure everything is evenly distributed. We don’t want pockets of baking soda in our cake! Set this bowl aside for now.
- Combine Wet Ingredients: In a separate, large mixing bowl (or the bowl of your stand mixer), combine the sugar and vegetable oil. Beat them together on medium speed until well combined. This usually takes about 2-3 minutes. You want the mixture to be light and fluffy.
- Add Eggs and Vanilla: Add the eggs one at a time, beating well after each addition. Make sure each egg is fully incorporated before adding the next. Then, stir in the vanilla extract.
- Add Food Coloring: Now for the signature red! Add the red food coloring to the wet ingredients and mix until the batter is a vibrant, even red color. Don’t be shy with the food coloring; it’s what gives the cake its distinctive look.
- Alternate Adding Dry and Wet Ingredients: Gradually add the dry ingredients to the wet ingredients, alternating with the buttermilk. Begin and end with the dry ingredients. So, add about one-third of the dry ingredients, then half of the buttermilk, then another third of the dry ingredients, the remaining buttermilk, and finally the last third of the dry ingredients. Mix on low speed until just combined after each addition. Be careful not to overmix the batter, as this can result in a tough cake.
- Add Vinegar and Baking Soda Mixture: In a small bowl, combine the white vinegar and baking soda. This mixture will fizz up that’s exactly what we want! Immediately add this mixture to the cake batter and stir until just combined. This reaction helps to create a light and airy texture in the cake.
- Pour into Bundt Pan: Pour the batter evenly into the prepared Bundt pan.
Baking the Cake
- Bake: Bake in the preheated oven for 50-60 minutes, or until a wooden skewer inserted into the center comes out clean or with just a few moist crumbs attached. The baking time can vary depending on your oven, so keep an eye on it.
- Cool in Pan: Let the cake cool in the pan for 10-15 minutes before inverting it onto a wire rack to cool completely. This prevents the cake from sticking to the pan and breaking.
Preparing the Cream Cheese Glaze
- Cream Butter and Cream Cheese: In a large bowl (or the bowl of your stand mixer), beat the softened cream cheese and butter together until smooth and creamy. Make sure both are at room temperature for the best results. Lumps are not our friends!
- Add Powdered Sugar: Gradually add the powdered sugar, one cup at a time, beating on low speed until combined. This prevents a powdered sugar explosion in your kitchen!
- Add Milk and Vanilla: Add the milk (or heavy cream) and vanilla extract. Beat on medium speed until the glaze is smooth and creamy. Add more milk, one tablespoon at a time, until you reach your desired consistency. I prefer a glaze that’s thick enough to coat the cake nicely but thin enough to drizzle.
Assembling and Glazing
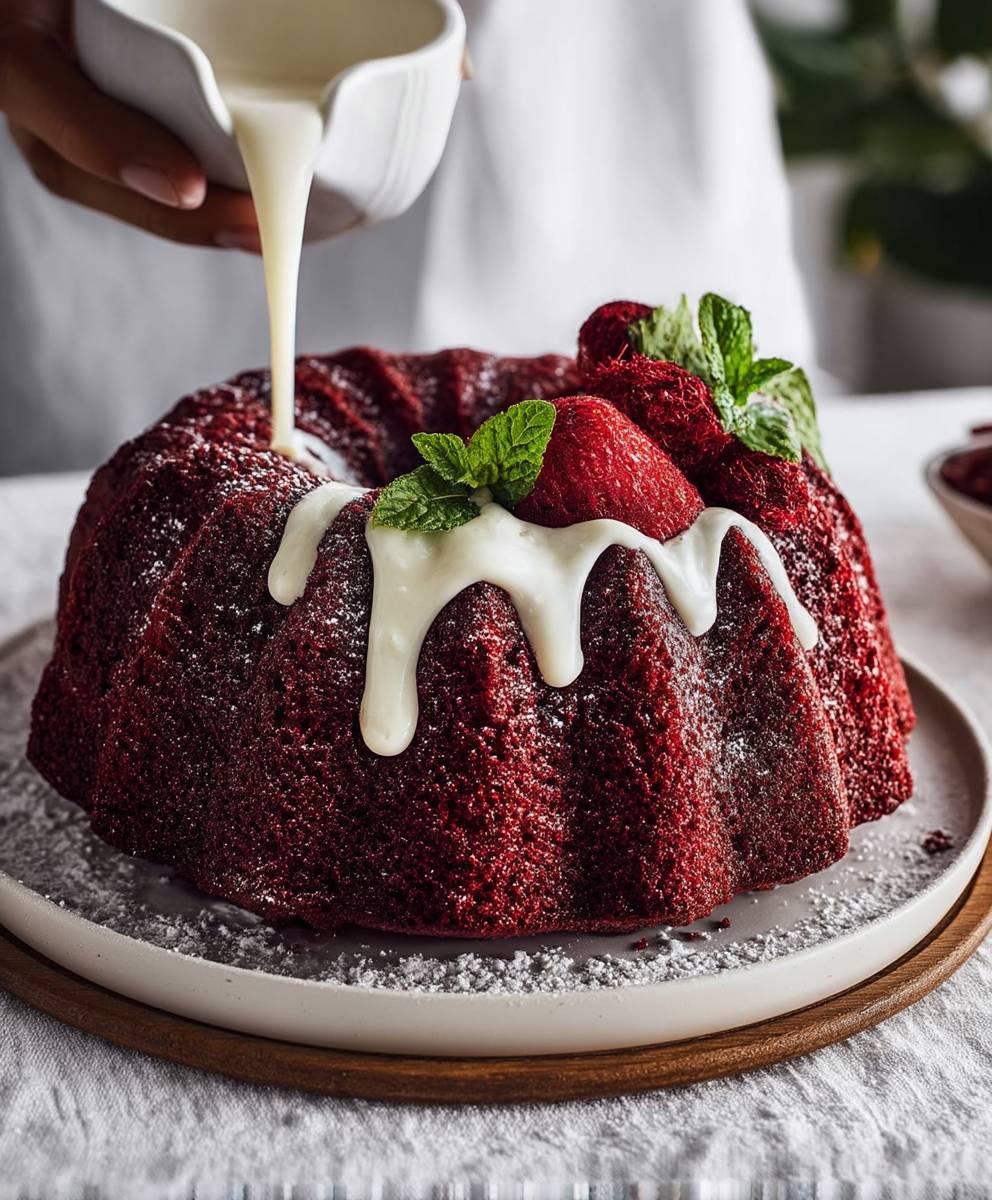
- Glaze the Cake: Once the cake is completely cool, place it on a serving plate or cake stand. Pour the cream cheese glaze over the top of the cake, allowing it to drip down the sides. You can use a spatula to help spread the glaze evenly.
- Optional Decorations: If desired, you can decorate the cake with sprinkles, chopped nuts, or fresh berries. I sometimes like to add a few red velvet cake crumbs for extra flair.
- Let the Glaze Set: Allow the glaze to set for about 15-20 minutes before slicing and serving. This will help the glaze to firm up a bit and prevent it from running everywhere.
Tips for Success:
- Room Temperature Ingredients: Using room temperature ingredients, especially the buttermilk, eggs, and cream cheese, is crucial for a smooth and even batter. Room temperature ingredients emulsify better, resulting in a more tender and moist cake.
- Don’t Overmix: Overmixing the batter can develop the gluten in the flour, resulting in a tough cake. Mix until just combined after each addition.
- Grease and Flour Thoroughly: A well-greased and floured Bundt pan is essential for preventing the cake from sticking. Don’t skip this step!
- Cool Completely Before Glazing: Make sure the cake is completely cool before glazing, or the glaze will melt and run off.
- Adjust Sweetness: If you prefer a less sweet glaze, you can reduce the amount of powdered sugar.
- Storage: Store the cake in an airtight container at room temperature for up to 3 days or in the refrigerator for up to 5 days.
Variations:
- Chocolate Chips: Add ½ cup of chocolate chips to the batter for a richer, more decadent cake.
- Nuts: Add ½ cup of chopped pecans or walnuts to the batter for added texture and flavor.
- Espresso Powder: Add 1 teaspoon of espresso powder to the dry ingredients to enhance the chocolate flavor.
- Lemon Zest: Add the zest of one lemon to the batter for a bright, citrusy twist.
- Different Glaze: Instead of cream cheese glaze, you can use a simple vanilla glaze or a chocolate ganache.
Troubleshooting:
- Cake is Dry: Make sure you’re not overbaking the cake. Also, ensure you’re using enough oil and buttermilk in the batter.
- Cake is Sticking to the Pan: Make sure you’re greasing and flouring the pan thoroughly. You can also try using a baking spray that contains flour.
- Glaze is Too Thick: Add more milk or heavy cream, one tablespoon at a time, until you reach your desired consistency.
- Glaze is Too Thin: Add more powdered sugar, one tablespoon at a time, until you reach your desired consistency.
Conclusion:
And there you have it! This Red Velvet Bundt Cake isn’t just a cake; it’s an experience. From the vibrant color to the incredibly moist crumb and the tangy cream cheese frosting, every bite is a celebration. I truly believe this recipe is a must-try for anyone who loves baking, or simply enjoys a delicious dessert. It’s impressive enough for special occasions, yet simple enough to whip up for a weekend treat.
Why is it a must-try? Because it delivers on all fronts. It’s visually stunning, incredibly flavorful, and surprisingly easy to make. The bundt shape adds an elegant touch, making it perfect for potlucks, birthdays, or even just a cozy night in. Plus, the combination of cocoa, buttermilk, and vinegar creates a unique depth of flavor that you won’t find in your average chocolate cake. The cream cheese frosting is the perfect complement, adding a tangy sweetness that balances the richness of the cake.
But don’t just take my word for it! I encourage you to try this recipe and experience the magic for yourself. And the best part? There are so many ways to customize it to your liking!
Here are a few serving suggestions and variations to get you started:
* Dust with powdered sugar: For a simple yet elegant finish, dust the cake with powdered sugar instead of frosting. This is a great option if you want a lighter dessert.
* Add chocolate chips: Fold in some chocolate chips (milk, dark, or white) into the batter for an extra chocolatey kick.
* Use a different frosting: If you’re not a fan of cream cheese frosting, try a vanilla buttercream or a chocolate ganache.
* Make mini bundt cakes: Use a mini bundt pan to create individual servings. These are perfect for parties or for portion control.
* Add nuts: Sprinkle chopped pecans or walnuts on top of the frosting for added texture and flavor.
* Berry Compote: Serve each slice with a dollop of fresh whipped cream and a vibrant berry compote. The tartness of the berries will beautifully complement the richness of the cake.
* Coffee Pairing: This cake pairs perfectly with a strong cup of coffee or a latte. The bitterness of the coffee cuts through the sweetness of the cake, creating a delightful balance.
* Boozy Variation: For an adult twist, brush the cooled cake with a simple syrup infused with a bit of rum or bourbon before frosting.
I’m confident that you’ll love this Red Velvet Bundt Cake as much as I do. It’s a recipe that’s sure to impress your friends and family, and it’s one that you’ll want to make again and again.
So, what are you waiting for? Grab your ingredients, preheat your oven, and get ready to bake! I can’t wait to hear about your experience. Please, share your photos and comments with me. Let me know what variations you tried and how they turned out. Did you add chocolate chips? Did you try a different frosting? I’m eager to see your creations and hear your feedback. Happy baking!
Red Velvet Bundt Cake: The Ultimate Recipe & Baking Guide
A moist and decadent red velvet bundt cake with a tangy cream cheese glaze. Perfect for holidays or any special occasion.
Ingredients
- 2 1/2 cups all-purpose flour
- 1 teaspoon baking soda
- 1 teaspoon salt
- 2 tablespoons unsweetened cocoa powder
- 1 1/2 cups granulated sugar
- 1 cup vegetable oil
- 2 large eggs
- 1 cup buttermilk
- 2 tablespoons red food coloring
- 1 teaspoon white vinegar
- 1 teaspoon vanilla extract
Instructions
- Preheat oven to 350 degrees F (175 degrees C). Grease and flour a 9×13 inch baking pan.
- In a large bowl, cream together the butter, shortening, and sugar until light and fluffy. Beat in the eggs one at a time, then stir in the vanilla. Combine the flour, baking soda, and salt; add to the creamed mixture alternately with the buttermilk, beginning and ending with flour mixture. Beat well after each addition. Stir in the vinegar and food coloring.
- Pour batter into the prepared pan.
- Bake for 30 to 35 minutes, or until a toothpick inserted into the center comes out clean. Let cool in the pan for 10 minutes before frosting.
- For the frosting, combine the cream cheese, butter, and vanilla in a medium bowl, and beat until smooth. Gradually add the confectioners’ sugar, beating until light and fluffy. Frost the cake while it is still slightly warm.
“`
Notes
- For best results, use full-fat buttermilk and cream cheese.
- Be careful not to overbake the cake, as it can become dry.
- The cream cheese frosting can be made ahead of time and stored in the refrigerator for up to 3 days.
- Garnish with fresh berries or chocolate shavings for an extra touch.
“`


Leave a Comment