
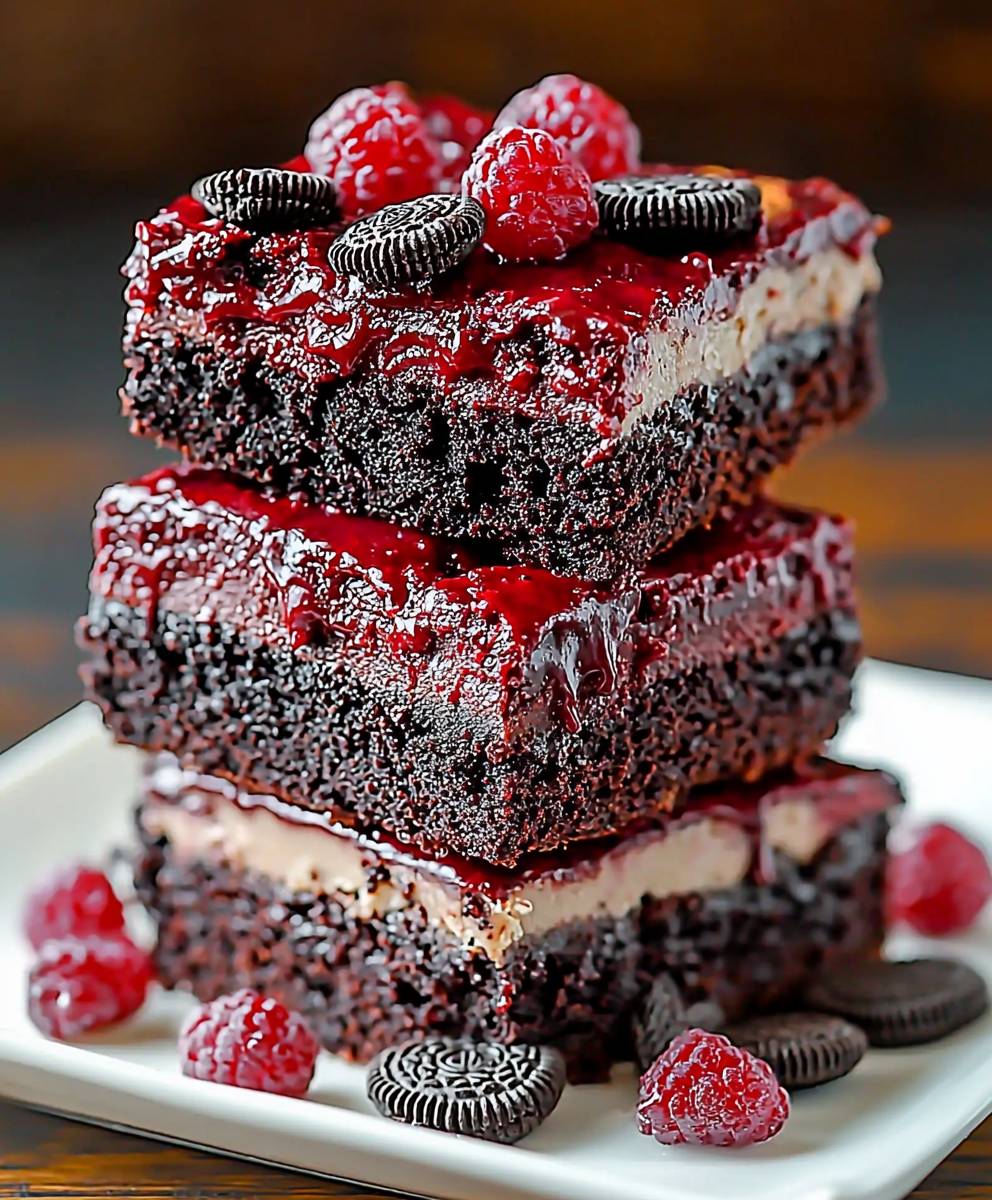
Red Velvet Oreo Brownies: Prepare to be utterly captivated by the most decadent, fudgy, and visually stunning dessert you’ll bake all year! Imagine the classic, comforting taste of red velvet cake swirled into a rich brownie batter, then studded with everyone’s favorite chocolate sandwich cookies. It’s a symphony of textures and flavors that will leave you craving more.
The allure of red velvet, with its subtle cocoa notes and vibrant crimson hue, has roots that trace back to the Victorian era. Originally, the red color came from the reaction between cocoa powder and acidic ingredients like buttermilk or vinegar. Today, we often rely on food coloring to achieve that signature look, but the essence of red velvet its moistness and delicate tang remains the same. Combining this beloved flavor with the satisfying crunch of Oreos and the intense chocolate of brownies is a stroke of genius, if I do say so myself!
What makes these Red Velvet Oreo Brownies so irresistible? It’s the perfect balance of textures: the chewy edges of the brownie, the soft, cakey interior, and the delightful crunch of the Oreo cookies. The flavor profile is equally compelling, with the slight tang of red velvet complementing the sweetness of the chocolate and the creamy filling of the Oreos. Plus, they are surprisingly easy to make, making them perfect for a weeknight treat or a show-stopping dessert for your next gathering. Get ready to experience brownie bliss!

Ingredients:
- For the Brownie Base:
- 1 cup (2 sticks) unsalted butter, melted
- 2 cups granulated sugar
- 4 large eggs
- 1 teaspoon vanilla extract
- ¾ cup all-purpose flour
- ¾ cup unsweetened cocoa powder
- ½ teaspoon baking powder
- ¼ teaspoon salt
- 1 tablespoon red food coloring
- 1 teaspoon white vinegar
- For the Oreo Layer:
- 24 Oreo cookies (regular size), roughly chopped
- For the Cream Cheese Swirl:
- 8 ounces cream cheese, softened
- ? cup granulated sugar
- 1 large egg yolk
- 1 teaspoon vanilla extract
Preparing the Brownie Batter:
- First, let’s get started with the brownie base. In a large bowl, combine the melted butter and granulated sugar. Make sure the butter isn’t too hot, or it might cook the eggs later. Whisk them together really well until the mixture is smooth and creamy. This step is important for getting that fudgy texture we all love!
- Now, add the eggs one at a time, whisking well after each addition. This helps to incorporate air into the batter, which contributes to the brownie’s rise and texture. Don’t skip this step! Then, stir in the vanilla extract.
- In a separate bowl, whisk together the all-purpose flour, unsweetened cocoa powder, baking powder, and salt. This ensures that the dry ingredients are evenly distributed throughout the batter, preventing any pockets of flour or cocoa.
- Gradually add the dry ingredients to the wet ingredients, mixing until just combined. Be careful not to overmix, as this can lead to tough brownies. We want them nice and fudgy, remember?
- In a small bowl, combine the red food coloring and white vinegar. This mixture helps to enhance the red color and also reacts with the baking powder to create a slightly tangy flavor that complements the chocolate. Add this mixture to the brownie batter and stir until evenly distributed. The batter should now have a beautiful red hue!
Assembling the Oreo Layer:
- Now, let’s prepare the Oreo layer. Roughly chop the Oreo cookies into smaller pieces. You can use a knife or a food processor for this step. I prefer to leave some larger chunks for a more textured bite.
- Gently fold about half of the chopped Oreos into the brownie batter. This will distribute the Oreo goodness throughout the brownies.
Preparing the Cream Cheese Swirl:
- Time for the cream cheese swirl! In a medium bowl, beat the softened cream cheese and granulated sugar together until smooth and creamy. Make sure the cream cheese is at room temperature to avoid any lumps.
- Add the egg yolk and vanilla extract to the cream cheese mixture and beat until well combined. The egg yolk adds richness and helps to bind the swirl together.
Baking the Brownies:
- Preheat your oven to 350°F (175°C). Grease and flour a 9×13 inch baking pan. This will prevent the brownies from sticking to the pan and make them easier to remove after baking. You can also line the pan with parchment paper, leaving an overhang on the sides, for even easier removal.
- Pour the brownie batter into the prepared baking pan and spread it evenly.
- Spoon the cream cheese mixture over the brownie batter in dollops. Use a knife or toothpick to swirl the cream cheese into the brownie batter, creating a marbled effect. Be careful not to overmix, as this can muddy the swirl.
- Sprinkle the remaining chopped Oreos over the top of the cream cheese swirl. This adds a final touch of Oreo flavor and texture.
- Bake for 30-35 minutes, or until a toothpick inserted into the center comes out with moist crumbs attached. The baking time may vary depending on your oven, so keep an eye on the brownies and check them periodically.
- Let the brownies cool completely in the pan before cutting into squares. This will allow them to set properly and prevent them from crumbling. I know it’s hard to resist, but trust me, it’s worth the wait!
Tips and Variations:
- For extra fudgy brownies: Underbake the brownies slightly. They should still be slightly gooey in the center.
- For cake-like brownies: Add an extra tablespoon of baking powder to the batter.
- Add chocolate chips: Fold in ½ cup of chocolate chips to the brownie batter for an extra chocolatey treat.
- Use different Oreo flavors: Experiment with different Oreo flavors, such as Golden Oreos or Mint Oreos, to customize the brownies to your liking.
- Make it gluten-free: Substitute the all-purpose flour with a gluten-free all-purpose flour blend.
- Storage: Store the brownies in an airtight container at room temperature for up to 3 days or in the refrigerator for up to 1 week.
- Freezing: You can freeze the brownies for up to 2 months. Wrap them tightly in plastic wrap and then place them in a freezer-safe bag or container. Thaw them overnight in the refrigerator before serving.
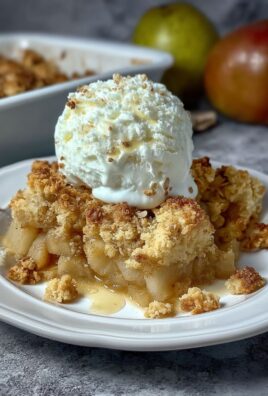
- Serving Suggestions: Serve the brownies plain, with a scoop of vanilla ice cream, or with a drizzle of chocolate sauce. They’re also delicious with a sprinkle of powdered sugar.
Troubleshooting:
- Brownies are too dry: You may have overbaked the brownies. Try reducing the baking time next time.
- Brownies are too gooey: You may have underbaked the brownies. Try increasing the baking time next time.
- Cream cheese swirl is sinking: Make sure the cream cheese is at room temperature and that you don’t overmix the swirl into the brownie batter.
- Brownies are sticking to the pan: Make sure you grease and flour the pan thoroughly or line it with parchment paper.
Enjoy your delicious Red Velvet Oreo Brownies!
Conclusion:
So there you have it! These Red Velvet Oreo Brownies are truly something special, and I genuinely believe they deserve a spot on your baking bucket list. Why? Because they’re the perfect trifecta of textures and flavors: the fudgy, intensely chocolatey base of a red velvet brownie, the creamy sweetness of the Oreo cookies nestled within, and that delightful hint of tang that makes red velvet so irresistible. It’s a symphony of deliciousness in every single bite!
But beyond the taste, these brownies are surprisingly easy to make. We’ve broken down the process into simple, manageable steps, so even if you’re a novice baker, you can confidently whip up a batch that will impress your friends and family. Forget complicated techniques and hard-to-find ingredients; this recipe is all about delivering maximum flavor with minimal fuss.
Why are these Red Velvet Oreo Brownies a must-try? Because they’re a guaranteed crowd-pleaser! They’re perfect for potlucks, birthday parties, holiday gatherings, or simply a cozy night in with a warm glass of milk. Imagine the look on everyone’s faces when you present a tray of these decadent treats pure joy!
And the best part? You can easily customize them to your liking.
Serving Suggestions and Variations:
* A la Mode: Serve warm with a scoop of vanilla ice cream for an extra indulgent dessert. The cold ice cream melting over the warm brownie is pure heaven.
* Drizzle Delight: Drizzle with melted white chocolate or cream cheese frosting for an added touch of sweetness and visual appeal.
* Nutty Addition: Sprinkle chopped pecans or walnuts on top before baking for a delightful crunch.
* Oreo Overload: For the ultimate Oreo lover, add crushed Oreos to the brownie batter itself!
* Cream Cheese Swirl: Swirl a simple cream cheese mixture (cream cheese, sugar, and vanilla extract) into the batter before baking for a tangy and beautiful effect.
* Espresso Boost: Add a teaspoon of instant espresso powder to the brownie batter to enhance the chocolate flavor.
* Festive Fun: Use different colored Oreos (like red and green for Christmas) to make them even more festive.
* Brownie Bites: Bake the batter in a mini muffin tin for perfectly portioned brownie bites.
I’m so excited for you to try this recipe and experience the magic of these Red Velvet Oreo Brownies for yourself. I truly believe you’ll fall in love with their rich flavor and irresistible texture. Don’t be afraid to get creative with the variations and make them your own!
Now, it’s your turn! Head to the kitchen, gather your ingredients, and let the baking begin. I’m confident that you’ll create a batch of brownies that will be the talk of the town. And most importantly, don’t forget to have fun! Baking should be a joyful experience, so put on some music, relax, and enjoy the process.
Once you’ve made these amazing brownies, I’d absolutely love to hear about your experience. Share your photos and comments on social media using [Your Hashtag Here] or leave a review on the recipe page. I’m eager to see your creations and hear what you think! Happy baking, and enjoy every single bite of these incredible Red Velvet Oreo Brownies!
Red Velvet Oreo Brownies: The Ultimate Dessert Recipe
Fudgy brownies swirled with red velvet batter and studded with Oreo cookies.
Ingredients
- 1 box (19.6 oz) brownie mix
- 1/2 cup vegetable oil
- 1/4 cup water
- 2 large eggs
- 1 teaspoon red food coloring
- 1 package (3.3 oz) Oreo cookies, coarsely chopped
- 1/2 cup white chocolate chips
Instructions
- Preheat oven to 350 degrees F (175 degrees C). Grease and flour a 9×13 inch pan.
- In a large bowl, cream together the butter, sugar, and brown sugar until smooth. Beat in the eggs one at a time, then stir in the vanilla.
- Dissolve the red food coloring in the vinegar, and add to the batter along with the cocoa powder. Mix well.
- Add the flour and salt to the batter, and mix until just combined.
- Fold in the white chocolate chips and crushed Oreos.
- Pour batter into the prepared pan and spread evenly.
- Bake for 25-30 minutes, or until a toothpick inserted into the center comes out with moist crumbs attached.
- Let cool completely before cutting into squares.
Notes
- For best results, use room temperature ingredients.
- Do not overbake the brownies. They should be slightly soft in the center.
- Feel free to substitute different types of Oreo cookies.
- Store brownies in an airtight container at room temperature for up to 3 days.

Leave a Comment