
Peach Lemonade: the quintessential summer cooler, but elevated! Imagine the sweet, juicy burst of ripe peaches mingling with the tangy zest of fresh lemons, all swirled together in a refreshing symphony of flavor. This isn’t your average lemonade; it’s a taste of sunshine in a glass, perfect for beating the heat and adding a touch of elegance to any occasion.
Lemonade itself boasts a history as vibrant as its flavor. Originating centuries ago in the Middle East, it gradually made its way across the globe, becoming a beloved beverage in countless cultures. The addition of fruit, like our star ingredient, peaches, is a more modern twist, adding layers of complexity and sweetness. Peaches, symbols of longevity and good fortune in some cultures, bring a touch of summery abundance to this classic drink.
What makes Peach Lemonade so irresistible? It’s the perfect balance of sweet and tart, the smooth, almost creamy texture from the pureed peaches, and the sheer convenience of whipping up a batch in minutes. Whether you’re hosting a backyard barbecue, relaxing on the porch, or simply craving a refreshing treat, this homemade lemonade is guaranteed to be a crowd-pleaser. Trust me, once you try this recipe, you’ll never go back to store-bought again!

Ingredients:
- Dry Ingredients:
- 3 cups all-purpose flour
- 4 tablespoons granulated sugar
- 4 teaspoons baking powder
- 1 teaspoon baking soda
- 1/2 teaspoon salt
- Wet Ingredients:
- 3 cups milk (any kind works!)
- 2 large eggs
- 4 tablespoons unsalted butter, melted
- 2 teaspoons vanilla extract
- Toppings (optional, but highly recommended!):
- Fresh berries (strawberries, blueberries, raspberries a mix is great!)
- Chocolate chips (milk, dark, or semi-sweet)
- Sprinkles (because why not?)
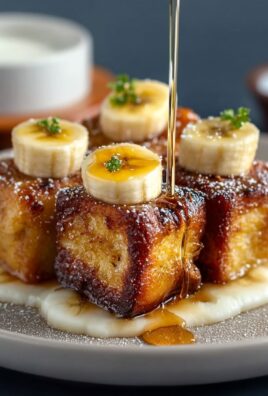
- Sliced bananas
- Chopped nuts (pecans, walnuts, almonds)
- Maple syrup, for serving
- Powdered sugar, for dusting
Preparing the Pancake Batter:
- Whisk the Dry Ingredients: In a large bowl, whisk together the flour, sugar, baking powder, baking soda, and salt. Make sure you get everything evenly distributed. This helps ensure a light and fluffy pancake. I like to whisk for at least 30 seconds to really incorporate the baking powder and baking soda.
- Combine the Wet Ingredients: In a separate bowl, whisk together the milk, eggs, melted butter, and vanilla extract. The melted butter should be cooled slightly before adding it to the eggs to prevent them from cooking. Whisk until everything is well combined and the mixture is smooth.
- Combine Wet and Dry: Pour the wet ingredients into the bowl with the dry ingredients. Gently fold the wet and dry ingredients together until just combined. Be careful not to overmix the batter. A few lumps are perfectly fine! Overmixing will develop the gluten in the flour, resulting in a tougher pancake. I usually stop mixing when I see just a few streaks of flour remaining.
- Let the Batter Rest (Optional but Recommended): Let the batter rest for 5-10 minutes. This allows the gluten to relax and the baking powder to activate, resulting in a lighter and fluffier pancake. While the batter rests, preheat your oven and prepare your baking sheet.
Preparing the Baking Sheet and Toppings:
- Preheat the Oven: Preheat your oven to 425°F (220°C). Make sure your oven is fully preheated before you put the pancake in.
- Prepare the Baking Sheet: Line a large baking sheet (approximately 12×17 inches) with parchment paper. This will prevent the pancake from sticking and make cleanup a breeze. You can also lightly grease the baking sheet with cooking spray if you prefer, but parchment paper is my go-to.
- Pour the Batter onto the Baking Sheet: Pour the pancake batter onto the prepared baking sheet and spread it out evenly. You want the batter to be about 1/4 to 1/2 inch thick. Don’t worry if it’s not perfectly even; it will even out as it bakes.
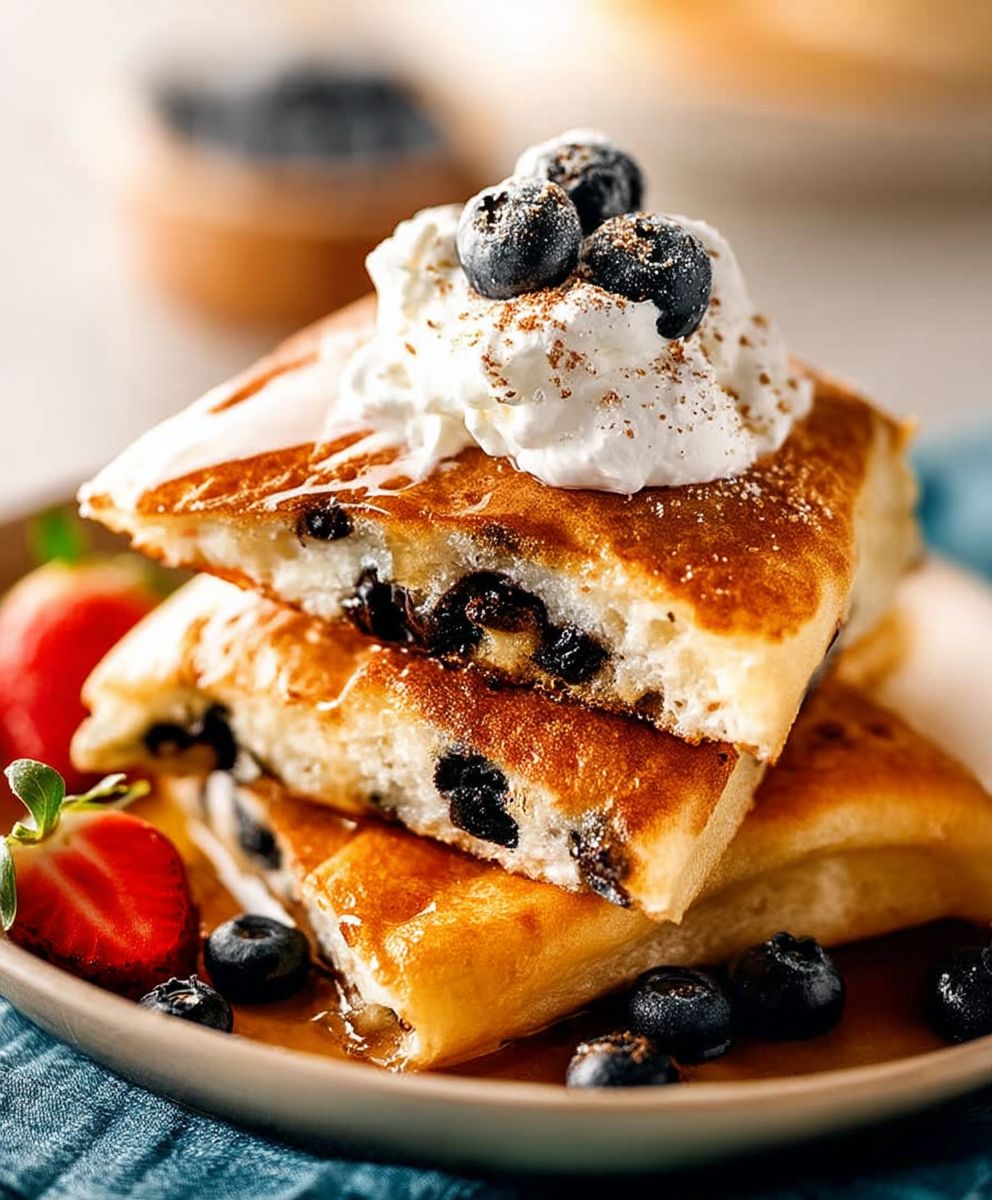
- Add Your Toppings: Now comes the fun part! Sprinkle your desired toppings over the pancake batter. Get creative! You can create different sections with different toppings to please everyone. For example, you could have a section with berries, a section with chocolate chips, and a section with nuts. Press the toppings lightly into the batter so they don’t fall off during baking. If you’re using bananas, I recommend adding them about halfway through the baking time to prevent them from browning too much.
Baking the Sheet Pan Pancake:
- Bake the Pancake: Bake in the preheated oven for 15-20 minutes, or until the pancake is golden brown and a toothpick inserted into the center comes out clean. The baking time will vary depending on your oven and the thickness of your pancake. Keep an eye on it and adjust the baking time as needed.
- Check for Doneness: To check for doneness, insert a toothpick into the center of the pancake. If it comes out clean, the pancake is done. If it comes out with wet batter on it, continue baking for a few more minutes. You can also gently press the top of the pancake. If it springs back, it’s done.
- Cool Slightly: Remove the pancake from the oven and let it cool on the baking sheet for a few minutes before cutting it into squares or rectangles. This will make it easier to handle and prevent it from falling apart.
Serving and Enjoying Your Sheet Pan Pancake:
- Cut and Serve: Cut the sheet pan pancake into squares or rectangles. The size of the pieces is up to you! I usually cut it into about 12-16 pieces.
- Add More Toppings (Optional): If you want, you can add more toppings after the pancake is baked. A dusting of powdered sugar, a drizzle of maple syrup, or a dollop of whipped cream are all great options.
- Serve Immediately: Serve the sheet pan pancake immediately while it’s still warm. It’s best enjoyed fresh out of the oven.
- Enjoy! Enjoy your delicious and easy sheet pan pancake! It’s perfect for a weekend brunch, a quick breakfast, or even a dessert.
Tips and Variations:
- Gluten-Free Option: To make this recipe gluten-free, simply substitute the all-purpose flour with a gluten-free all-purpose flour blend. Make sure the blend contains xanthan gum for best results.
- Dairy-Free Option: To make this recipe dairy-free, use a dairy-free milk alternative such as almond milk, soy milk, or oat milk. You can also use a dairy-free butter alternative.
- Add Spices: For a warm and cozy flavor, add 1 teaspoon of cinnamon or nutmeg to the dry ingredients.
- Chocolate Pancake: Add 1/4 cup of cocoa powder to the dry ingredients for a chocolatey pancake.
- Savory Pancake: Omit the sugar and vanilla extract and add savory toppings such as cooked bacon, shredded cheese, and chopped vegetables.
- Fruit Variations: Use different fruits depending on the season. Apples, peaches, and pears are all great options.
- Nut Variations: Use different nuts depending on your preference. Pecans, walnuts, almonds, and hazelnuts are all delicious.
- Make Ahead: You can prepare the batter ahead of time and store it in the refrigerator for up to 24 hours. Just whisk it again before pouring it onto the baking sheet.
- Storage: Leftover sheet pan pancake can be stored in an airtight container in the refrigerator for up to 3 days. Reheat in the microwave or oven before serving.
Troubleshooting:
- Pancake is not cooking through: If the pancake is browning too quickly on top but is not cooked through in the center, lower the oven temperature to 375°F (190°C) and continue baking until done.
- Pancake is too dry: If the pancake is too dry, add a little more milk to the batter.
- Pancake is too dense: If the pancake is too dense, make sure you are not overmixing the batter. Also, make sure your baking powder and baking soda are fresh.
- Toppings are sinking to the bottom: If your toppings are sinking to the bottom of the pancake, try tossing them in a little flour before adding them to the batter. This will help them stay suspended.
Serving Suggestions:
- Serve with maple syrup, powdered sugar, and fresh berries.
- Serve with whipped cream and chocolate sauce.
- Serve with a side of bacon or sausage.
- Serve with a cup of coffee or tea.
- Cut into smaller pieces and serve as a snack.
Nutritional Information (approximate, will vary based on toppings):
- Calories: 250-350 per serving
- Fat: 8-12 grams
- Saturated Fat: 4-6 grams
- Cholesterol: 50-75 mg
- Sodium: 300-400 mg
- Carbohydrates: 40-50 grams
- Sugar: 15-20 grams
-
Conclusion:
This Sheet Pan Pancake recipe is truly a game-changer, and I wholeheartedly believe it deserves a permanent spot in your breakfast (or even dessert!) rotation. Forget standing over a hot griddle, flipping individual pancakes until your arm aches. This method delivers fluffy, golden-brown perfection for a crowd, all from a single pan. The ease of preparation alone makes it a winner, but the customizable nature of this recipe is what truly elevates it.
Why is this a must-try? Because it’s incredibly efficient, unbelievably delicious, and endlessly adaptable. Think about it: you can whip up a batch in minutes, freeing up your precious morning time. Plus, the texture is divine a delightful combination of slightly crispy edges and a soft, pillowy center. Its the perfect solution for busy families, brunch gatherings, or even just a special weekend treat.
But the fun doesn’t stop there! The possibilities for variations are practically limitless. Feeling fruity? Add a generous scattering of fresh berries blueberries, raspberries, or sliced strawberries before baking. Craving something a little more decadent? Chocolate chips, chopped nuts, or even a swirl of peanut butter would be fantastic additions. For a savory twist, consider adding crumbled bacon, shredded cheese, or diced ham. Get creative and experiment with your favorite flavors!
Serving suggestions are just as versatile. A simple dusting of powdered sugar and a drizzle of maple syrup is always a classic choice. But don’t be afraid to think outside the box! A dollop of whipped cream, a scoop of ice cream (for a dessert pancake!), or a spoonful of fruit compote would all be delicious accompaniments. You could even cut the pancake into squares and serve it with a side of yogurt and granola for a lighter, healthier option.
Serving Ideas:
- Classic: Maple syrup and butter
- Fruity: Fresh berries and whipped cream
- Decadent: Chocolate sauce and ice cream
- Savory: Scrambled eggs and bacon
I am genuinely excited for you to try this Sheet Pan Pancake recipe. It’s a simple yet satisfying way to bring joy to your table. I’m confident that once you experience the ease and deliciousness of this method, you’ll never go back to traditional pancakes again.
So, what are you waiting for? Gather your ingredients, preheat your oven, and get ready to bake up a batch of pancake perfection. And most importantly, don’t forget to share your experience! I’d love to hear about your variations, your serving suggestions, and how much your family and friends enjoyed it. Tag me in your photos on social media I can’t wait to see your creations! Happy baking! Let me know if you have any questions or need any tips along the way. I’m here to help you make the perfect sheet pan pancake every single time. I am sure you will love this recipe as much as I do!
Sheet Pan Pancake: The Easiest Way to Make Pancakes for a Crowd
Fluffy, golden pancakes baked on a sheet pan for easy serving. Perfect for a crowd or a quick family breakfast. Customize with your favorite toppings!
Ingredients
- 2 cups all-purpose flour
- 4 teaspoons baking powder
- 1/2 teaspoon baking soda
- 1/4 teaspoon salt
- 2 tablespoons sugar
- 2 large eggs
- 1 3/4 cups milk
- 4 tablespoons unsalted butter, melted, plus more for greasing
- Optional toppings: berries, chocolate chips, sprinkles, maple syrup
Instructions
- Preheat oven to 425°F. Grease a 13×18 inch sheet pan.
- In a large bowl, whisk together the flour, sugar, baking powder, salt, and cinnamon.
- In a separate bowl, whisk together the milk, eggs, melted butter, and vanilla extract.
- Pour the wet ingredients into the dry ingredients and whisk until just combined. Do not overmix.
- Pour the batter onto the prepared sheet pan and spread evenly.
- Top with your desired toppings, such as berries, chocolate chips, or nuts.
- Bake for 15-20 minutes, or until a toothpick inserted into the center comes out clean.
- Let cool slightly before cutting into squares and serving.
Notes
“`html- For a thinner pancake, use 3 cups of milk.
- For a thicker pancake, use 2 cups of milk.
- Feel free to add any toppings you like! Berries, chocolate chips, nuts, and sprinkles are all great options.
“`

Leave a Comment