
Turkey Gravy: the unsung hero of Thanksgiving! Let’s be honest, is there anything more disappointing than a dry slice of turkey? But fear not, because with the right gravy, even the most overcooked bird can be resurrected into a delectable delight. I’m going to share my foolproof recipe for rich, flavorful turkey gravy that will have your guests singing your praises.
Gravy, in its simplest form, has been around for centuries, evolving from basic pan drippings thickened with flour to the complex and nuanced sauces we enjoy today. While its exact origins are debated, the concept of enriching savory dishes with a luscious sauce is deeply rooted in culinary history. For many, gravy is more than just a condiment; it’s a symbol of comfort, family, and tradition, especially during holiday gatherings.
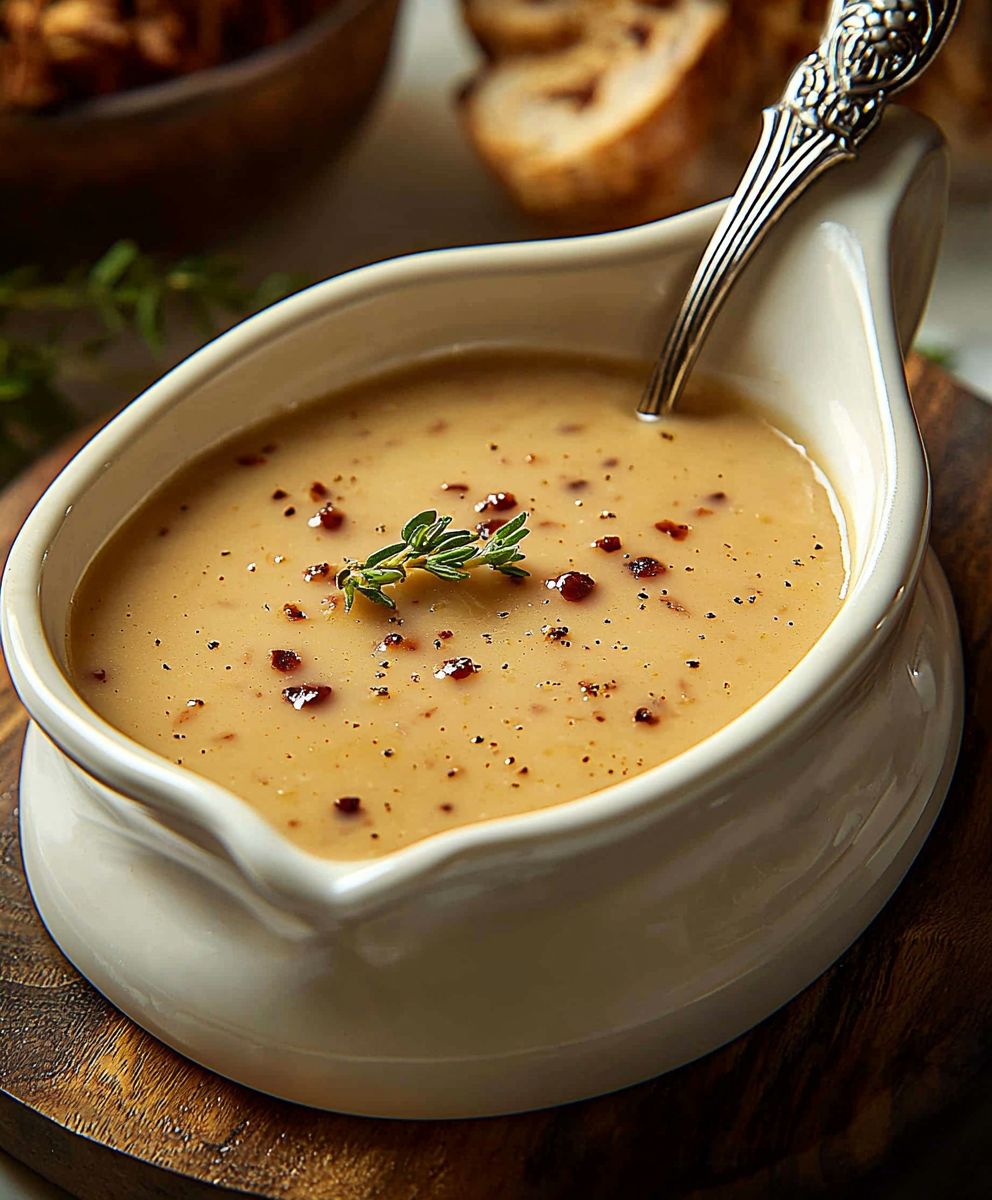
People adore turkey gravy for its ability to transform a meal. The savory, umami-rich flavor complements the often-mild taste of turkey, adding depth and complexity. The smooth, velvety texture coats the palate, creating a satisfying and comforting sensation. Plus, a good gravy can work wonders on mashed potatoes, stuffing, and even leftover turkey sandwiches! It’s the ultimate culinary multitasker, and that’s why it’s a must-have on any Thanksgiving table. So, let’s get started and create a gravy that will be the star of your holiday feast!

Ingredients:
- 1/4 cup turkey drippings (reserved from roasting the turkey)
- 1/4 cup all-purpose flour
- 4 cups turkey or chicken broth (low sodium preferred)
- 1/2 cup dry white wine (optional, such as Sauvignon Blanc or Pinot Grigio)
- 1 tablespoon Worcestershire sauce
- 1 teaspoon dried thyme
- 1/2 teaspoon dried sage
- 1/4 teaspoon black pepper, freshly ground
- Salt to taste
- 2 tablespoons unsalted butter (optional, for extra richness)
- 1 tablespoon cornstarch (optional, for thickening if needed)
- 2 tablespoons cold water (optional, for cornstarch slurry)
Preparing the Gravy Base:
Okay, let’s get started! The key to amazing gravy is a good base, and that starts with those delicious turkey drippings. Don’t skip this step it’s where all the flavor comes from!
- Strain the Turkey Drippings: After you’ve roasted your turkey and let it rest, carefully pour the drippings from the roasting pan through a fine-mesh sieve into a heatproof bowl or measuring cup. This will remove any solids and leave you with pure, flavorful fat and juices. Let the drippings sit for a few minutes so the fat separates from the juices.
- Separate the Fat: Skim off the fat from the top of the drippings. You can use a spoon or a fat separator for this. We need about 1/4 cup of the fat for the roux. If you don’t have enough fat, you can supplement with melted butter. If you have too much, save it for roasting vegetables later it’s liquid gold!
- Measure the Drippings: Measure out 1/4 cup of the reserved turkey fat. Pour it into a medium-sized saucepan over medium heat.
- Whisk in the Flour: This is where we make the roux! Gradually whisk in 1/4 cup of all-purpose flour into the hot turkey fat. Whisk constantly for about 3-5 minutes, until the mixture is smooth and golden brown. This is important cooking the flour removes the raw flour taste and helps thicken the gravy. Be careful not to burn it! It should smell nutty and delicious. If it starts to smoke, reduce the heat immediately.
Adding the Liquids and Flavorings:
Now for the good stuff! We’re going to build the flavor and consistency of our gravy. Take your time and whisk constantly to avoid lumps.
- Slowly Add the Broth: Gradually pour in 4 cups of turkey or chicken broth, whisking constantly to prevent lumps from forming. Start with a small amount of broth (about 1/2 cup) and whisk it in thoroughly until smooth. Then, add the remaining broth in a steady stream, continuing to whisk.
- Deglaze with Wine (Optional): If you’re using wine, now’s the time to add it! Pour in 1/2 cup of dry white wine and bring the mixture to a simmer. The alcohol will cook off, leaving behind a lovely depth of flavor. If you’re not using wine, simply skip this step.
- Add the Worcestershire Sauce and Spices: Stir in 1 tablespoon of Worcestershire sauce, 1 teaspoon of dried thyme, 1/2 teaspoon of dried sage, and 1/4 teaspoon of freshly ground black pepper. These seasonings will add complexity and warmth to the gravy.
- Simmer and Thicken: Bring the gravy to a gentle simmer over medium-low heat. Let it simmer for about 10-15 minutes, or until it has thickened to your desired consistency. Stir occasionally to prevent sticking. The longer it simmers, the more the flavors will meld together.
Adjusting and Finishing the Gravy:
Almost there! Now we’ll fine-tune the flavor and consistency to make sure it’s absolutely perfect.
- Taste and Season: Taste the gravy and add salt to taste. Remember that the broth and drippings may already be salty, so start with a small amount of salt and add more as needed.
- Add Butter (Optional): For extra richness and a glossy sheen, stir in 2 tablespoons of unsalted butter. This is totally optional, but it adds a luxurious touch.
- Thicken Further (If Needed): If your gravy isn’t thick enough, you can thicken it with a cornstarch slurry. In a small bowl, whisk together 1 tablespoon of cornstarch with 2 tablespoons of cold water until smooth. Slowly pour the slurry into the simmering gravy, whisking constantly. The gravy will thicken almost immediately. Be careful not to add too much cornstarch, or the gravy will become gloppy.
- Strain Again (Optional): For an extra-smooth gravy, you can strain it through a fine-mesh sieve one last time. This will remove any remaining lumps or solids.
- Keep Warm: Keep the gravy warm until serving. You can transfer it to a gravy boat or a heatproof serving dish. If it sits for a while, it may thicken slightly, so you may need to add a little more broth to thin it out before serving.
Tips for Perfect Gravy:
- Use Good Quality Broth: The quality of your broth will directly impact the flavor of your gravy. Use homemade broth if possible, or choose a low-sodium, high-quality store-bought broth.
- Don’t Overcook the Roux: Burning the roux will result in a bitter-tasting gravy. Keep the heat low and whisk constantly.
- Whisk, Whisk, Whisk: Whisking is key to preventing lumps. Whisk constantly while adding the broth and cornstarch slurry.
- Adjust the Seasoning: Taste the gravy frequently and adjust the seasoning as needed. Salt, pepper, and herbs can all be added to enhance the flavor.
- Make Ahead: Gravy can be made ahead of time and reheated. Store it in an airtight container in the refrigerator for up to 3 days. Reheat gently over low heat, stirring occasionally. You may need to add a little more broth to thin it out.
Troubleshooting:
- Lumpy Gravy: If your gravy is lumpy, try whisking it vigorously or straining it through a fine-mesh sieve. You can also use an immersion blender to smooth it out.
- Thin Gravy: If your gravy is too thin, simmer it for a longer period of time to allow it to thicken. You can also thicken it with a cornstarch slurry.
- Thick Gravy: If your gravy is too thick, add a little more broth to thin it out.
- Bland Gravy: If your gravy is bland, add more salt, pepper, herbs, or Worcestershire sauce. You can also add a splash of lemon juice or a dash of hot sauce for extra flavor.
- Greasy Gravy: If your gravy is greasy, try skimming off the excess fat with a spoon. You can also add a tablespoon of cornstarch slurry to help absorb the fat.
Conclusion:
And there you have it! This isn’t just any gravy; it’s a turkey gravy revelation. I truly believe this recipe is a must-try for anyone looking to elevate their holiday meal or simply craving a comforting, savory sauce. The depth of flavor, the silky smooth texture, and the sheer simplicity of the process make it a winner in my book, and I’m confident it will be in yours too. Why is it a must-try? Because it’s foolproof! Even if you’ve never made gravy from scratch before, this recipe will guide you through each step with ease. The result is a rich, flavorful gravy that tastes like it took hours to prepare, but in reality, it’s ready in under an hour. Forget those bland, store-bought gravies this homemade version is a game-changer. Plus, using the pan drippings from your roasted turkey infuses the gravy with an unparalleled depth of flavor that you simply can’t replicate any other way. It’s the perfect complement to your Thanksgiving or Christmas feast, and it’s guaranteed to impress your family and friends. But the best part? It’s incredibly versatile! While this recipe is fantastic as is, feel free to experiment with different variations to suit your taste. For a spicier kick, add a pinch of cayenne pepper or a dash of hot sauce. If you prefer a sweeter gravy, a tablespoon of maple syrup or brown sugar will do the trick. You can also incorporate different herbs and spices, such as thyme, rosemary, or sage, to create a unique flavor profile. Here are a few serving suggestions to get you started: * Classic Turkey Dinner: Of course, the most obvious pairing is with a perfectly roasted turkey, mashed potatoes, stuffing, and cranberry sauce. Drizzle generously over everything for the ultimate holiday experience. * Poutine Perfection: Elevate your poutine game by using this turkey gravy instead of traditional beef gravy. The rich, savory flavor will take your poutine to a whole new level. * Open-Faced Sandwiches: Transform leftover turkey into a delicious open-faced sandwich by topping slices of turkey with mashed potatoes and smothering it all in this incredible gravy. * Biscuits and Gravy: For a comforting breakfast or brunch, serve this gravy over warm, flaky biscuits. It’s a hearty and satisfying way to start the day. * Shepherd’s Pie Upgrade: Add a layer of this gravy to your shepherd’s pie for an extra layer of flavor and richness. Don’t be afraid to get creative and experiment with different ways to use this delicious gravy. The possibilities are endless! I truly hope you give this recipe a try. I’m so excited for you to experience the joy of making your own homemade turkey gravy. Once you taste the difference, you’ll never go back to store-bought again! And most importantly, I’d love to hear about your experience! Did you make any variations? What did you serve it with? What did your family and friends think? Please share your thoughts and photos in the comments below. Your feedback is invaluable, and I can’t wait to see what culinary creations you come up with. Happy cooking! Print
Turkey Gravy: The Ultimate Guide to Perfect Gravy Every Time
- Total Time: 30 minutes
- Yield: 4 cups 1x
Description
Rich, flavorful turkey gravy made from scratch with drippings, broth, and herbs. Perfect for Thanksgiving!
Ingredients
- 1/4 cup turkey drippings (reserved from roasting the turkey)
- 1/4 cup all-purpose flour
- 4 cups turkey or chicken broth (low sodium preferred)
- 1/2 cup dry white wine (optional, such as Sauvignon Blanc or Pinot Grigio)
- 1 tablespoon Worcestershire sauce
- 1 teaspoon dried thyme
- 1/2 teaspoon dried sage
- 1/4 teaspoon black pepper, freshly ground
- Salt to taste
- 2 tablespoons unsalted butter (optional, for extra richness)
- 1 tablespoon cornstarch (optional, for thickening if needed)
- 2 tablespoons cold water (optional, for cornstarch slurry)
Instructions
- Strain the Turkey Drippings: After roasting your turkey, pour the drippings through a fine-mesh sieve into a heatproof bowl. Let the drippings sit for a few minutes so the fat separates from the juices.
- Separate the Fat: Skim off the fat from the top of the drippings. You need about 1/4 cup of the fat for the roux. Supplement with melted butter if needed.
- Measure the Drippings: Measure out 1/4 cup of the reserved turkey fat. Pour it into a medium-sized saucepan over medium heat.
- Whisk in the Flour: Gradually whisk in 1/4 cup of all-purpose flour into the hot turkey fat. Whisk constantly for about 3-5 minutes, until the mixture is smooth and golden brown. Be careful not to burn it.
- Slowly Add the Broth: Gradually pour in 4 cups of turkey or chicken broth, whisking constantly to prevent lumps from forming. Start with a small amount of broth (about 1/2 cup) and whisk it in thoroughly until smooth. Then, add the remaining broth in a steady stream, continuing to whisk.
- Deglaze with Wine (Optional): If using wine, pour in 1/2 cup of dry white wine and bring the mixture to a simmer.
- Add the Worcestershire Sauce and Spices: Stir in 1 tablespoon of Worcestershire sauce, 1 teaspoon of dried thyme, 1/2 teaspoon of dried sage, and 1/4 teaspoon of freshly ground black pepper.
- Simmer and Thicken: Bring the gravy to a gentle simmer over medium-low heat. Let it simmer for about 10-15 minutes, or until it has thickened to your desired consistency. Stir occasionally to prevent sticking.
- Taste and Season: Taste the gravy and add salt to taste.
- Add Butter (Optional): For extra richness, stir in 2 tablespoons of unsalted butter.
- Thicken Further (If Needed): If your gravy isn’t thick enough, whisk together 1 tablespoon of cornstarch with 2 tablespoons of cold water until smooth. Slowly pour the slurry into the simmering gravy, whisking constantly.
- Strain Again (Optional): For an extra-smooth gravy, you can strain it through a fine-mesh sieve one last time.
- Keep Warm: Keep the gravy warm until serving.
Notes
- Use good quality broth for the best flavor.
- Don’t overcook the roux, or it will taste bitter.
- Whisk constantly to prevent lumps.
- Adjust the seasoning to your liking.
- Gravy can be made ahead of time and reheated.
- Lumpy Gravy: Whisk vigorously, strain, or use an immersion blender.
- Thin Gravy: Simmer longer or thicken with cornstarch slurry.
- Thick Gravy: Add more broth.
- Bland Gravy: Add more salt, pepper, herbs, Worcestershire sauce, lemon juice, or hot sauce.
- Greasy Gravy: Skim off excess fat or add cornstarch slurry.
- Prep Time: 10 minutes
- Cook Time: 20 minutes


Leave a Comment